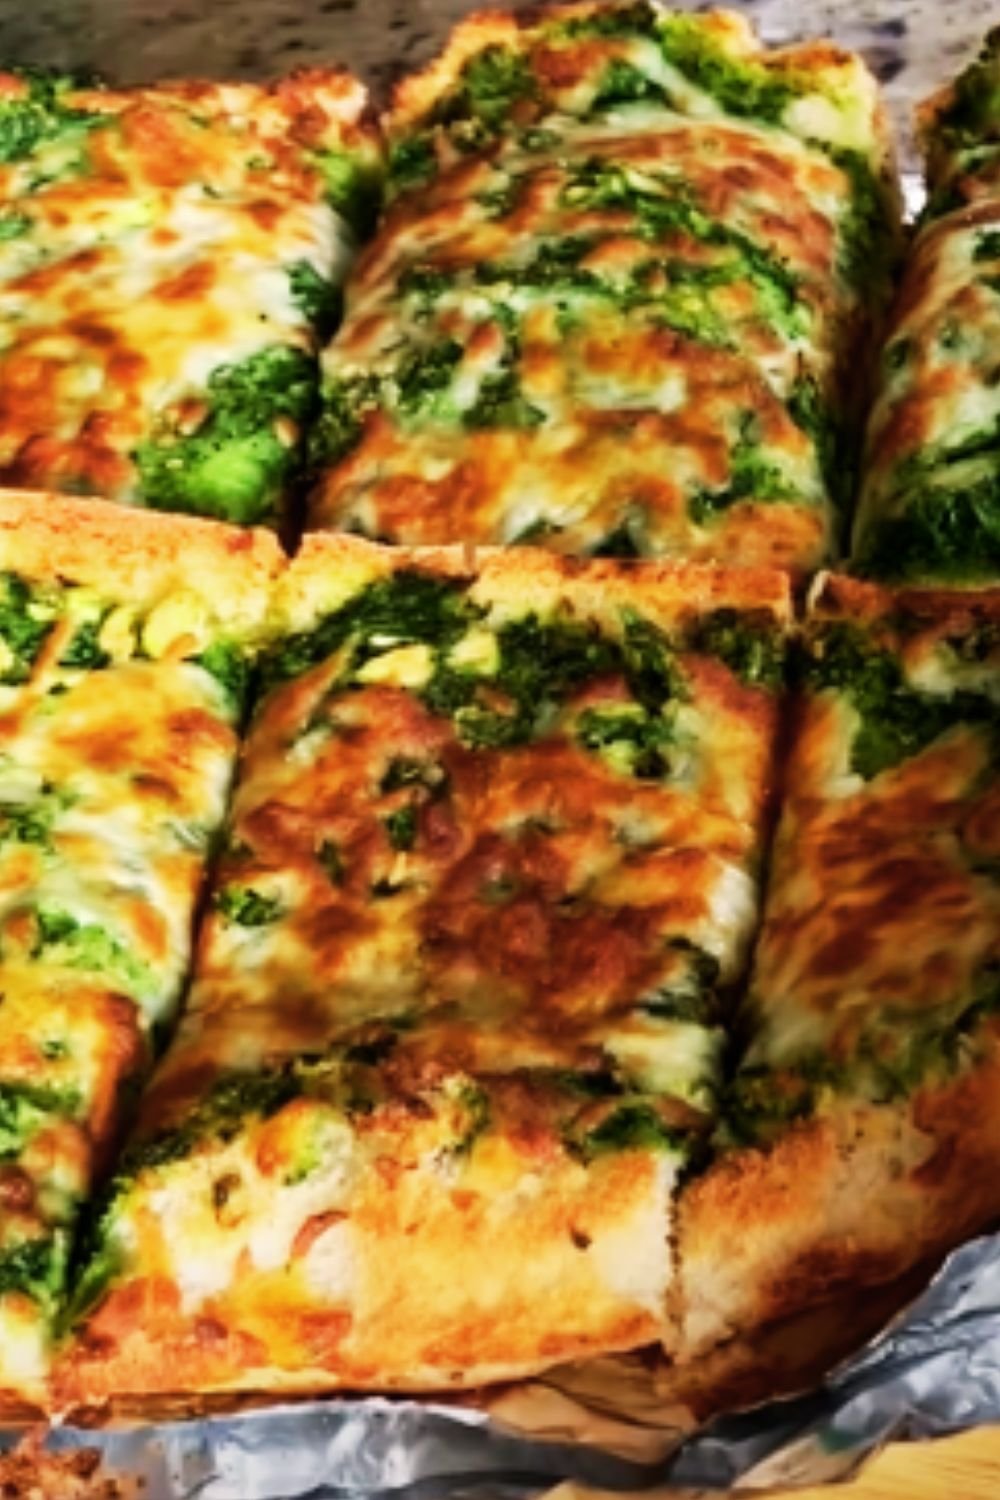
There’s something magical about the aroma of garlic herb cheese bread wafting through the kitchen. That intoxicating blend of butter, garlic, herbs, and melted cheese never fails to make my mouth water. As someone who has been baking bread for over 15 years, I’ve perfected this recipe through countless iterations, and I’m thrilled to share my ultimate version with you today.
This isn’t just any garlic bread recipe. It’s a labor of love that combines a crusty artisan loaf with a perfectly balanced garlic herb butter and a generous blanket of melted cheese. The result is a side dish that frequently steals the spotlight from whatever main course it’s meant to accompany.
The Magic Behind Perfect Garlic Herb Cheese Bread
What makes this garlic bread special isn’t just the ingredients (though they’re important), but the technique. I’ve found that the secret lies in building layers of flavor and understanding the science behind what makes bread both crispy and soft in all the right places.
When I first started making garlic bread, I would simply slather some butter on bread, sprinkle on garlic powder and call it a day. Let me tell you, we’ve come a long way from those humble beginnings! The difference between good and extraordinary garlic bread comes down to:
- Using fresh ingredients whenever possible
- Creating a compound butter that infuses flavors deeply
- Choosing the right bread as your foundation
- Understanding the perfect baking temperature and timing
- Employing the “double bake” method for optimal texture
Let’s dive into the recipe, and I’ll share all my hard-earned tips along the way.
Ingredients You’ll Need
For the best garlic herb cheese bread, quality ingredients make all the difference. Here’s what you’ll need:
For the Bread Base:
- 1 large artisan loaf (French boule or Italian loaf, approximately 16-18 inches)
- ½ cup (1 stick) unsalted butter, softened to room temperature
- 6 cloves garlic, minced finely (about 2 tablespoons)
- 2 tablespoons fresh parsley, finely chopped
- 1 tablespoon fresh thyme leaves
- 1 tablespoon fresh rosemary, minced
- 1 teaspoon fresh oregano, chopped
- ½ teaspoon sea salt
- ¼ teaspoon freshly ground black pepper
- 2 cups cheese blend (equal parts mozzarella, provolone, and parmesan)
- 2 tablespoons extra virgin olive oil
Optional Garnishes:
- Additional 1 tablespoon fresh parsley, chopped
- 2 tablespoons grated parmesan for finishing
- Red pepper flakes to taste
- 1 tablespoon chives, thinly sliced
Equipment Needed
Before we begin, make sure you have these tools on hand:
- Sharp bread knife
- Mixing bowl
- Aluminum foil
- Baking sheet
- Cutting board
- Garlic press (optional but helpful)
- Pastry brush
- Cheese grater
Step-by-Step Instructions
Step 1: Prepare the Garlic Herb Butter
The foundation of amazing garlic bread is a well-crafted compound butter. Here’s how to make it:
- In a medium bowl, add the softened butter. Make sure it’s truly at room temperature but not melted for the best consistency.
- Add the minced garlic to the butter. Pro tip: Let minced garlic sit for 10 minutes before adding it to the butter to allow allicin (the compound responsible for garlic’s health benefits and intense flavor) to develop.
- Add all the fresh herbs: parsley, thyme, rosemary, and oregano.
- Sprinkle in the salt and freshly ground black pepper.
- Using a spatula or fork, mix all ingredients until thoroughly combined. The butter should have a green-flecked appearance with garlic evenly distributed throughout.
- Set aside at room temperature. If making ahead, refrigerate but bring back to a spreadable consistency before using.
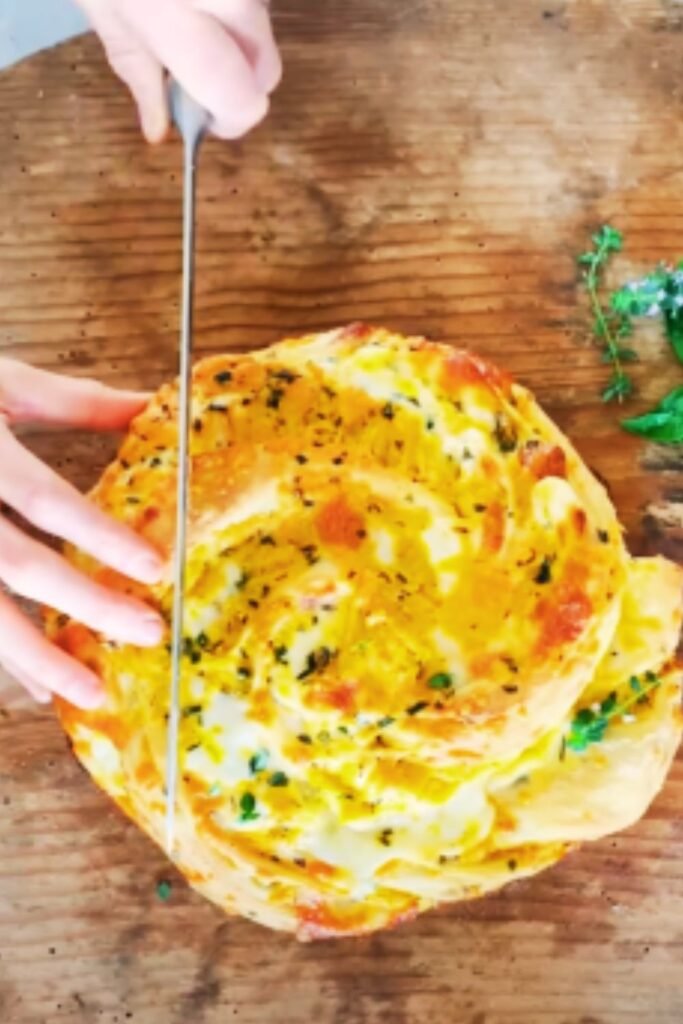
Step 2: Prepare the Bread
The way you cut your bread is crucial for the perfect garlic bread experience:
- Preheat your oven to 375°F (190°C).
- Place the loaf on a cutting board. Using a sharp bread knife, make horizontal cuts across the loaf, but don’t cut all the way through the bottom crust. The slices should be about ¾-inch thick.
- Make a second set of cuts perpendicular to the first ones, creating a crosshatch pattern, but again, don’t cut through the bottom crust. This creates bread cubes that remain connected at the base.
- If using a round boule, you can cut the bread in a radiating pattern from the center instead.
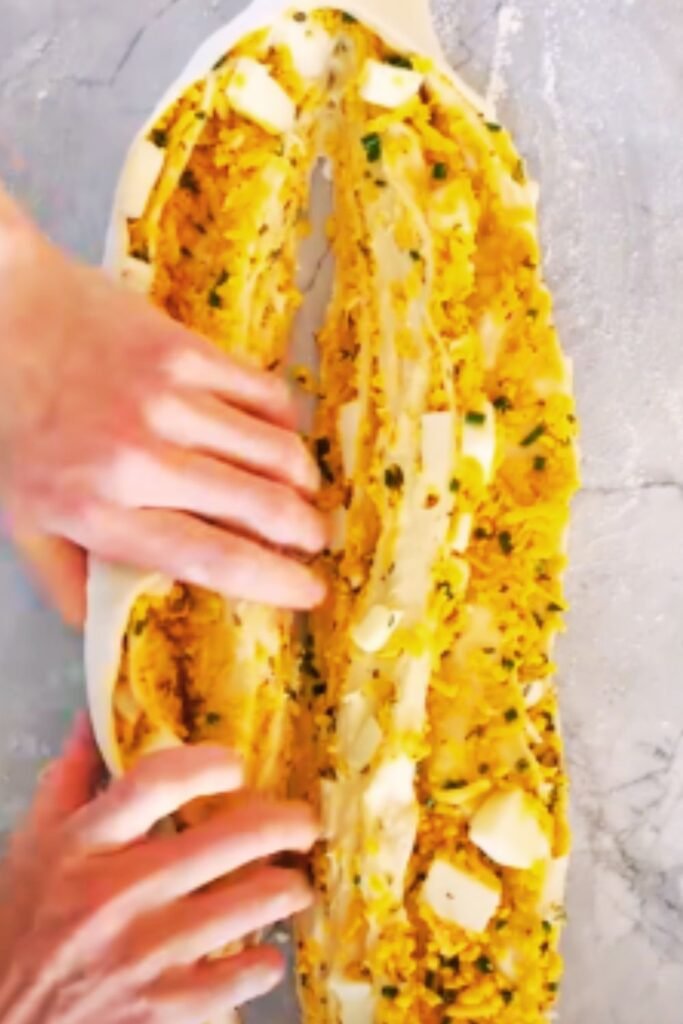
Step 3: Apply the Garlic Herb Butter
This is where the magic happens:
- Using your fingers or a small spatula, gently pry open the bread cuts and generously spread the garlic herb butter inside each crevice.
- Make sure to get the butter deep into the cuts for maximum flavor distribution.
- After applying butter between all the bread sections, brush the top of the loaf with olive oil using a pastry brush.
Step 4: First Bake
The double-bake method ensures the flavors penetrate deeply:
- Wrap the entire loaf loosely in aluminum foil, leaving a small opening at the top for steam to escape.
- Place on a baking sheet and bake for 15 minutes at 375°F (190°C).
- This initial bake allows the butter to melt and the garlic and herbs to infuse into the bread.
Step 5: Add Cheese and Final Bake
Now we transform good garlic bread into extraordinary cheese bread:
- Carefully remove the bread from the oven and open the foil.
- Increase the oven temperature to 425°F (220°C).
- Gently pull apart some of the cuts to open them slightly, then sprinkle the cheese mixture into the crevices, pushing some down between the bread sections.
- Sprinkle the remaining cheese over the top of the loaf.
- Return to the oven with the foil open, exposing the top of the bread.
- Bake for an additional 10-12 minutes, or until the cheese is completely melted and beginning to brown in spots.
- For an extra golden top, broil for the final 1-2 minutes, watching carefully to prevent burning.
Step 6: Garnish and Serve
The finishing touches make all the difference:
- Remove from the oven and immediately sprinkle with additional fresh parsley and grated parmesan if using.
- Add red pepper flakes or chives if desired.
- Allow to cool for 3-5 minutes before serving (if you can wait that long!).
- Serve while still warm and gooey for the best experience.
Nutritional Information
I believe in transparency when it comes to what we eat. Here’s the approximate nutritional breakdown per serving (assuming 10 servings per loaf):
| Nutrient | Amount per Serving |
|---|---|
| Calories | 285 |
| Total Fat | 14.5g |
| Saturated Fat | 7.8g |
| Cholesterol | 32mg |
| Sodium | 410mg |
| Total Carbohydrates | 30g |
| Dietary Fiber | 1.2g |
| Sugars | 1.5g |
| Protein | 8.6g |
| Calcium | 152mg |
| Iron | 1.8mg |
| Potassium | 85mg |
| Vitamin A | 325IU |
| Vitamin C | 2.5mg |
Variations to Try
One of the joys of this recipe is how versatile it is. Here are some of my favorite variations:
Different Cheese Combinations
| Cheese Blend | Flavor Profile | Best Paired With |
|---|---|---|
| Mozzarella, Provolone & Parmesan | Classic Italian | Pasta dishes, tomato-based soups |
| Gruyère & Emmental | Rich, nutty | French onion soup, beef dishes |
| Cheddar & Monterey Jack | Sharp, slightly spicy | Chili, barbecue |
| Blue cheese & Mozzarella | Bold, tangy | Steak, hearty salads |
| Goat cheese & Mozzarella | Creamy, tangy | Mediterranean dishes |
Herb Variations
| Herb Combination | Flavor Profile | Special Notes |
|---|---|---|
| Basil, Oregano, Parsley | Mediterranean | Perfect with tomato-based dishes |
| Dill, Chives, Parsley | Bright, fresh | Great with fish or seafood |
| Sage, Thyme, Rosemary | Earthy, robust | Excellent with poultry and pork |
| Cilantro, Lime Zest, Parsley | Vibrant, citrusy | Pairs with Mexican and Asian dishes |
| Tarragon, Chervil, Parsley | Delicate, anise-like | Elegant option for special occasions |
Special Add-ins
For an extra dimension of flavor, consider these additions:
- Sun-dried tomatoes, finely chopped
- Caramelized onions
- Cooked, crumbled bacon
- Roasted red peppers, diced
- Artichoke hearts, chopped
- Toasted pine nuts
- Calabrian chili paste for heat lovers
Common Mistakes to Avoid
In my years of perfecting this recipe, I’ve made plenty of mistakes. Learn from my experience!
| Mistake | Problem It Causes | How to Avoid It |
|---|---|---|
| Using cold butter | Uneven spreading, poor flavor incorporation | Allow butter to soften at room temperature for 1-2 hours |
| Cutting all the way through the bread | Bread falls apart when serving | Keep the bottom crust intact when cutting |
| Not using fresh herbs | Diminished flavor | Use fresh herbs whenever possible; if using dried, reduce amounts by two-thirds |
| Overcooking | Dry, hard bread | Follow timing guidelines and watch carefully during final broiling |
| Undercooking | Raw garlic taste, unmelted cheese | Ensure proper cooking time during both baking phases |
| Using pre-shredded cheese | Poor melting, grainy texture | Grate your own cheese from blocks for superior melt and flavor |
| Skipping the olive oil | Less crispy crust | Always brush the top with olive oil before baking |
Make-Ahead and Storage Tips
I often prepare elements of this recipe in advance for quick assembly. Here’s how:
Make-Ahead Options:
- Garlic Herb Butter can be made up to 3 days in advance. Store in an airtight container in the refrigerator. Bring to room temperature before using.
- Pre-cut the bread up to 6 hours before baking. Wrap tightly in plastic wrap to prevent drying out.
- Cheese can be grated a day ahead and stored in an airtight container in the refrigerator.
Storage and Reheating:
- Store leftovers in an airtight container or wrapped in foil in the refrigerator for up to 2 days.
- To reheat, preheat oven to 350°F (175°C). Wrap bread in foil and heat for 10-15 minutes until warmed through and cheese is melty again.
- Freeze option: After the first bake (before adding cheese), cool completely, wrap tightly in foil, then plastic wrap, and freeze for up to 1 month. Thaw overnight in the refrigerator, then proceed with the cheese addition and final bake.
Serving Suggestions
This garlic herb cheese bread pairs beautifully with so many dishes. Here are my favorite combinations:
Perfect Pairings:
- Soups: Tomato basil soup, minestrone, or a hearty vegetable soup
- Pasta: Spaghetti with marinara, fettuccine alfredo, or baked ziti
- Salads: Caesar salad, Mediterranean chopped salad, or a simple green salad with balsamic vinaigrette
- Main Dishes: Roasted chicken, grilled steaks, or vegetable lasagna
- On its own: Served with extra marinara sauce for dipping
Drink Pairings:
- Sparkling water with lemon
- Iced tea with fresh mint
- Lemonade
- Italian soda
- Fruit juice blends
Why This Recipe Works: The Science Behind It
I’m fascinated by the food science that makes this recipe so successful:
- The butter-to-bread ratio is carefully calculated to provide enough moisture and flavor without making the bread soggy.
- Allicin development in the garlic (allowing it to sit after mincing) enhances both flavor and health benefits.
- The double-bake method serves two purposes:
- First bake: Gentle heat allows flavors to infuse into the bread
- Second bake: Higher heat creates textural contrast between crisp exterior and soft interior
- Temperature progression (starting at 375°F, then increasing to 425°F) ensures proper cooking of the garlic (removing its raw bite) while creating the perfect cheese melt.
- The crosshatch cutting pattern maximizes surface area for butter and cheese while maintaining the bread’s structure.
Cost Analysis
Making this garlic herb cheese bread at home is not only delicious but economical compared to restaurant versions:
| Ingredient | Approximate Cost |
|---|---|
| Artisan loaf | $4.50 |
| Butter (1 stick) | $1.25 |
| Fresh garlic | $0.50 |
| Fresh herbs | $2.00 |
| Cheese blend | $3.75 |
| Olive oil | $0.25 |
| Seasonings | $0.15 |
| Total Cost | $12.40 |
| Cost per serving (10 servings) | $1.24 |
Compare this to restaurant garlic bread that often costs $8-12 per order!
Questions & Answers
Over the years, I’ve received many questions about garlic bread. Here are the most common ones:
Q: Can I use dried herbs instead of fresh? Yes, but reduce the amount to one-third of what the recipe calls for fresh herbs. For example, use 1 teaspoon dried parsley instead of 1 tablespoon fresh. The flavor won’t be quite as vibrant, but it will still be delicious.
Q: What’s the best type of bread to use? I prefer a crusty artisan loaf with a substantial crust and chewy interior. French boules, Italian loaves, or sourdough all work well. Avoid soft sandwich bread or pre-sliced bread as they don’t hold up to the butter and cheese.
Q: Can I make this recipe dairy-free? Absolutely! Use a high-quality plant-based butter and dairy-free cheese alternatives. Look for brands that specifically mention good melting properties.
Q: How do I know when the garlic is cooked enough? Properly cooked garlic should be fragrant and slightly golden, not brown. It loses its harsh bite and develops a sweet, nutty flavor. If you can still taste raw garlic after baking, it needs more time in the oven.
Q: Can I add meat to this recipe? Yes! Cooked and crumbled bacon, prosciutto, or even pepperoni can be added between the cheese layers. Just make sure any meat is already cooked before adding it to the bread.
Q: Why did my cheese get hard instead of staying gooey? This typically happens when the cheese is overcooked or when using pre-shredded cheese (which contains anti-caking agents). Use freshly grated cheese and watch the broiling time carefully.
Q: Is there a way to reduce the calories? You can use less butter and cheese, though this will affect the end result. Another option is to use a lighter hand when applying the butter and opt for part-skim mozzarella in your cheese blend.
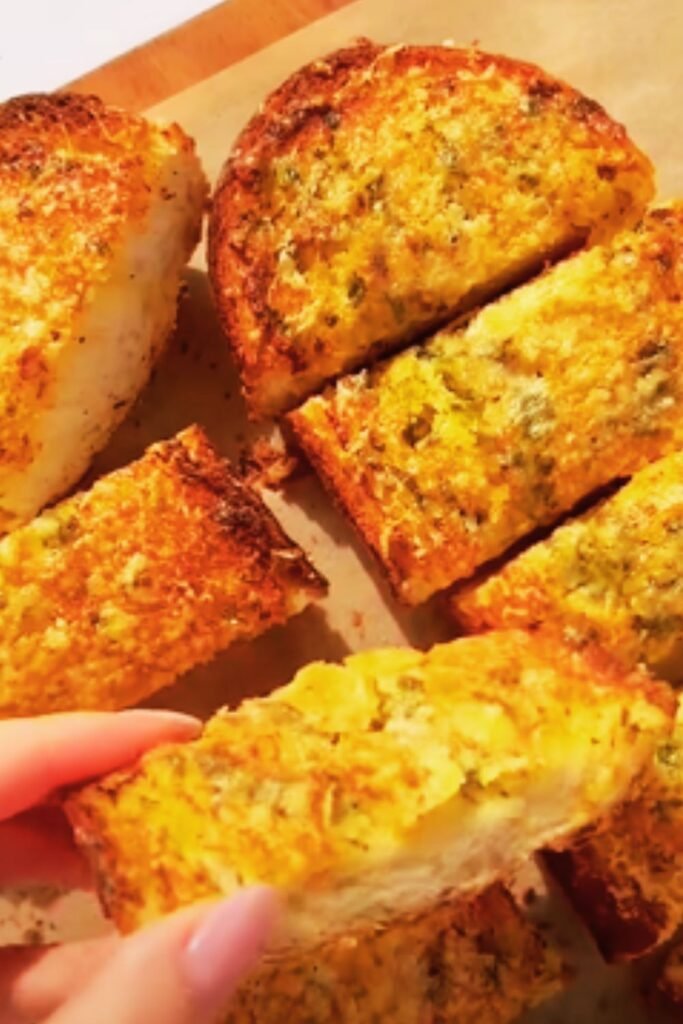
Final Thoughts
There’s something deeply satisfying about pulling apart a piece of warm, aromatic garlic herb cheese bread and watching the cheese stretch into delicate strands. It’s one of those simple pleasures that never fails to bring joy to the dinner table.
I encourage you to make this recipe your own. Experiment with different herb combinations, cheese blends, and serving options. The foundation remains the same, but the possibilities for personalization are endless.
Remember, the key to truly exceptional garlic bread lies not just in the ingredients but in the intention and care you put into each step. Take your time, enjoy the process, and share the results with those you love. Food made with care always tastes better, and this garlic herb cheese bread is no exception.
Happy baking, and enjoy every cheesy, garlicky bite!