There’s something magical about the combination of tangy lemon and sweet berries that makes my taste buds dance with joy. I’ve been perfecting this Lemon Layer Cake with Fresh Berries recipe for years, and I’m thrilled to finally share it with you! This show-stopping dessert combines fluffy lemon-infused cake layers with velvety cream cheese frosting and the freshest seasonal berries. Whether you’re celebrating a special occasion or simply craving something deliciously bright, this cake delivers pure sunshine on a plate.
The Magic of Lemon and Berries
My love affair with lemon desserts began in my grandmother’s kitchen. I remember watching her zest lemons with such precision, explaining that the oils in the zest contained the purest lemon flavor. She would say, “The secret to a perfect lemon cake isn’t just in the juice—it’s capturing that aromatic zest that makes your dessert truly special.”
When paired with fresh berries, lemon creates a perfect balance between tart and sweet. The acidity cuts through the richness of the cream cheese frosting, while the berries add bursts of juicy sweetness in every bite. It’s a combination that works in perfect harmony.
Ingredients You’ll Need
For the Lemon Cake Layers:
- 3 cups (375g) all-purpose flour, sifted
- 2½ teaspoons baking powder
- ½ teaspoon baking soda
- ½ teaspoon salt
- 1 cup (226g) unsalted butter, at room temperature
- 2 cups (400g) granulated sugar
- 4 large eggs, at room temperature
- 2 tablespoons fresh lemon zest (from about 3-4 lemons)
- ¼ cup fresh lemon juice
- 1 tablespoon pure vanilla extract
- 1 cup (240ml) buttermilk, at room temperature
For the Cream Cheese Frosting:
- 16 oz (450g) full-fat cream cheese, softened
- 1 cup (226g) unsalted butter, softened
- 5 cups (600g) powdered sugar, sifted
- 1 tablespoon fresh lemon juice
- 2 teaspoons pure vanilla extract
- Pinch of salt
For the Berry Filling and Decoration:
- 2 cups mixed fresh berries (strawberries, blueberries, raspberries, blackberries)
- ¼ cup (50g) granulated sugar
- 1 tablespoon lemon juice
- 1 teaspoon lemon zest
- Additional 2-3 cups fresh berries for decorating
- Optional: lemon slices and mint leaves for garnish
Essential Equipment
Before diving into the baking process, I always make sure I have all the necessary tools ready:
- Three 8-inch round cake pans
- Parchment paper
- Stand mixer or hand mixer
- Mixing bowls (various sizes)
- Sifter or fine-mesh sieve
- Zester/microplane
- Citrus juicer
- Offset spatula
- Cake turntable (optional but helpful)
- Serrated knife for leveling cakes
- Cake stand for serving
Step-by-Step Instructions
Preparing the Cake Layers
- Preheat and prep: Start by preheating your oven to 350°F (175°C). Grease three 8-inch round cake pans and line the bottoms with parchment paper circles. I find this double protection ensures my cakes never stick.
- Mix dry ingredients: In a medium bowl, whisk together the sifted flour, baking powder, baking soda, and salt. Setting this aside allows for more efficient mixing later.
- Cream butter and sugar: In the bowl of a stand mixer fitted with the paddle attachment (or using a hand mixer), beat the butter on medium speed until creamy, about 1 minute. Add the granulated sugar and beat on high speed for 3-4 minutes until the mixture is light and fluffy. This lengthy creaming process is crucial for a tender cake texture.
- Add eggs and flavoring: Add eggs one at a time, beating well after each addition. Scrape down the sides of the bowl as needed. Beat in the lemon zest, lemon juice, and vanilla extract until combined. The mixture might look slightly curdled at this point—that’s perfectly normal!
- Alternate dry ingredients and buttermilk: With the mixer on low speed, add the dry ingredients in three additions, alternating with the buttermilk, beginning and ending with the dry ingredients. Mix just until incorporated after each addition. Overmixing will develop too much gluten, resulting in a tough cake.
- Divide and bake: Divide the batter evenly between the prepared cake pans and smooth the tops with an offset spatula. Bake for 22-26 minutes, or until a toothpick inserted in the center comes out clean with just a few moist crumbs. The cakes should spring back when lightly touched.
- Cool properly: Allow the cakes to cool in the pans for 10 minutes, then remove from pans and transfer to a wire rack to cool completely before frosting. I sometimes wrap the cooled layers in plastic wrap and refrigerate overnight to make frosting easier the next day.
Making the Cream Cheese Frosting
- Beat the cream cheese and butter: In a large bowl using a hand mixer or stand mixer fitted with a paddle attachment, beat the softened cream cheese and butter together on high speed until smooth and creamy, about 2 minutes.
- Add remaining ingredients: Add the confectioners’ sugar, lemon juice, vanilla extract, and a pinch of salt. Beat on low speed for 30 seconds, then increase to high speed and beat for 3 minutes until completely combined and creamy. If the frosting seems too thin, add more confectioners’ sugar. If it’s too thick, add a bit more lemon juice.
- Chill if necessary: If the frosting seems too soft to work with, refrigerate it for 15-20 minutes before assembling the cake.
Preparing the Berry Filling
- Macerate berries: In a medium bowl, combine 2 cups of mixed berries (chopped if large), granulated sugar, lemon juice, and lemon zest. Gently stir and let sit for 15-30 minutes until the berries release some of their juices.
- Drain excess liquid: Using a slotted spoon, remove the berries from their juice. Reserve both the macerated berries and the juice separately.
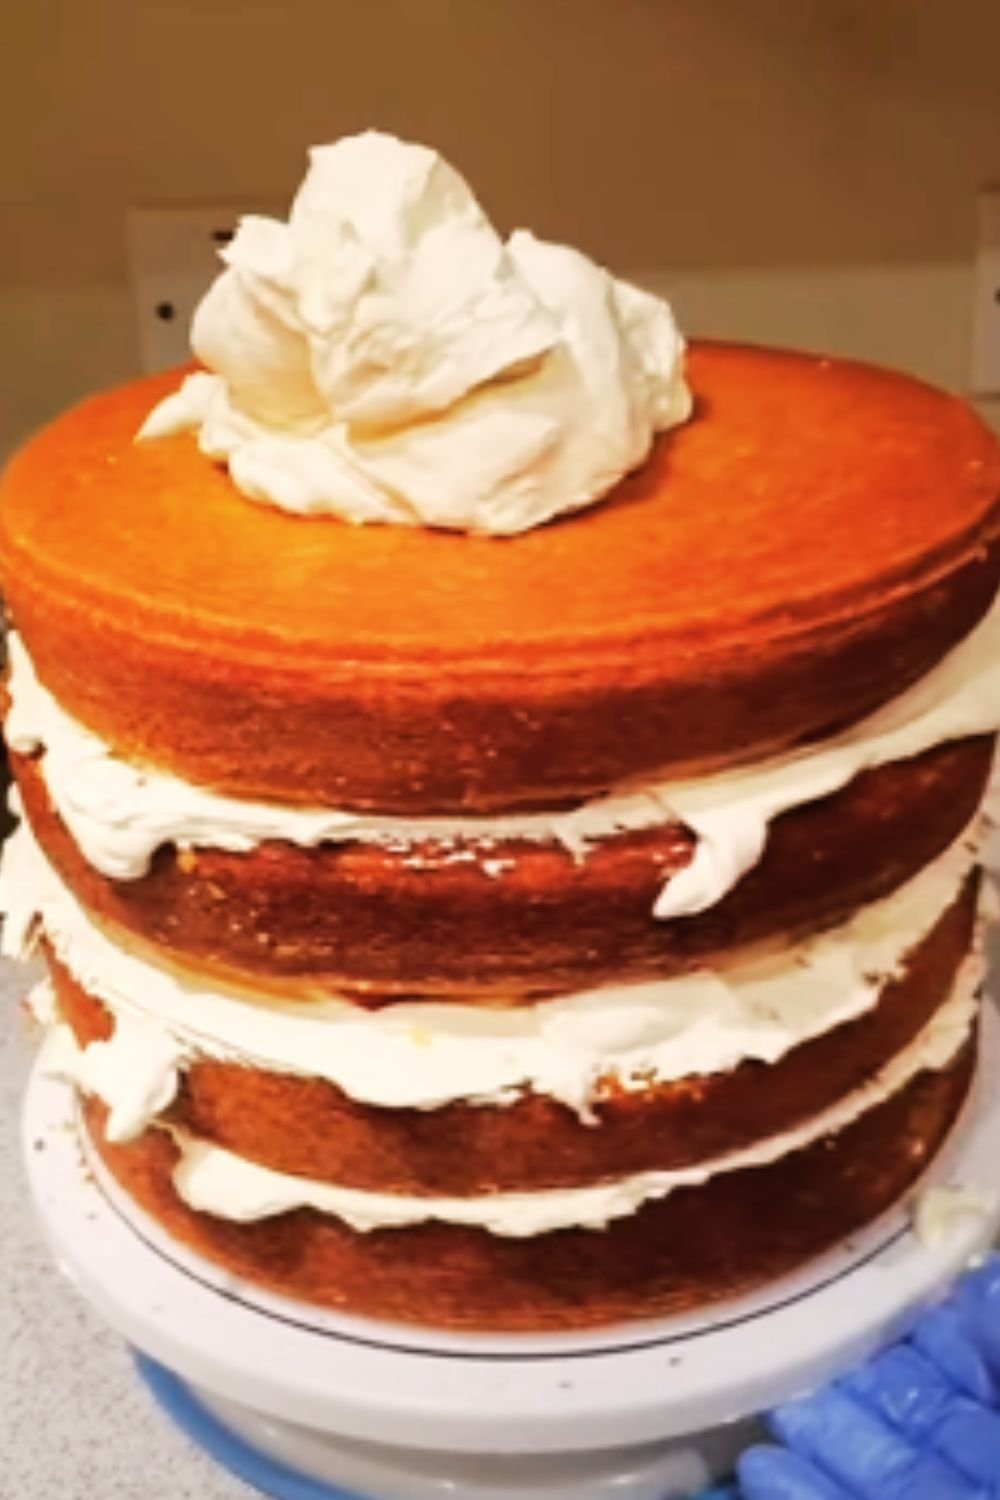
Assembling the Cake
- Level cake layers: Using a long serrated knife, level the tops of your cake layers if they have domed during baking. This ensures even, professional-looking layers.
- First layer assembly: Place one cake layer on your serving plate or cake stand. Using an offset spatula, spread about 1 cup of frosting evenly over the top. Create a frosting dam around the edge by piping a thick ring of frosting around the perimeter. This prevents the berry filling from seeping out.
- Add berry filling: Spoon half of the macerated berries (drained) into the center of the frosting dam, spreading them evenly but not pushing against the dam.
- Continue stacking: Place the second cake layer on top and repeat the process with frosting, dam, and remaining macerated berries.
- Complete the stack: Place the final cake layer on top, bottom side up for a flat top surface.
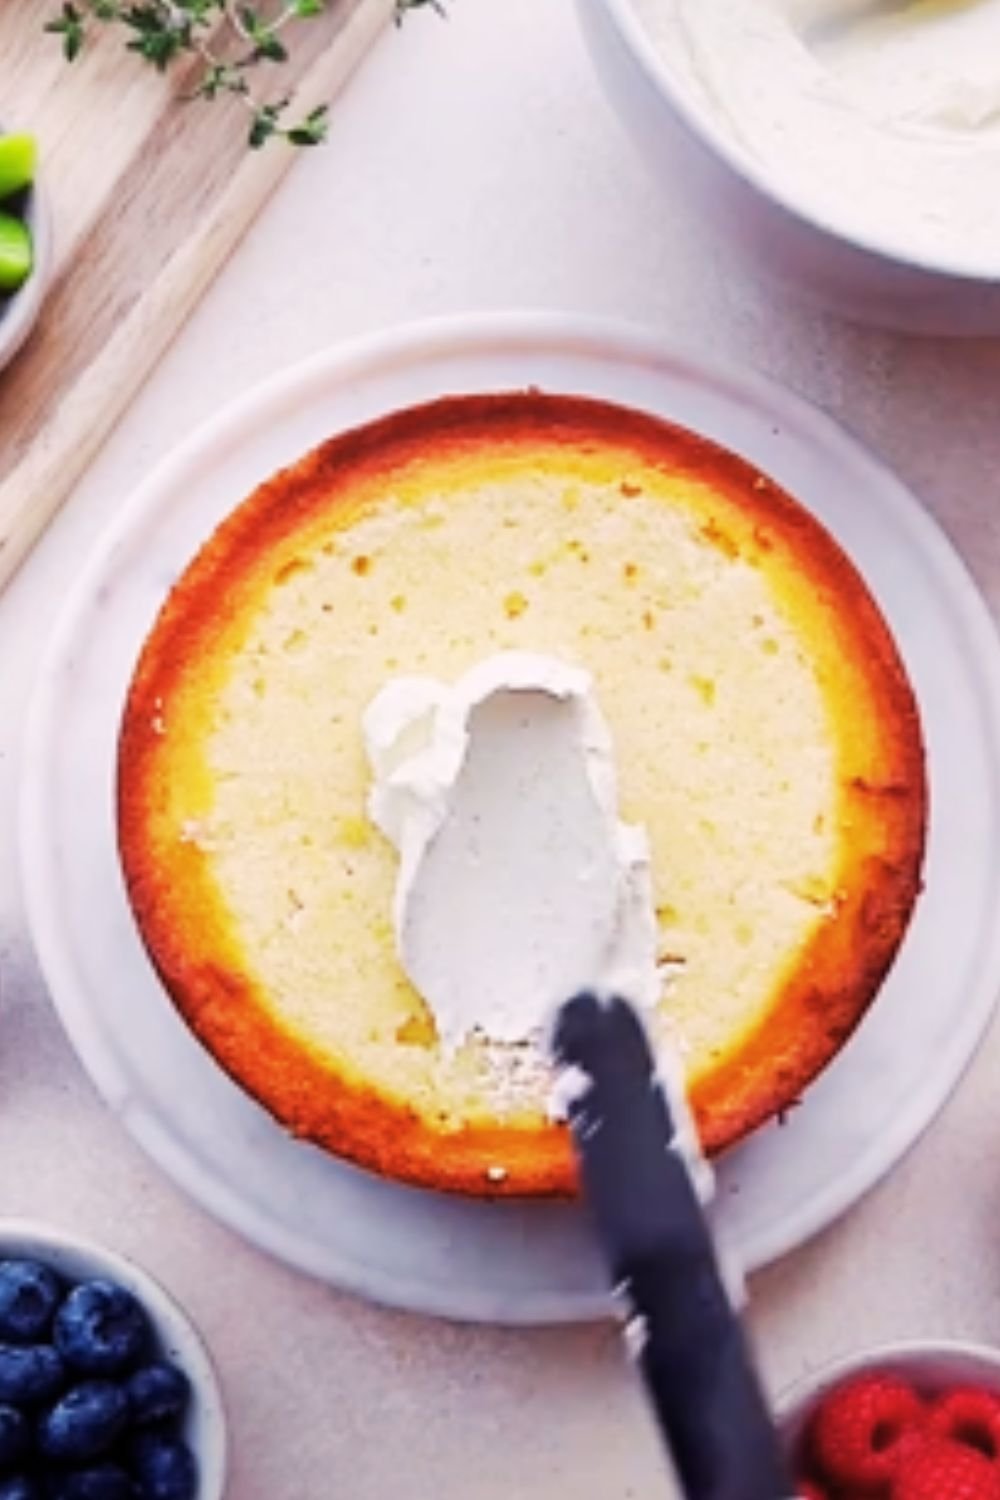
- Crumb coat: Apply a thin layer of frosting all over the cake to seal in any crumbs. This is called a crumb coat. Refrigerate for 20-30 minutes to set this layer.
- Final frosting: After the crumb coat has set, apply the remaining frosting to the top and sides of the cake. You can create a smooth finish or textured swirls, depending on your preference.
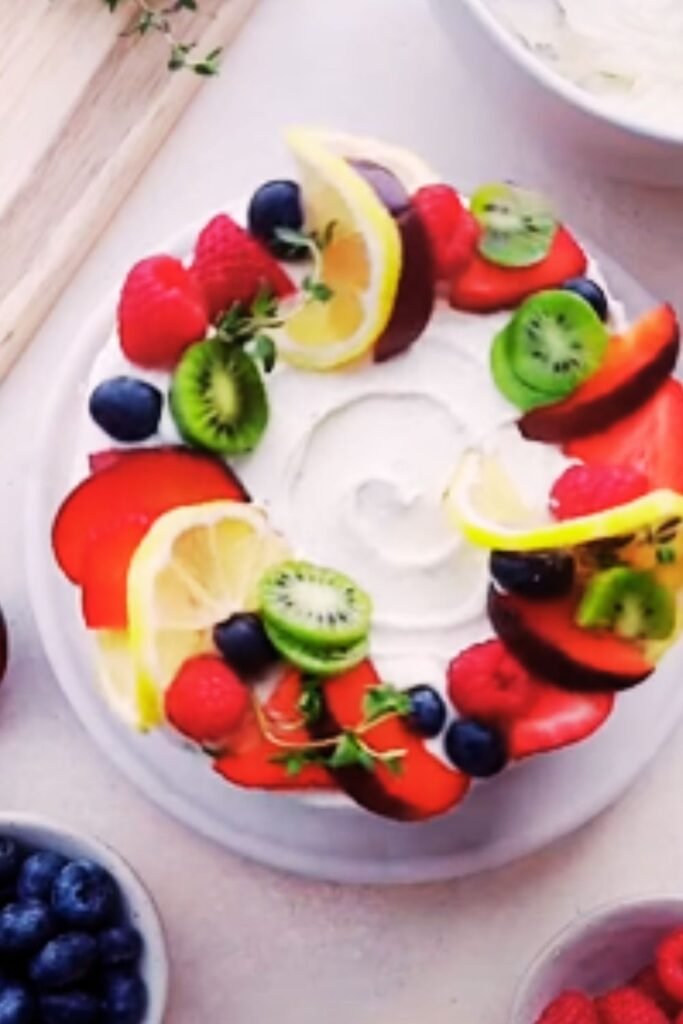
Decorating with Fresh Berries
- Arrange berries: Decorate the top and/or sides of the cake with fresh berries in a pattern of your choice. I like to create a cascade effect down one side for a dramatic presentation.
- Add finishing touches: Garnish with lemon slices and mint leaves if desired. For an extra touch of elegance, you can dust the berries with a little powdered sugar just before serving.
- Brush with reserved juice: For a beautiful shiny finish, brush the visible berries with a little of the reserved juice from the macerated berries. This adds flavor and creates an appealing glisten.
Expert Tips for Success
Throughout my years of baking this cake, I’ve discovered several tricks that make a significant difference in the final result:
For Perfect Cake Layers:
- Room temperature ingredients: This is non-negotiable! Cold ingredients don’t incorporate properly, leading to dense cakes. I set my refrigerated ingredients out at least an hour before baking.
- Measure flour correctly: I always sift before measuring or use the spoon-and-level method to avoid packing too much flour into my measuring cups, which would result in a dry cake.
- Don’t skimp on the creaming step: Those 3-4 minutes of beating butter and sugar together create tiny air pockets that expand during baking, giving your cake lift and tenderness.
- Alternate wet and dry ingredients: This prevents the batter from separating and ensures even mixing without overworking the gluten.
For Smooth, Stable Frosting:
- Use full-fat cream cheese: Lower fat versions contain more water and create runny frosting that won’t hold its shape.
- Cold cream cheese, room temperature butter: For the best texture, I’ve found that slightly cool cream cheese (about 10 minutes out of the refrigerator) combined with fully softened butter creates the perfect consistency.
- Sift your powdered sugar: This extra step eliminates lumps that would be impossible to smooth out later.
For Beautiful Berry Decoration:
- Choose firm, fresh berries: Inspect each berry for freshness—they should be plump, firm, and vibrant in color.
- Dry berries thoroughly: After washing, dry the decorating berries completely on paper towels. Moisture will cause them to bleed into your frosting.
- Create contrast: Mix different types and colors of berries for visual appeal. The varied shapes and colors create a stunning presentation.
Make-Ahead and Storage Tips
This cake can be quite an undertaking, so I often spread the work over a couple of days:
1-2 Days Before Serving:
- Bake the cake layers, cool completely, then wrap tightly in plastic wrap and refrigerate.
- Wash and thoroughly dry berries, then store in the refrigerator.
1 Day Before Serving:
- Prepare the frosting and assemble the cake.
- Keep the assembled cake in the refrigerator overnight, but don’t add the fresh berry decoration yet.
Day of Serving:
- Decorate with fresh berries 2-4 hours before serving.
- For the best flavor and texture, remove the cake from the refrigerator 30-60 minutes before serving to take the chill off.
Storage After Serving:
- Cover and refrigerate leftover cake for up to 3 days.
- The quality of fresh berries will decline after the first day, but the cake will still taste delicious.
Variations to Try
One of the joys of this recipe is how adaptable it is to different seasons and preferences:
Seasonal Berry Options:
| Season | Best Berries to Use | Complementary Flavors |
|---|---|---|
| Spring | Strawberries, early blueberries | Fresh mint, edible flowers |
| Summer | Blueberries, blackberries, raspberries | Basil, lavender |
| Fall | Late raspberries, blackberries | Cinnamon, nutmeg |
| Winter | Frozen berry medley (thawed and patted dry) | Rosemary, candied citrus |
Flavor Variations:
| Variation | Key Ingredient Changes | Notes |
|---|---|---|
| Lemon-Lavender | Add 1-2 tsp culinary lavender to the sugar before creaming | Strain the lavender out for smoother texture or leave in for visual appeal |
| Lemon-Thyme | Add 1 tbsp fresh thyme leaves to the batter | Creates a sophisticated herbal note |
| Meyer Lemon | Substitute Meyer lemons for regular lemons | Results in a milder, slightly sweeter lemon flavor |
| Lemon-Coconut | Add ½ cup toasted coconut to the batter, use coconut milk instead of buttermilk | Frost with coconut cream cheese frosting and top with toasted coconut |
Dietary Adaptations:
| Dietary Need | Substitution | Effect on Result |
|---|---|---|
| Gluten-Free | Replace all-purpose flour with high-quality 1:1 gluten-free baking flour | Slightly more delicate texture |
| Dairy-Free | Use plant-based butter and cream cheese alternatives, non-dairy milk with 1 tbsp vinegar for buttermilk | Less rich but still delicious |
| Reduced Sugar | Reduce sugar to 1½ cups in cake, 4 cups in frosting | Less sweet but maintains structure |
| Egg-Free | Replace each egg with ¼ cup unsweetened applesauce or a commercial egg replacer | Slightly denser crumb |
Serving Suggestions
I love to make this cake the centerpiece of a celebration, and here are some of my favorite ways to serve it:
- For a spring brunch: Pair with a sparkling elderflower beverage and a fruit salad.
- For a summer garden party: Serve with iced tea infused with fresh mint and lemon.
- For an elegant dinner party: Accompany with a fruit sorbet trio on the side.
- For afternoon tea: Offer alongside cucumber sandwiches and a citrus tea blend.

Troubleshooting Common Issues
Even experienced bakers encounter challenges. Here are solutions to common problems you might face:
Cake Layers
| Problem | Possible Cause | Solution |
|---|---|---|
| Cake layers sank in the middle | Oven temperature too low or cake underbaked | Test oven temperature with an oven thermometer; ensure toothpick comes out clean |
| Tough, dense texture | Overmixing the batter after adding flour | Mix just until ingredients are incorporated after adding flour |
| Dry cake | Too much flour or overbaking | Measure flour correctly; check cake a few minutes before recommended baking time |
| Uneven rise | Uneven oven temperature or pans placed too close together | Rotate pans halfway through baking; leave at least 2 inches between pans |
Frosting Issues
| Problem | Possible Cause | Solution |
|---|---|---|
| Runny frosting | Ingredients too warm or low-fat cream cheese used | Refrigerate frosting for 20 minutes; always use full-fat cream cheese |
| Lumpy frosting | Cream cheese or butter not softened properly | Ensure ingredients are at proper temperature; sift powdered sugar |
| Frosting melting off cake | Room too warm | Work in cool environment; refrigerate cake for 20-30 minutes between frosting stages |
| Frosting too sweet | Too much powdered sugar | Add a pinch more salt or a bit more lemon juice to balance sweetness |
Berry Decoration
| Problem | Possible Cause | Solution |
|---|---|---|
| Berries bleeding into frosting | Berries too wet or cut | Dry berries thoroughly; for cut berries, place on paper towels before adding to cake |
| Berries sinking into frosting | Frosting too soft | Chill cake until frosting is firm before adding berries |
| Berries look dull | Not fresh or stored too long | Select the freshest berries; add them as close to serving time as possible |
| Berry juice making frosting soggy | Macerated berries not drained properly | Drain berries well with a slotted spoon; pat dry if necessary |
Frequently Asked Questions
Q: Can I make this cake with cake flour instead of all-purpose flour?
A: Absolutely! Cake flour will give you an even more tender crumb. Substitute 3¼ cups of cake flour for the 3 cups of all-purpose flour in the recipe.
Q: My cream cheese frosting is too runny. What did I do wrong?
A: This usually happens when the ingredients are too warm or if you used low-fat cream cheese. Make sure to use full-fat cream cheese, and if your frosting is runny, refrigerate it for 20-30 minutes before continuing.
Q: Can I use frozen berries in this recipe?
A: For the filling between layers, frozen berries (thawed and well-drained) will work fine. However, for decorating the outside of the cake, I strongly recommend fresh berries as frozen berries will release too much moisture as they continue to thaw.
Q: How far in advance can I make this cake?
A: You can bake the cake layers up to 2 days ahead (wrapped well and refrigerated) and assemble with frosting 1 day ahead. I recommend adding the fresh berry decoration no more than 4 hours before serving for the best appearance.
Q: My cake layers came out flat. What happened?
A: Check that your baking powder and baking soda are fresh (replace every 6 months). Also, make sure you’re creaming the butter and sugar long enough (3-4 minutes) and that your oven is properly preheated to the correct temperature.
Q: Is there a way to make this cake less sweet?
A: Yes, you can reduce the sugar in the cake to 1½ cups without affecting the structure. For the frosting, you can reduce the powdered sugar to 4 cups and add an extra pinch of salt to balance the sweetness.
Q: My berries keep sinking into the frosting. How can I prevent this?
A: Make sure your frosting is firm enough by chilling the frosted cake for 20-30 minutes before adding berries. Additionally, make sure your berries are completely dry before placing them on the cake.
Q: Can I make cupcakes instead of a layer cake with this recipe?
A: Yes! This recipe will make about 24-28 cupcakes. Bake at the same temperature (350°F/175°C) for 18-22 minutes. Core each cupcake and add a small amount of berry filling before topping with frosting and a fresh berry.
Why This Recipe Works
I’ve made this cake more times than I can count, and there’s a good reason it never fails to impress. The science behind this recipe is what makes it consistently successful:
- The acid trifecta: Lemon juice, buttermilk, and berries all contain acids that react with the baking soda, producing carbon dioxide bubbles that help the cake rise beautifully.
- Fat content balance: The butter in the cake and the cream cheese in the frosting provide richness without becoming overwhelming, thanks to the citrus and berry counterpoints.
- Temperature control: Room temperature ingredients incorporate evenly, creating a smooth batter that bakes into a tender, even crumb.
- Moisture retention: The sugar in the cake doesn’t just sweeten—it helps retain moisture, keeping your cake fresh and delicious for days.
When these elements work together in harmony, the result is a cake that’s greater than the sum of its parts—bright, balanced, and utterly memorable.
As my grandmother used to say, “A cake made with love always tastes better.” I hope you’ll feel the joy I do when you serve this stunning lemon layer cake to your loved ones. There’s nothing quite like watching someone’s face light up when they take that first perfect bite of tangy lemon cake, creamy frosting, and sweet berry goodness.
Happy baking!