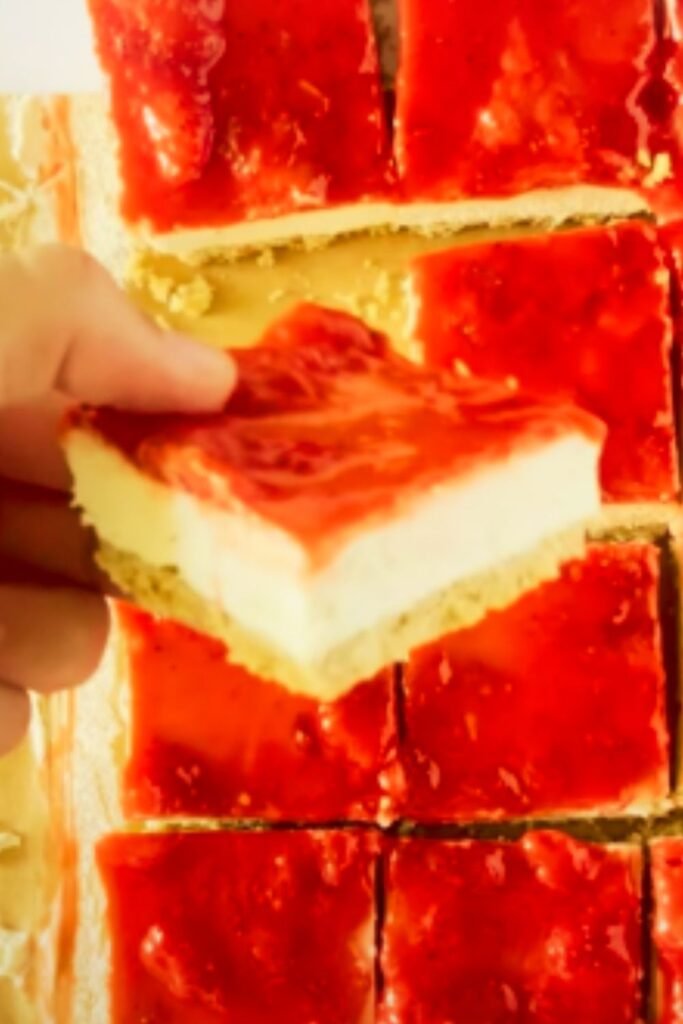
There’s something irresistible about the combination of buttery graham cracker crust, creamy cheesecake filling, and sweet strawberry topping that makes my taste buds dance with joy. After countless trips to the store buying those pre-packaged Philadelphia Cheesecake Snack Bars, I decided it was time to create my own version at home. Not only are these homemade treats more economical, but I can control exactly what goes into them, avoiding unnecessary preservatives and additives.
These no-bake strawberry cheesecake bars are perfect for when you need a quick dessert fix without turning on the oven. They’re ideal for summer gatherings, after-school snacks, or whenever you want to impress guests with minimal effort. The best part? They taste even better than the store-bought version!
Why This Recipe Works
I’ve spent years perfecting this recipe, and I’m thrilled to share my discoveries with you. Here’s why these cheesecake snack bars are absolutely foolproof:
- No baking required: Perfect for hot summer days or when you don’t want to wait for the oven to preheat.
- Make-ahead friendly: These bars actually taste better after they’ve had time to set, making them perfect for planning ahead.
- Customizable: While I love the classic strawberry topping, you can easily swap in other fruits based on what’s in season.
- Portion-controlled: Unlike a full cheesecake where I might be tempted to cut “just one more slice,” these bars are pre-portioned for sensible snacking.
- Kid-approved: My little ones give these bars two thumbs up, and they never suspect they’re getting less sugar than in the store-bought version.
The Perfect Ingredients
The key to recreating that Philadelphia-style taste lies in selecting the right ingredients. Here’s what you’ll need:
For the Graham Cracker Crust
- 2 cups graham cracker crumbs (about 16 full sheets)
- 2 tablespoons granulated sugar
- 1/2 cup (1 stick) unsalted butter, melted
- 1/4 teaspoon salt
For the Cheesecake Filling
- 16 ounces (2 blocks) cream cheese, softened to room temperature
- 1/3 cup granulated sugar
- 1/4 cup sour cream
- 2 teaspoons pure vanilla extract
- 1 tablespoon fresh lemon juice
- 1/4 cup heavy cream
For the Strawberry Topping
- 2 cups fresh strawberries, diced
- 1/4 cup granulated sugar
- 1 tablespoon lemon juice
- 2 tablespoons water
- 1 tablespoon cornstarch (mixed with 1 tablespoon cold water)
Essential Equipment
You don’t need fancy equipment to make these bars, but these tools will make the process much smoother:
- 9×9-inch square pan (for thicker bars) or 9×13-inch pan (for thinner bars)
- Parchment paper
- Food processor (for crushing graham crackers) or a ziplock bag and rolling pin
- Electric mixer (stand or hand mixer)
- Rubber spatula
- Measuring cups and spoons
- Medium saucepan (for the strawberry topping)
Step-by-Step Instructions
Preparing the Pan
- Line your baking pan with parchment paper, leaving some overhang on the sides for easy removal later.
- Lightly coat with non-stick spray if desired.
Making the Graham Cracker Crust
- In a food processor, pulse graham crackers until you have fine crumbs. If you don’t have a food processor, place the crackers in a ziplock bag and crush them with a rolling pin.
- Transfer the crumbs to a mixing bowl and add sugar and salt, then stir to combine.
- Pour in the melted butter and mix until the mixture resembles wet sand.
- Press the mixture firmly into the bottom of your prepared pan. I like to use the bottom of a measuring cup to ensure an even, compact layer.
- Place the crust in the refrigerator to chill while you prepare the filling.
Creating the Cheesecake Filling
This is where the magic happens! The key to a smooth, creamy filling is making sure your cream cheese is properly softened.
- In a large bowl, beat the softened cream cheese with an electric mixer until completely smooth, about 2-3 minutes. Don’t skip this step! It’s crucial for eliminating any lumps.
- Add the sugar and beat for another minute until well incorporated.
- Mix in the sour cream, vanilla extract, and lemon juice until smooth.
- In a separate bowl, whip the heavy cream until stiff peaks form.
- Gently fold the whipped cream into the cream cheese mixture using a rubber spatula. This adds lightness to the filling.
- Remove the crust from the refrigerator and spread the cheesecake filling evenly over the crust.
- Return the pan to the refrigerator while you prepare the strawberry topping.
Making the Strawberry Topping
- In a medium saucepan, combine the diced strawberries, sugar, and lemon juice.
- Cook over medium heat, stirring occasionally, until the strawberries release their juices, about 5 minutes.
- In a small bowl, mix the cornstarch with cold water to create a slurry.
- Slowly pour the cornstarch slurry into the strawberry mixture, stirring constantly.
- Continue cooking for another 2-3 minutes until the mixture thickens.
- Remove from heat and allow to cool completely. The topping will continue to thicken as it cools.
Assembling the Bars
- Once the strawberry topping has cooled to room temperature, gently spread it over the cheesecake layer.
- Cover the pan with plastic wrap and refrigerate for at least 4 hours, preferably overnight.
- When ready to serve, use the parchment paper overhang to lift the entire dessert out of the pan.
- With a sharp knife, cut into bars. For clean cuts, wipe the knife with a warm, damp cloth between slices.
Expert Tips for Perfect Cheesecake Bars
After making these bars countless times, I’ve discovered a few tricks that make all the difference:
- Temperature matters: Make sure your cream cheese is truly at room temperature before beating. Cold cream cheese will result in a lumpy filling.
- Don’t rush the chilling: These bars need time to set properly. I recommend at least 4 hours in the refrigerator, but overnight is ideal.
- Fresh vs. frozen strawberries: While fresh strawberries provide the best flavor and texture, you can use frozen in a pinch. Just be sure to thaw and drain them well.
- Make it extra smooth: For an ultra-smooth filling, beat the cream cheese alone first, then add other ingredients one at a time.
- Prevent a soggy crust: If your graham cracker crust tends to get soggy, try brushing it with a thin layer of melted white chocolate before adding the filling.
Nutritional Information
For those who are watching their intake, here’s a breakdown of the nutritional content per bar (based on cutting into 16 bars):
| Nutrient | Amount per Serving |
|---|---|
| Calories | 280 |
| Total Fat | 19g |
| Saturated Fat | 11g |
| Cholesterol | 55mg |
| Sodium | 180mg |
| Total Carbohydrates | 23g |
| Dietary Fiber | 1g |
| Sugars | 15g |
| Protein | 3g |
Storage and Make-Ahead Instructions
One of the things I love most about these bars is how well they keep in the refrigerator:
- Refrigerator: Store in an airtight container for up to 5 days.
- Freezer: These bars freeze beautifully! Wrap individual pieces in plastic wrap, then place in a freezer-safe container. They’ll keep for up to 3 months.
- Thawing: When ready to enjoy, thaw overnight in the refrigerator or for about 30 minutes at room temperature.
Variations to Try
While the classic strawberry version is my go-to, I’ve experimented with several delicious variations:
Blueberry Cheesecake Bars
Substitute an equal amount of blueberries for the strawberries in the topping recipe.
Raspberry White Chocolate
Add 1/2 cup of white chocolate chips to the cheesecake filling and use raspberries for the topping.
Lemon Cheesecake Bars
Increase the lemon juice to 2 tablespoons in the filling and add 1 tablespoon of lemon zest. Skip the fruit topping and instead make a simple lemon glaze with powdered sugar and lemon juice.
Chocolate Crust Option
Replace the graham crackers with chocolate cookie crumbs (like Oreos with the filling removed) for a delicious chocolate contrast to the creamy filling.

Serving Suggestions
These versatile bars can be dressed up or down depending on the occasion:
- Serve with a dollop of whipped cream and a fresh strawberry for an elegant dessert presentation.
- Add a drizzle of chocolate sauce for chocolate lovers.
- Create a dessert board with these bars cut into smaller pieces alongside fresh fruit and chocolate truffles for a party.
- Pack them in lunch boxes for a special midday treat (they’ll stay firm if kept cool).
- Serve with a scoop of vanilla ice cream for an indulgent dessert.
Troubleshooting Common Issues
Even experienced bakers encounter problems sometimes. Here are solutions to common issues:
Filling Won’t Set
- Make sure you’re using full-fat cream cheese, not the reduced-fat version.
- Check that you whipped the heavy cream to stiff peaks before folding it in.
- Allow sufficient chilling time; sometimes it takes longer than 4 hours.
Runny Strawberry Topping
- Ensure you’re cooking the cornstarch mixture long enough to activate its thickening properties.
- If your strawberries are particularly juicy, you might need an extra teaspoon of cornstarch.
- Remember that the topping will continue to thicken as it cools.
Crumbly Crust
- If your crust is falling apart, you likely didn’t add enough butter or didn’t press it firmly enough into the pan.
- Make sure you’re compacting the crust well using the bottom of a measuring cup or glass.
Special Dietary Adaptations
With a few simple swaps, these cheesecake bars can accommodate various dietary needs:
Gluten-Free Version
- Use gluten-free graham crackers or gluten-free cookies for the crust.
Lower Sugar Option
- Reduce the sugar in each component by up to half.
- Use a natural sweetener like monk fruit or stevia (adjust quantities according to package directions).
Dairy-Free Alternative
- Substitute dairy-free cream cheese and coconut cream (the solid part from a refrigerated can of full-fat coconut milk) for the heavy cream.
- Use coconut oil instead of butter in the crust.
Seasonal Fruit Variations
One of the beauties of this recipe is its versatility with seasonal fruits:
| Season | Fruit Suggestions |
|---|---|
| Spring | Strawberries, Rhubarb |
| Summer | Blueberries, Peaches, Raspberries |
| Fall | Apples (cooked with cinnamon), Cranberries |
| Winter | Citrus curd, Pomegranate seeds |
Frequently Asked Questions

Can I make these bars without an electric mixer? Yes, but it will require significant arm strength! Make sure your cream cheese is very soft, and use a sturdy whisk to beat it until smooth. For the whipped cream, you’ll definitely need to whip by hand with a whisk, which takes longer but is certainly possible.
Why do I need to add lemon juice to the filling? The small amount of acidity in lemon juice balances the sweetness and richness of the cream cheese. It also contributes to the classic cheesecake flavor without making the bars taste lemony.
Can I use graham cracker crumbs from a box instead of crushing my own? Absolutely! Pre-crushed graham cracker crumbs work perfectly and save time. You’ll need about 2 cups.
My bars are too soft to cut cleanly. What should I do? Place them in the freezer for about 15-20 minutes before cutting. This firms them up just enough for clean slices without freezing them solid.
Can I make these in a muffin tin for individual servings? Yes! Line a muffin tin with paper liners and follow the same process. Reduce the chilling time to about 2-3 hours since the smaller portions will set faster.
How do I know when the cream cheese is sufficiently softened? When you press your finger into the cream cheese, it should leave an indentation easily without resistance. If it’s still firm, give it more time at room temperature or microwave in 10-second intervals, checking frequently.
Can I use light cream cheese? You can, but the filling won’t be as rich and might not set as firmly. I recommend using full-fat cream cheese for the best texture and flavor.
Is there a way to make these bars less sweet? Yes, you can reduce the sugar in both the filling and the topping by up to half without affecting the texture significantly.
The Story Behind These Bars
I first created this recipe when planning my daughter’s birthday party. I wanted something special that could be made ahead and would appeal to both kids and adults. The Philadelphia snack bars had always been a favorite in our household, but I wanted to create something with fresher ingredients and more authentic flavor.
After several test batches, tweaking the ratios of cream cheese to sour cream, and experimenting with different sweetness levels, I landed on this recipe. They were such a hit at the party that three different people asked me for the recipe!
Now, these cheesecake bars are my signature dessert for gatherings, and I love seeing people’s surprise when I tell them how simple they are to make. There’s something deeply satisfying about transforming basic ingredients into something that brings so much joy to others.
Whether you’re an experienced baker or a novice in the kitchen, these strawberry cheesecake snack bars are approachable, foolproof, and guaranteed to impress. The combination of buttery crust, creamy filling, and fresh strawberry topping creates a perfect harmony of flavors and textures that’s hard to resist.
So gather your ingredients, clear some space in your refrigerator, and prepare to discover your new favorite no-bake dessert. These cheesecake bars might just become your signature recipe too!