There’s something deeply satisfying about opening a jar of homemade pickled beets. The vibrant ruby color, the perfect balance of sweet and tangy flavors, and that distinctive earthy beet taste transformed through the pickling process. I’ve been making these pickled beets for years, and they’ve become a staple in my refrigerator. They’re incredibly versatile – perfect alongside a sandwich, tossed into salads, or enjoyed as a simple side dish.
What I love most about this recipe is how straightforward it is. Even if you’ve never pickled anything before, you can create something truly delicious with minimal effort. The best part? No special canning equipment required! This refrigerator pickling method is quick, easy, and yields fantastic results every time.
Why You’ll Love These Pickled Beets
Before diving into the recipe, let me share why these pickled beets deserve a spot in your regular cooking rotation:
- They’re incredibly easy to make – perfect for beginners
- No special equipment needed – just basic kitchen tools
- They keep for weeks in the refrigerator
- The flavor improves with time
- They’re versatile in so many dishes
- They make beautiful homemade gifts
- They’re packed with nutrients
- They’re a great way to preserve beets when they’re in season
Ingredients You’ll Need
For this recipe, simplicity is key. You’ll need just a handful of ingredients:
For the Beets:
- 2 pounds fresh beets (about 6-8 medium beets)
- 1 tablespoon olive oil (if roasting)
- 1 teaspoon salt
For the Pickling Liquid:
- 1 cup apple cider vinegar
- 1/2 cup water
- 1/3 cup granulated sugar (adjust to taste)
- 1 tablespoon kosher salt
- 1 cinnamon stick
- 5 whole cloves
- 1 bay leaf
- 1 teaspoon whole black peppercorns
- 1 small red onion, thinly sliced (optional)
Equipment List
This recipe requires minimal equipment, which is part of what makes it so accessible:
- Large pot for boiling beets (or baking sheet if roasting)
- Sharp knife and cutting board
- Measuring cups and spoons
- Medium saucepan for the pickling liquid
- Clean mason jars or other glass containers with lids
- Gloves to prevent stained hands (optional but recommended)
Preparing the Beets
When it comes to preparing beets for pickling, you have two main options: boiling or roasting. Both methods work well, though they produce slightly different results. I’ll walk you through both so you can choose your preferred method.
Method 1: Boiling the Beets
- Start by thoroughly washing your beets under cold running water. Scrub gently to remove any dirt or debris.
- Trim off the leafy tops, leaving about 1 inch of the stems attached (this helps prevent the beets from “bleeding” too much color during cooking).
- Place the beets in a large pot and cover with cold water. Add 1 teaspoon of salt to the water.
- Bring the water to a boil, then reduce to a simmer. Cover and cook until the beets are tender.
- Small beets: about 25-30 minutes
- Medium beets: about 35-45 minutes
- Large beets: about 50-60 minutes
- To test for doneness, insert a knife into the thickest part of a beet. It should slide in easily with little resistance.
- Once tender, drain the beets and transfer them to a bowl of cold water to cool.
Method 2: Roasting the Beets
This is actually my preferred method because roasting concentrates the beets’ natural sweetness and gives them a deeper flavor.
- Preheat your oven to 400°F (200°C).
- Wash and trim the beets as described in the boiling method.
- Place the beets on a large piece of aluminum foil. Drizzle with 1 tablespoon of olive oil and sprinkle with 1 teaspoon of salt.
- Wrap the beets tightly in the foil, creating a sealed packet.
- Place the packet on a baking sheet and roast in the preheated oven.
- Small beets: about 40-45 minutes
- Medium beets: about 50-60 minutes
- Large beets: about 65-75 minutes
- To test for doneness, carefully open the foil packet (watch out for steam!) and insert a knife into the thickest part of a beet. It should slide in easily.
- Allow the beets to cool until you can handle them comfortably.
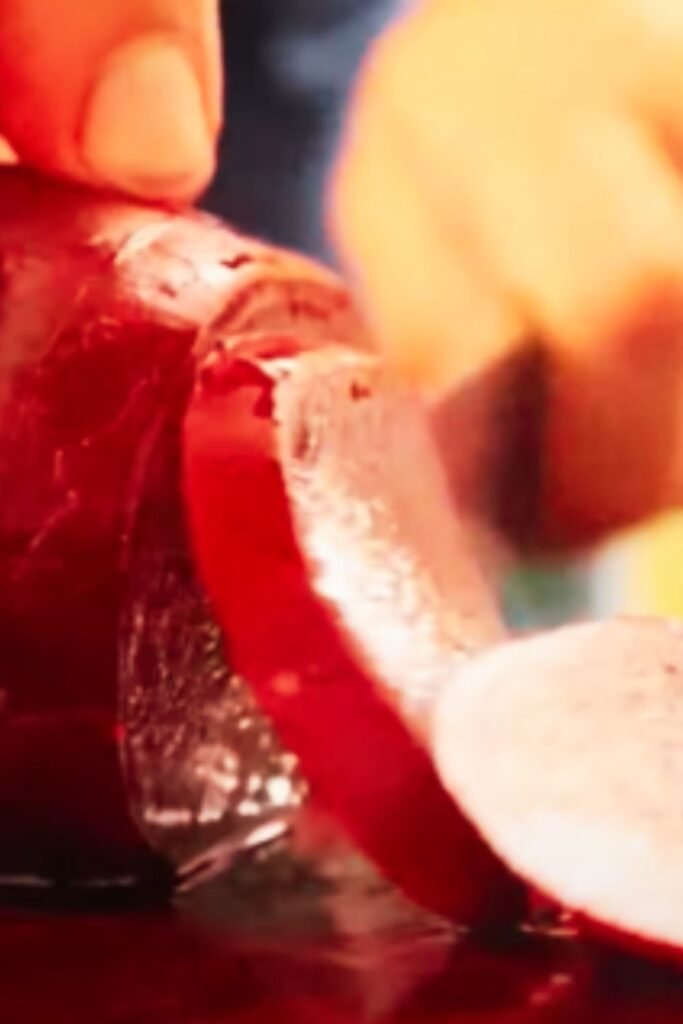
Peeling and Slicing the Beets
Regardless of which cooking method you chose, the next steps are the same:
- Once the beets are cool enough to handle, put on gloves to prevent staining your hands (beet juice is a powerful natural dye!).
- Gently rub the skin off the beets. It should slip off easily after cooking.
- Cut off both the stem and root ends.
- Slice the beets into your preferred shape:
- Round slices (about 1/4 inch thick)
- Half-moons (if using larger beets)
- Small cubes
- Wedges
I typically opt for 1/4-inch thick rounds because they’re perfect for salads and sandwiches, but choose whatever works best for how you plan to use them.
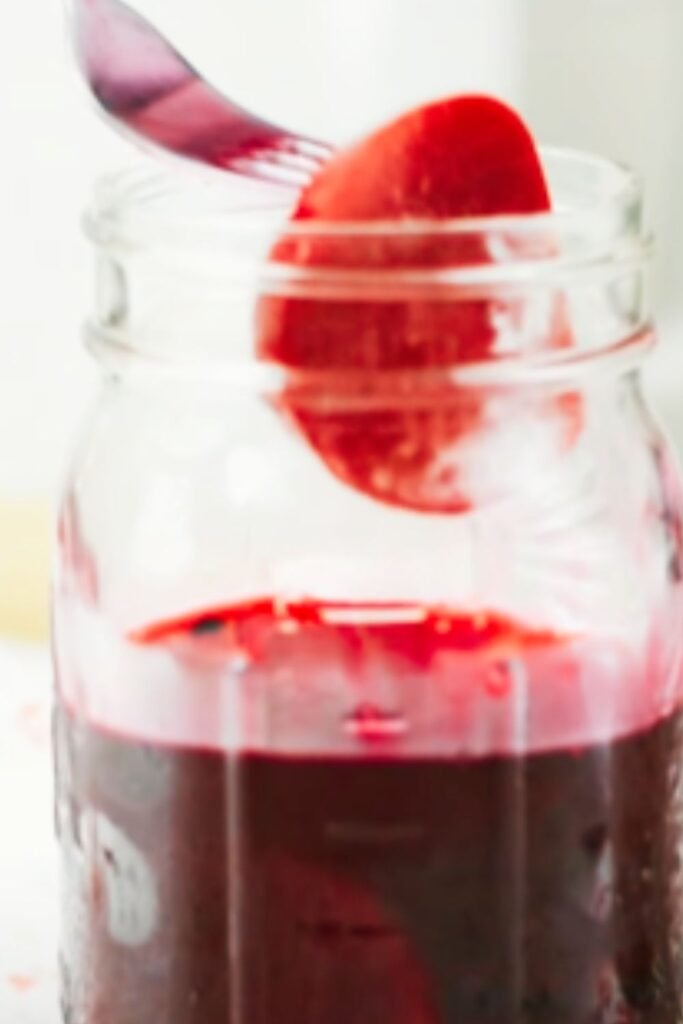
Creating the Pickling Liquid
Now it’s time to prepare the pickling brine that will transform our cooked beets into a tangy, flavorful treat:
- In a medium saucepan, combine the apple cider vinegar, water, sugar, and salt.
- Add the cinnamon stick, cloves, bay leaf, and black peppercorns.
- Bring the mixture to a boil over medium-high heat, stirring occasionally to dissolve the sugar and salt.
- Once boiling, reduce the heat and simmer for about 5 minutes to allow the spices to infuse the brine.
- Remove from heat and let the pickling liquid cool slightly for about 5 minutes.
Assembling the Pickled Beets
With our beets prepared and pickling liquid ready, it’s time to bring everything together:
- If using, place a layer of thinly sliced red onion at the bottom of your clean glass jars.
- Add the sliced beets to the jars, packing them fairly tightly but not crushing them.
- Pour the hot pickling liquid over the beets, making sure to include some of the whole spices in each jar.
- Leave about 1/2 inch of headspace at the top of each jar.
- Tap the jars gently on the counter to release any air bubbles.
- Secure the lids on the jars and allow them to cool to room temperature.
- Once cooled, transfer the jars to the refrigerator.
Patience Pays Off
While it’s tempting to dive right into your freshly pickled beets, I highly recommend giving them at least 24 hours in the refrigerator before eating. This allows the flavors to develop and the beets to properly pickle. For the best flavor, wait 2-3 days before enjoying them.
The pickled beets will keep well in the refrigerator for up to 3-4 weeks. The flavor will continue to develop over the first week.
Flavor Variations
While the classic pickling spices I’ve included create a wonderful traditional pickled beet, don’t be afraid to experiment with different flavor profiles:
Sweet and Spicy
- Add 1 jalapeño, sliced
- Include 1/4 teaspoon red pepper flakes
- Use 1/2 cup honey instead of sugar
Herb-Infused
- Add 2-3 sprigs of fresh thyme
- Include 1 tablespoon of fresh dill
- Add 2 crushed garlic cloves
Citrus Bright
- Add the zest of one orange
- Include 2 tablespoons of fresh orange juice
- Use 1 star anise instead of cloves
Eastern-Inspired
- Add 1 teaspoon of freshly grated ginger
- Include 1/4 teaspoon ground cardamom
- Use 1 tablespoon of whole mustard seeds
Nutritional Benefits of Pickled Beets
Pickled beets aren’t just delicious – they’re also packed with nutrients:
| Nutrient | Benefit |
|---|---|
| Fiber | Supports digestive health and helps you feel full |
| Folate | Important for cell growth and function, especially during pregnancy |
| Manganese | Helps form connective tissue, bones, and sex hormones |
| Potassium | Regulates heart function and blood pressure |
| Vitamin C | Supports immune function and skin health |
| Nitrates | May help improve athletic performance and heart health |
| Betalains | Powerful antioxidants with anti-inflammatory properties |
While the pickling process may reduce some of the water-soluble vitamins, many of the beneficial compounds remain intact, making pickled beets a tasty and nutritious addition to your diet.
Creative Ways to Use Pickled Beets
These vibrant gems are incredibly versatile. Here are some of my favorite ways to enjoy them:
Salads
- Mix with goat cheese, walnuts, and arugula
- Combine with orange segments, feta, and mint
- Toss with quinoa, cucumbers, and a lemon vinaigrette
Sandwiches and Wraps
- Layer on sandwiches with cream cheese and cucumber
- Add to wraps with hummus and mixed greens
- Include in veggie burgers for added flavor and moisture
Main Dishes
- Serve alongside grilled chicken or fish
- Chop and add to grain bowls
- Mix into risotto for a stunning color and flavor boost
Appetizers
- Serve on crostini with ricotta and a drizzle of honey
- Add to a charcuterie board
- Blend into a vibrant beet hummus
Other Creative Uses
- Chop finely and add to deviled egg filling
- Blend into smoothies for a nutritious boost
- Use in place of cucumber for a twist on traditional tzatziki
Serving Suggestions
Pickled beets can transform an ordinary meal into something special. Here are some perfect pairings:
- Serve alongside grilled proteins like chicken, fish, or tofu
- Add to a cheese board with sharp cheddar, creamy goat cheese, and crusty bread
- Enjoy as a side dish with hearty stews or roasts
- Incorporate into holiday spreads – their vibrant color makes them festive
- Offer as a condiment option for sandwiches and burgers
- Pair with other pickled vegetables for a colorful pickle platter
- Serve with boiled eggs and fresh herbs for a nutritious light lunch
Troubleshooting Tips
Even with such a simple recipe, occasional issues can arise. Here’s how to address common problems:
Beets Too Hard
- Cook the beets longer before pickling
- Slice the beets thinner
- Allow more time in the pickling liquid
Too Sweet or Too Sour
- Adjust the sugar-to-vinegar ratio in your next batch
- For currently too-sweet pickles, add a tablespoon of plain vinegar to the jar
- For overly sour pickles, add a teaspoon of sugar and shake to dissolve
Dull Color
- Use fresh, vibrant beets
- Don’t overcook the beets before pickling
- Store in a cool, dark place as light can cause color to fade
Cloudy Brine
- Use filtered water instead of tap water
- Ensure all equipment is thoroughly clean
- Make sure sugar and salt fully dissolve in the brine
Soft or Mushy Beets
- Don’t overcook the beets initially
- Use the freshest beets possible
- Make sure your brine is hot when poured over the beets
Gift-Giving Ideas
Homemade pickled beets make wonderful gifts. Here are some presentation ideas:
- Transfer to decorative jars with personalized labels
- Include a recipe card with serving suggestions
- Create a “pickle basket” with various homemade pickled vegetables
- Pair with artisanal cheeses and crackers for a gourmet gift
- Include in holiday food gifts alongside other homemade preserves
Storage Tips
To ensure your pickled beets stay fresh and delicious:
- Always store in the refrigerator
- Keep beets fully submerged in the pickling liquid
- Use clean utensils when removing beets from the jar
- If properly stored, they’ll last 3-4 weeks in the refrigerator
- For longer storage, you can process using proper water bath canning methods (though that’s beyond the scope of this refrigerator pickle recipe)
Frequently Asked Questions
Can I reduce the sugar in this recipe? Absolutely! The sugar helps balance the acidity but isn’t necessary for food safety in refrigerator pickles. You can reduce it by half or substitute with honey or maple syrup to taste.
Do I need to peel the beets before cooking them? No, it’s actually easier to peel beets after cooking. The skins slip off much more easily once the beets are tender.
Can I use pre-cooked packaged beets? Yes! For an even quicker recipe, you can use pre-cooked beets from the produce section. Just skip to the slicing and pickling steps.
How do I prevent staining my hands when working with beets? Wear disposable gloves or rub your hands with a little oil before handling beets. If staining occurs, lemon juice or baking soda can help remove it.
Are pickled beets good for you? Yes! Beets contain fiber, folate, manganese, potassium, and beneficial plant compounds. While the pickling process adds some sodium and sugar, they remain a nutritious choice.
Can I reuse the pickling liquid? I don’t recommend reusing the pickling liquid for food safety reasons. However, it makes an excellent base for salad dressings!
Why did my beets lose their color? This can happen if the beets were overcooked or if they were exposed to too much light during storage. Use fresh beets and store in a dark place for best color retention.
Can I use other types of vinegar? Yes! White vinegar, rice vinegar, or white wine vinegar all work well. Each will impart a slightly different flavor profile.
Do I need to sterilize my jars for refrigerator pickles? For refrigerator pickles, thoroughly clean jars with hot, soapy water are sufficient. True sterilization is only necessary for shelf-stable canning.
Can I make these pickled beets shelf-stable? This recipe is designed for refrigerator storage. For shelf-stable pickles, you would need to follow proper water bath canning procedures, which would require some adjustments to the recipe.
A Lasting Tradition
There’s something deeply satisfying about transforming fresh produce into something that can be enjoyed for weeks to come. Pickling is one of our oldest food preservation methods, and for good reason – it’s practical, delicious, and accessible.
I hope this recipe becomes a favorite in your kitchen as it has in mine. Whether you’re new to pickling or a seasoned preserver, the simple joy of opening a jar of homemade pickled beets months after the harvest is something truly special. Their vibrant color can brighten even the gloomiest winter day, bringing a taste of summer to your table year-round.
Happy pickling!