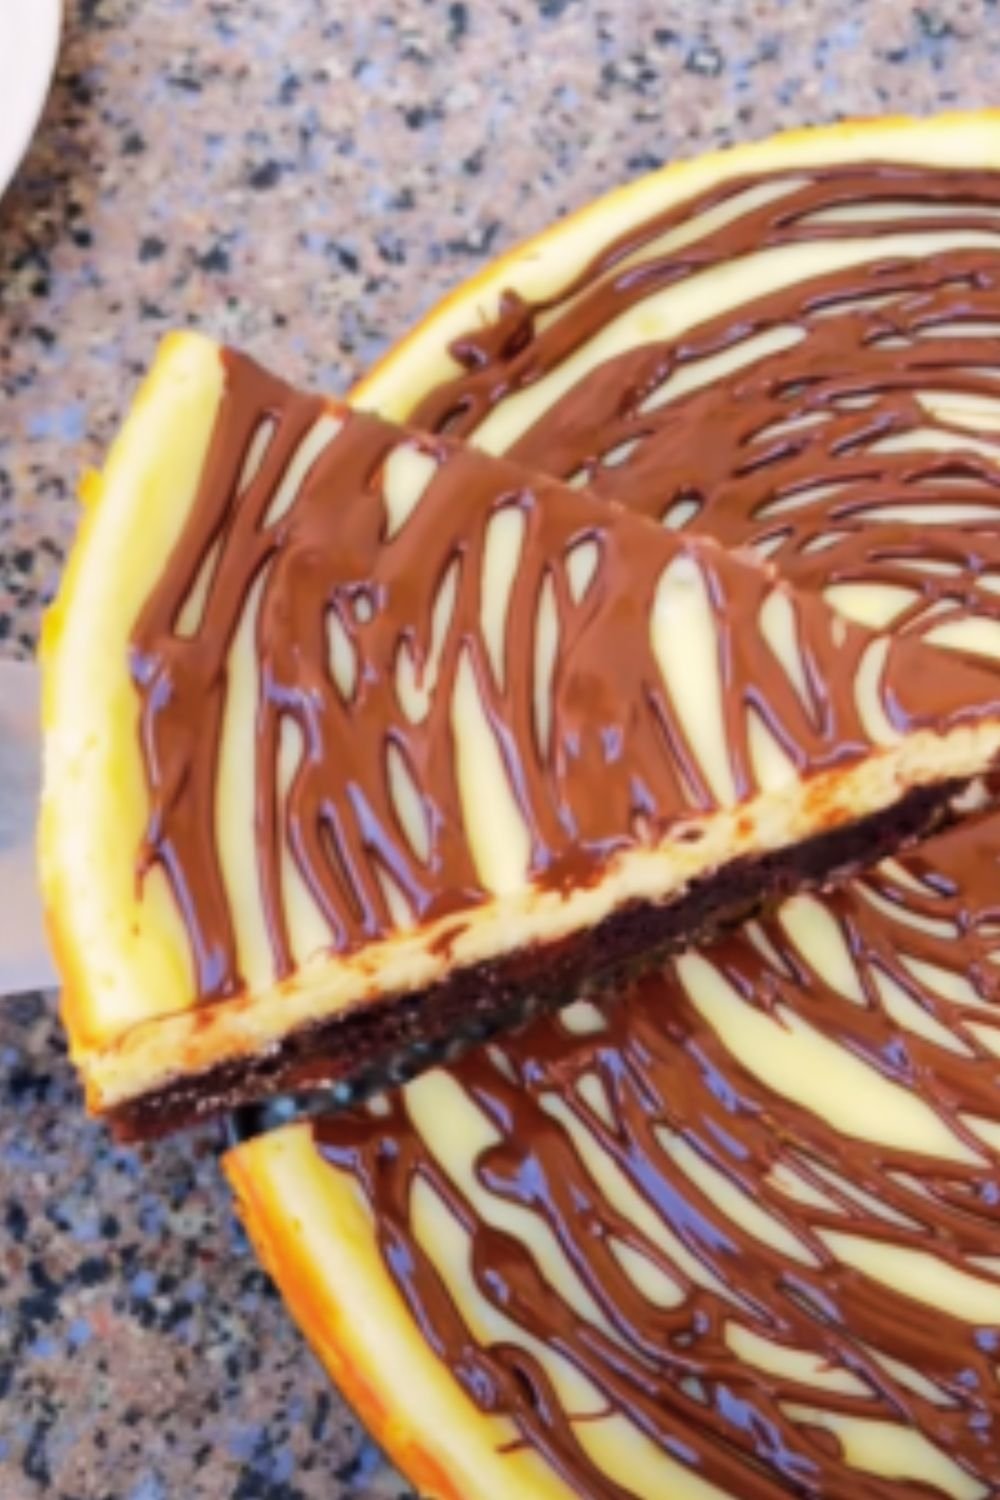
There’s something magical about the caramelized spice flavor of Lotus Biscoff cookies that makes dessert lovers worldwide swoon. Today, I’m sharing my absolute favorite no-bake cheesecake recipe that showcases these delicious cookies in all their glory. This Easy No-Bake Lotus Biscoff Cheesecake combines a crunchy cookie base with a silky smooth cream cheese filling, all infused with that distinctive Biscoff flavor we can’t get enough of.
What I love most about this recipe is that it requires zero baking—perfect for hot summer days or when you simply don’t want to turn on the oven. With just a few simple steps, you’ll create a dessert that looks and tastes like it came from a high-end bakery. Let me walk you through how to make this showstopper that will have everyone asking for seconds.
What Makes This Biscoff Cheesecake Special
Before we dive into the recipe, let me tell you why this particular Biscoff cheesecake stands out from the crowd:
- The perfect balance of sweetness and that distinctive Biscoff spice flavor
- A buttery, crunchy base that contrasts beautifully with the creamy filling
- The luxurious smooth texture that melts in your mouth
- An impressive appearance that requires minimal effort
- Make-ahead friendly—perfect for entertaining
- Absolutely no baking required!
I’ve perfected this recipe through countless iterations, finding the ideal ratio of ingredients to achieve that perfect texture and flavor. Trust me when I say this will become your go-to impressive dessert.
Ingredients You’ll Need
For the Base:
- 300g (10.5oz) Lotus Biscoff cookies
- 100g (7 tbsp) unsalted butter, melted
- Pinch of salt
For the Filling:
- 600g (21oz) full-fat cream cheese, room temperature
- 100g (1/2 cup) granulated sugar
- 1 tsp vanilla extract
- 250g (1 cup) Lotus Biscoff spread (smooth variety)
- 300ml (1 1/4 cups) heavy whipping cream, cold
For the Topping:
- 100g (1/2 cup) Lotus Biscoff spread, slightly warmed
- 100ml (1/3 cup + 1 tbsp) heavy whipping cream, whipped
- 6-8 Lotus Biscoff cookies, for decoration
- 2 tbsp Biscoff cookie crumbs
Essential Equipment
While this recipe doesn’t require fancy kitchen gadgets, you will need:
- 9-inch (23cm) springform pan
- Food processor (or a sturdy zip-top bag and rolling pin)
- Electric mixer (stand or handheld)
- Mixing bowls
- Spatula
- Refrigerator (obviously!)
Step-by-Step Instructions
Preparing the Base
- Line the bottom of your springform pan with parchment paper for easy removal later.
- Place the Biscoff cookies in a food processor and pulse until you have fine crumbs. If you don’t have a food processor, place the cookies in a strong zip-top bag and crush them with a rolling pin.
- Transfer the cookie crumbs to a mixing bowl and add the melted butter and salt. Mix until the crumbs are evenly moistened and resemble wet sand.
- Press the mixture firmly into the bottom of your prepared pan, creating an even layer. I like to use the bottom of a measuring cup to really compact the base.
- Refrigerate the base while you prepare the filling (at least 30 minutes).
Creating the Perfect Filling
- In a large mixing bowl, beat the cream cheese and sugar until smooth and creamy, about 2 minutes.
- Add the vanilla extract and Biscoff spread. Beat again until completely incorporated and no streaks remain. The mixture should be silky smooth.
- In a separate bowl, whip the cold heavy cream until stiff peaks form. This is crucial for the proper texture of your cheesecake.
- Gently fold the whipped cream into the cream cheese mixture using a spatula. Take your time with this step—you want to maintain as much air as possible while ensuring everything is well combined.
Assembling the Cheesecake
- Remove the chilled base from the refrigerator.
- Pour the filling over the base and smooth the top with a spatula. Tap the pan gently on the counter a few times to remove any large air bubbles.
- Refrigerate the cheesecake for at least 6 hours, but preferably overnight. This setting time is non-negotiable for achieving the perfect texture!
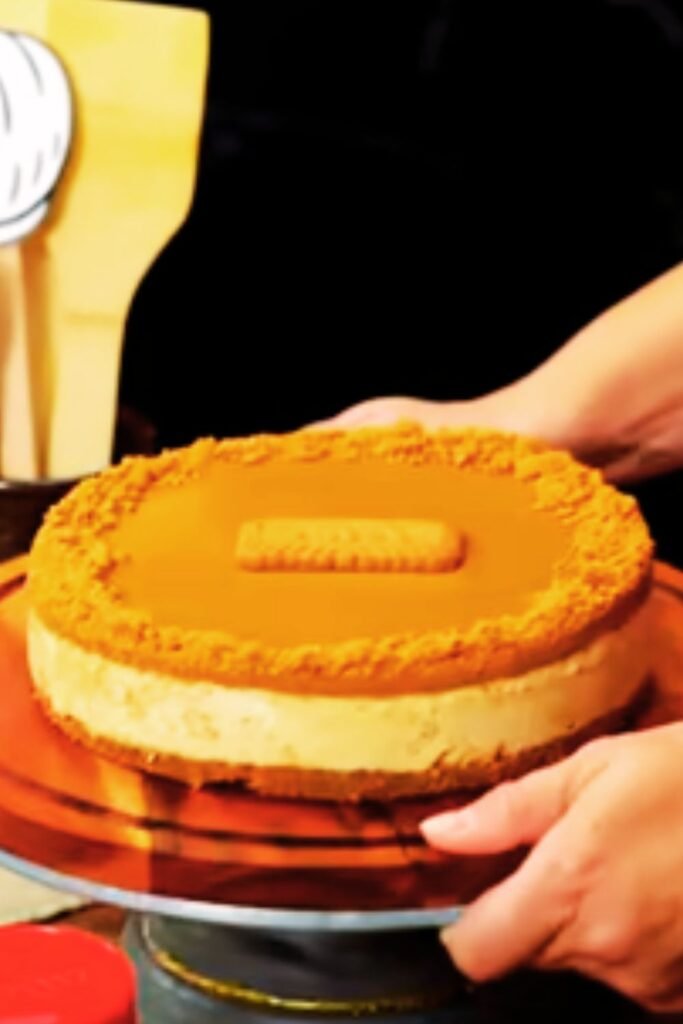
Adding the Final Touches
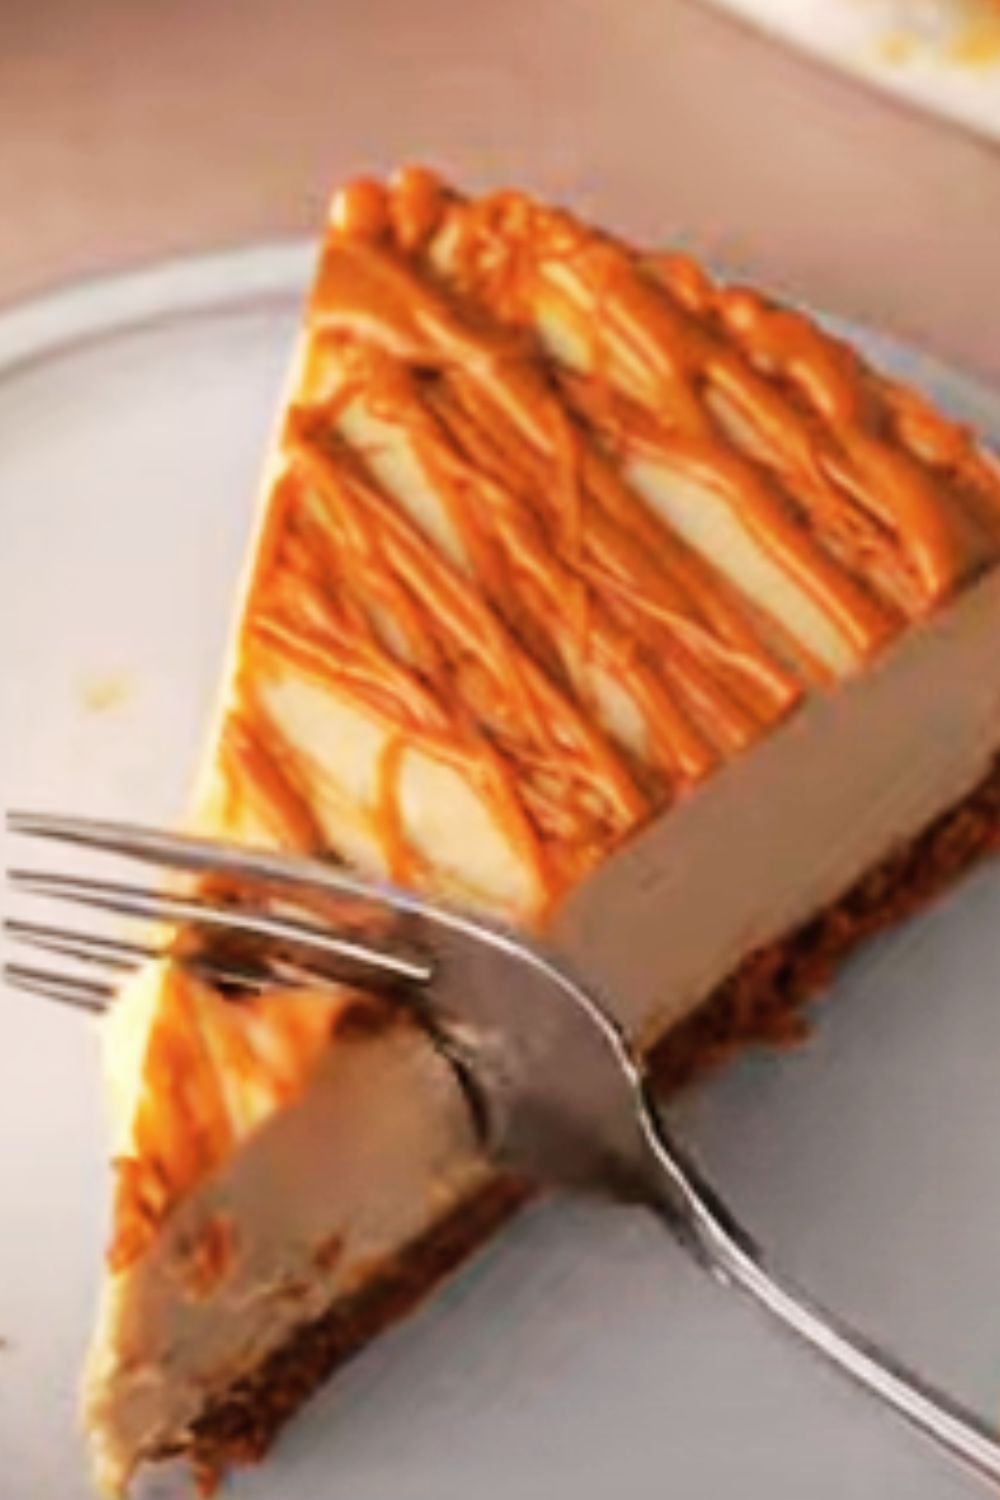
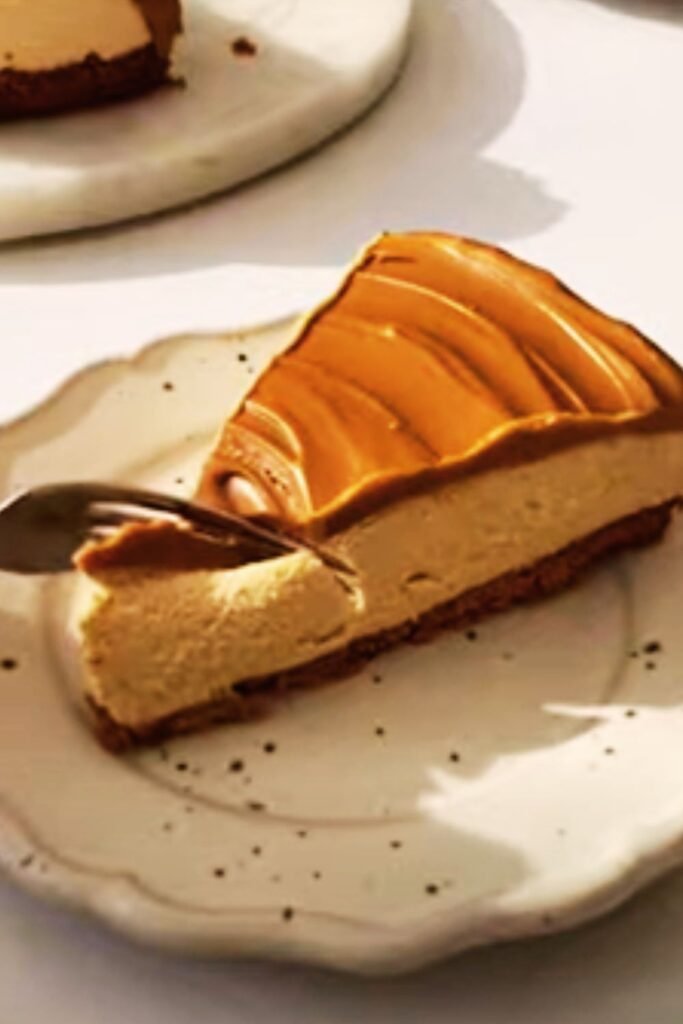
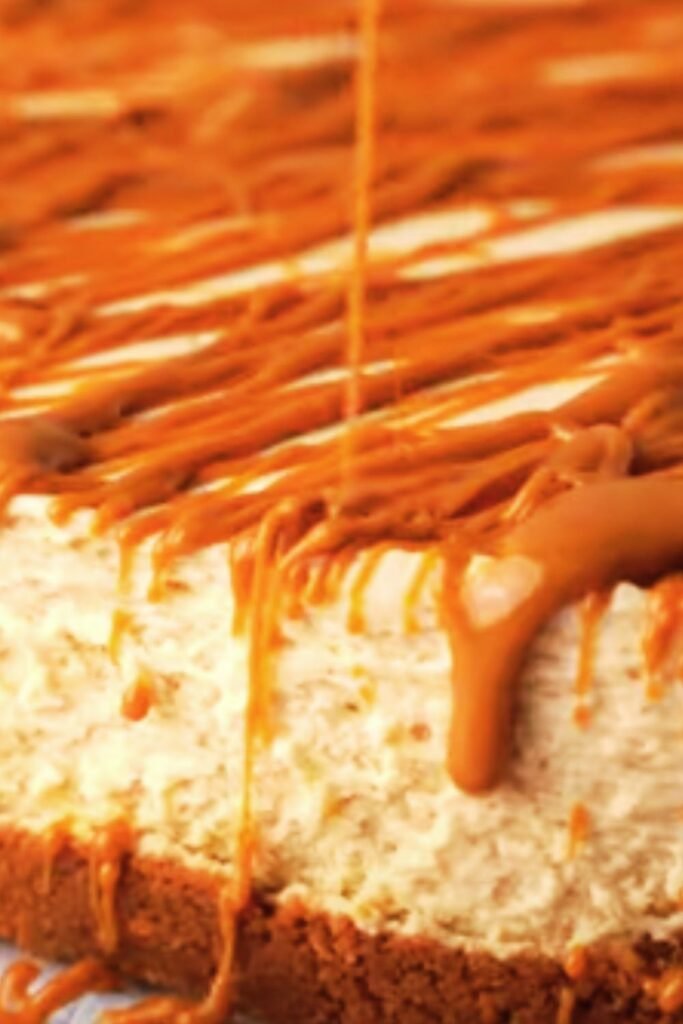
- Once the cheesecake has set, warm the Biscoff spread slightly (just 10-15 seconds in the microwave) until it’s pourable but not hot.
- Pour the warmed spread over the top of the cheesecake and quickly smooth it with an offset spatula.
- Pipe dollops of whipped cream around the edge of the cheesecake.
- Arrange whole or halved Biscoff cookies between the whipped cream dollops.
- Sprinkle Biscoff crumbs in the center for an extra touch of decoration and flavor.
Troubleshooting Tips for Perfect Results
| Issue | Potential Cause | Solution |
|---|---|---|
| Filling is too soft | Cream not whipped enough | Ensure cream reaches stiff peaks before folding |
| Ingredients too warm | Make sure cream cheese is room temp but cream is cold | |
| Insufficient setting time | Allow at least 6 hours in refrigerator, preferably overnight | |
| Base is too hard | Too much butter | Measure butter precisely—too much makes a hard base |
| Compressed too firmly | Press firmly but not with excessive force | |
| Filling has lumps | Cream cheese not softened | Ensure cream cheese is at room temperature |
| Insufficient mixing | Beat until completely smooth before adding other ingredients | |
| Topping sets before spreading | Spread too warm | Warm just until pourable, work quickly to spread |
| Working too slowly | Have all decorations ready before applying topping |
Variations to Try
One of the things I love about this basic recipe is how adaptable it is. Here are some delicious variations to consider:
White Chocolate Biscoff Cheesecake
Add 150g of melted and cooled white chocolate to your filling mixture before folding in the whipped cream. The white chocolate complements the Biscoff flavor beautifully while adding an extra layer of richness.
Chocolate Biscoff Cheesecake
Add 3 tablespoons of cocoa powder to your filling mixture, or melt 150g of dark chocolate and allow it to cool before incorporating it into your filling. The chocolate-Biscoff combination is absolutely divine!
Biscoff Cheesecake Cups
Instead of making one large cheesecake, create individual portions in glasses or jars. Layer the base, filling, and toppings for a beautiful presentation that’s perfect for dinner parties.
Biscoff and Berry Cheesecake
Add a layer of raspberry or strawberry compote between the base and filling for a fruity twist. The slight tartness of the berries cuts through the sweetness and adds a beautiful color contrast.
Make-Ahead and Storage Tips
This cheesecake is perfect for planning ahead, which makes it ideal for entertaining:
Make-Ahead Options:
- Prepare the entire cheesecake 1-2 days in advance and keep refrigerated.
- Make the base up to 3 days ahead and store in the refrigerator.
- The assembled but undecorated cheesecake can be frozen for up to 1 month (thaw overnight in the refrigerator before decorating).
Storage Guidelines:
- Keep refrigerated at all times when not serving.
- Cover loosely with plastic wrap or place in an airtight container to prevent the cheesecake from absorbing other flavors from your refrigerator.
- Best consumed within 3-4 days for optimal texture and flavor.
- Not suitable for freezing once decorated with whipped cream.
Serving Suggestions
To elevate your Biscoff cheesecake experience even further, consider these serving ideas:
- Serve with a scoop of vanilla ice cream for an indulgent dessert.
- Drizzle extra warmed Biscoff spread over each slice just before serving.
- Pair with a hot cup of coffee—the bitter notes contrast beautifully with the sweet cheesecake.
- For special occasions, dust with a little gold edible glitter for a touch of glamour.
- Garnish with caramelized banana slices for an extra flavor dimension.
- A small dollop of unsweetened whipped cream helps balance the sweetness.
Nutritional Information
While this is definitely a treat rather than an everyday dessert, it’s helpful to know what you’re consuming. Here’s an approximate nutritional breakdown per slice (based on 12 slices per cheesecake):
| Nutrient | Amount per Slice |
|---|---|
| Calories | 550 |
| Fat | 38g |
| – Saturated Fat | 21g |
| Carbohydrates | 42g |
| – Sugar | 35g |
| Protein | 5g |
| Sodium | 260mg |
| Fiber | 1g |
The History Behind Lotus Biscoff
I find the story behind these beloved cookies fascinating! Lotus Biscoff cookies (originally called Speculoos) have been produced in Belgium since 1932. These thin, crunchy cookies with their distinctive caramelized flavor were traditionally served with coffee, which is why they’re often called “coffee cookies.”
The name “Biscoff” is actually a combination of “biscuit” and “coffee.” These cookies gained worldwide popularity after being served on airline flights and have since transformed into various products, including the spreadable cream version we use in this recipe.
The spread was actually invented by a Belgian woman who created it for a television competition in 2007, proving that sometimes the best culinary inventions come from home kitchens just like yours and mine!
Why No-Bake Cheesecakes Are So Reliable
I’m a big fan of no-bake cheesecakes for several reasons:
- They’re practically foolproof compared to traditional baked cheesecakes that can crack or sink.
- The texture is consistently smooth and creamy.
- There’s no water bath to worry about.
- They’re perfect for hot weather when you don’t want to use the oven.
- The flavor is often purer and less altered by the baking process.
The secret to a perfect no-bake cheesecake is patience—allowing sufficient time for it to set properly is crucial. Unlike baked versions that rely on eggs for structure, no-bake cheesecakes depend on the natural setting properties of cream cheese and whipped cream when chilled.
Frequently Asked Questions
Can I use low-fat cream cheese for this recipe? I don’t recommend it. Full-fat cream cheese provides the richness and structure needed for the cheesecake to set properly. Low-fat versions contain more water and can result in a softer, less stable filling.
My cheesecake didn’t set firmly. What went wrong? The most common issues are: not whipping the cream to stiff peaks, over-mixing when folding in the whipped cream (which deflates it), or not chilling long enough. Make sure to refrigerate for at least 6 hours, preferably overnight.
Can I use crunchy Biscoff spread instead of smooth? Yes! It will give your cheesecake an interesting texture with small cookie pieces throughout. Just be aware that the filling won’t be as smooth.
I can’t find Lotus Biscoff cookies or spread. What can I substitute? Graham crackers work well for the base, and you could use another cookie butter or even peanut butter for the filling, though the flavor will be different. Speculoos cookies are very similar if you can find those.
Can this cheesecake be made dairy-free? Yes, you can use dairy-free cream cheese and coconut cream (the solid part from chilled coconut milk) as substitutes. The texture will be slightly different but still delicious.
How far in advance can I make this cheesecake? The cheesecake can be made 2-3 days in advance and kept refrigerated. Add the decorative elements just before serving for the best appearance.
My Biscoff spread layer on top set too quickly and looks uneven. How can I fix this? Try warming the spread a bit more and working very quickly to spread it. If it sets unevenly, you can always cover any imperfections with strategic placement of cookies and whipped cream.
Can I add gelatin to make the cheesecake more stable? Yes, you can add 2 teaspoons of powdered gelatin bloomed in 3 tablespoons of cold water and then gently heated until dissolved. Mix this into your filling for extra stability, especially in warm weather.
Final Thoughts
This Easy No-Bake Lotus Biscoff Cheesecake is more than just a dessert—it’s an experience. The contrasting textures of the crunchy base and the silky filling, combined with that unmistakable caramelized spice flavor of Biscoff, create a truly memorable treat that will have everyone asking for your secret.
What I love most about sharing this recipe is seeing the joy it brings to people’s faces when they take that first bite. There’s something almost magical about transforming simple ingredients into something so impressive with relatively little effort. And isn’t that what great cooking is all about?
I hope you enjoy making and eating this cheesecake as much as I do. Don’t forget to take a photo before that first slice disappears—if you’re anything like my family, this dessert tends to vanish quickly!
Remember, the key to success with this recipe is patience during the setting time and using quality ingredients. That extra hour in the refrigerator or splurging on the name-brand cream cheese really does make a difference in the final result.
Happy no-baking!