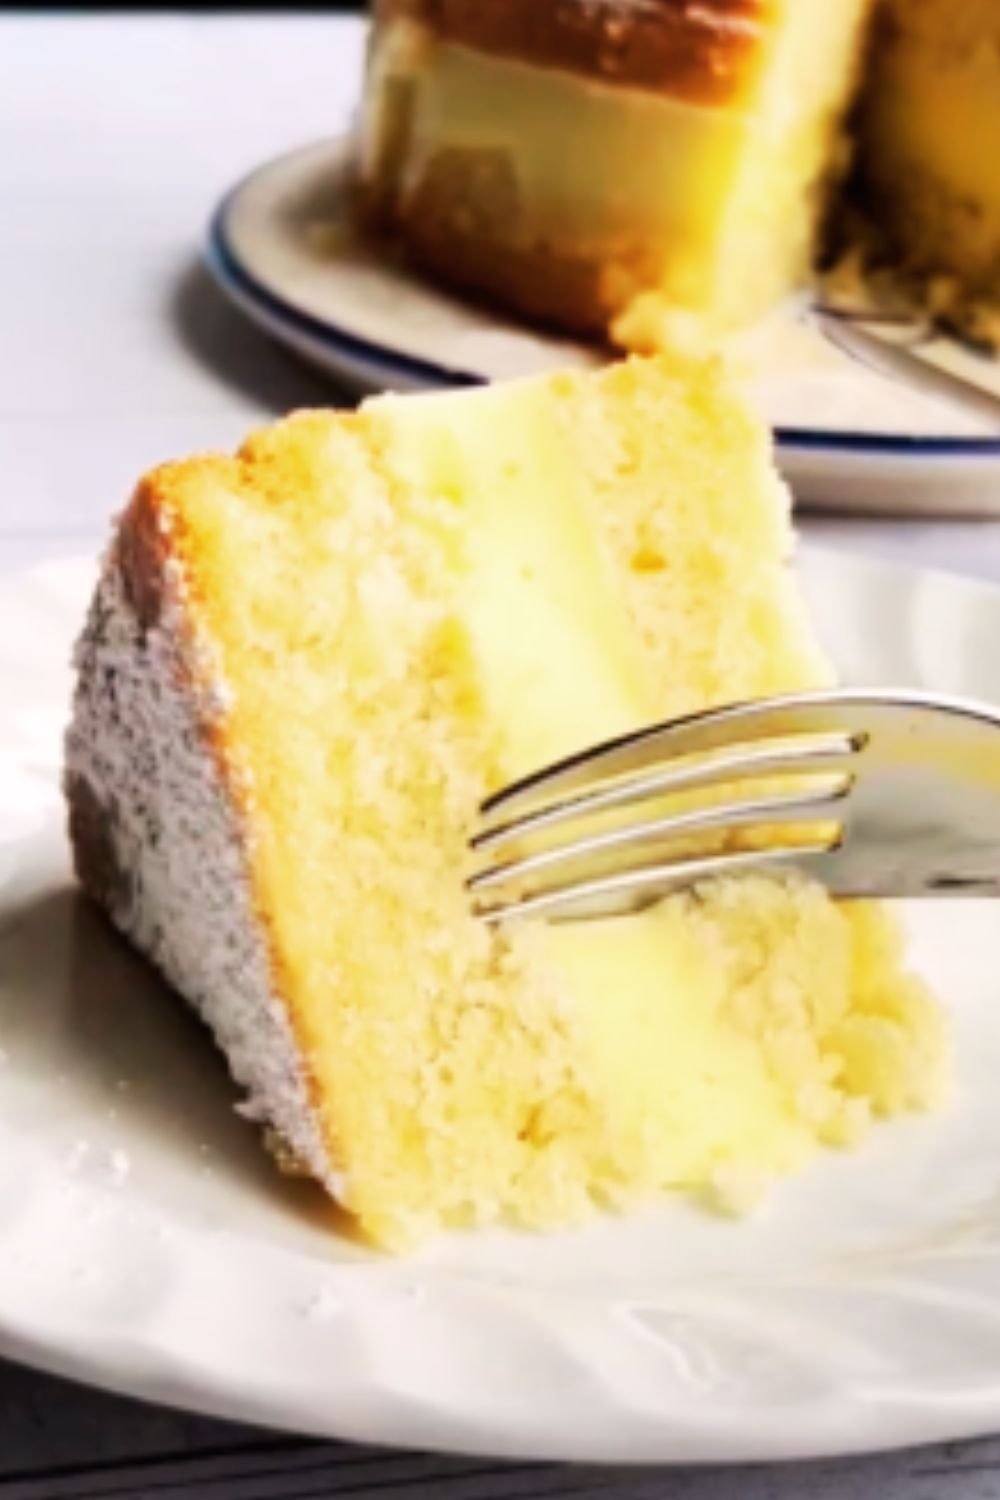
Have you ever found yourself torn between ordering a croissant or a muffin at your local bakery? Well, I’m here to tell you that you no longer need to choose. Enter the cruffin – the delightful love child of a croissant and a muffin that has taken the pastry world by storm. As someone who has spent countless hours perfecting this recipe in my home kitchen (and consuming far too many in the name of “research”), I’m excited to share everything I know about this buttery, flaky treat.
What Exactly Is a Cruffin?
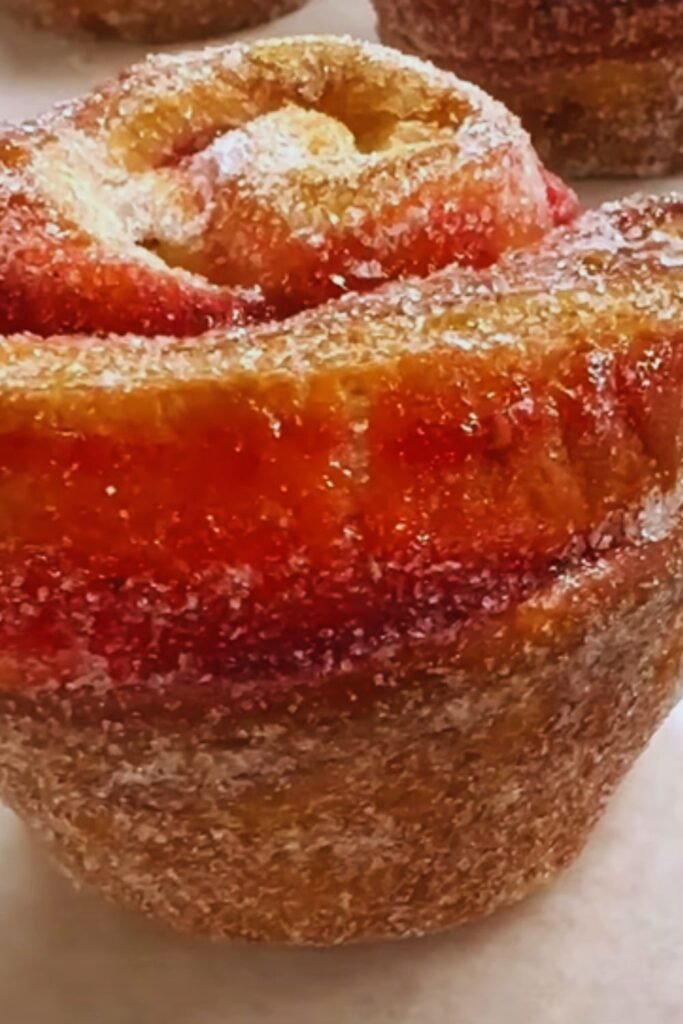
A cruffin is exactly what it sounds like – a hybrid pastry that combines the buttery, flaky layers of a croissant with the shape and versatility of a muffin. The pastry dough is rolled, folded multiple times to create those signature layers, and then shaped in a muffin tin. The result? A stunning spiral-shaped pastry with a crisp exterior and a tender, airy interior that can be filled with anything from vanilla custard to fruit preserves.
First created in Australia and popularized by Mr. Holmes Bakehouse in San Francisco around 2013, cruffins have since become a global sensation. I still remember the first time I bit into one – the shattering of the crisp exterior giving way to those delicate, buttery layers within. It was love at first bite.
Why Cruffins Are Worth the Effort
Before we dive into the recipe, I want to be completely honest with you – making cruffins from scratch isn’t exactly a quick weekend project. The process requires patience, precision, and plenty of time for resting the dough. But I promise you this: the results are absolutely worth it.
Here’s why I believe cruffins deserve a spot in your baking repertoire:
- Impressive presentation: Few pastries command attention like a cruffin. Their spiral design and towering height make them an Instagram-worthy treat.
- Versatility: They can be filled with virtually anything – sweet or savory.
- Texture contrast: The combination of crispy exterior and tender, airy interior creates an unbeatable textural experience.
- Bragging rights: Successfully making cruffins from scratch earns you serious baking credibility.
Ready to take on the challenge? Let’s get started!
Essential Ingredients for Perfect Cruffins
The foundation of exceptional cruffins lies in using high-quality ingredients. Here’s what you’ll need:
| Ingredient | Quantity | Notes |
|---|---|---|
| All-purpose flour | 500g (4 cups) | Higher protein content (10-12%) works best |
| European-style butter | 340g (1½ cups) | Must be cold; higher fat content (82-84%) |
| Active dry yeast | 7g (2¼ teaspoons) | Can substitute instant yeast (use 25% less) |
| Granulated sugar | 50g (¼ cup) | Helps with browning and subtle sweetness |
| Salt | 10g (1½ teaspoons) | Enhances flavor and controls yeast activity |
| Whole milk | 240ml (1 cup) | Cold or room temperature |
| Egg | 1 large | For enriching the dough |
| Water | 60ml (¼ cup) | Cold |
| Vanilla extract | 5ml (1 teaspoon) | Optional, but adds depth of flavor |
| Fillings | Various | Custard, jam, chocolate ganache, etc. |
| Finishing sugar | As needed | For coating (granulated or powdered) |
Special Equipment You’ll Need
While cruffins can be made with basic kitchen tools, having the right equipment makes the process much easier:
- Muffin tin: Standard 12-cavity muffin tin
- Rolling pin: Preferably marble or wood for better dough handling
- Pastry brush: For removing excess flour and applying washes
- Bench scraper: Essential for handling and cutting the dough
- Kitchen scale: For precise measurements
- Piping bags: For adding fillings
- Pastry tips: Various sizes depending on fillings
- Thermometer: To monitor butter and dough temperatures
The Step-by-Step Cruffin-Making Process
Day 1: Preparing the Dough
- Make the dough base:
- In a large bowl, combine the flour, sugar, salt, and yeast.
- In a separate bowl, whisk together the milk, egg, water, and vanilla (if using).
- Add the liquid ingredients to the dry ingredients and mix until a shaggy dough forms.
- Knead for about 5 minutes until smooth but slightly tacky.
- Shape into a rectangle, wrap in plastic, and refrigerate for 1 hour.
- Prepare the butter block:
- Place the cold butter between two sheets of parchment paper.
- Beat with a rolling pin to soften slightly, then roll into an 8×5-inch (20x12cm) rectangle.
- Chill if it becomes too soft.
- Laminate the dough (first turn):
- Roll the chilled dough into a 16×10-inch (40x25cm) rectangle.
- Place the butter block on one half of the dough, leaving a 1-inch border.
- Fold the other half over the butter and seal the edges by pressing firmly.
- Turn the dough 90 degrees so the open end faces right.
- Continue lamination:
- Roll the dough into a 24×8-inch (60x20cm) rectangle.
- Fold the dough in thirds like a letter.
- Wrap and refrigerate for 1 hour.
- Repeat this rolling and folding process two more times, chilling the dough for 1 hour between each turn.
- After the final fold, wrap the dough tightly and refrigerate overnight.
I’ve learned through many failed attempts that temperature is absolutely crucial when working with laminated dough. If your kitchen is warm, work quickly and return the dough to the refrigerator if it starts to feel soft or if the butter begins to melt. Trust me, I’ve had my share of butter leakage disasters!
Day 2: Shaping and Baking
- Prepare for shaping:
- Remove the dough from the refrigerator and let it rest for 10 minutes.
- Lightly grease your muffin tin.
- On a lightly floured surface, roll the dough into a large rectangle about 24×16 inches (60x40cm) and 1/8-inch thick.
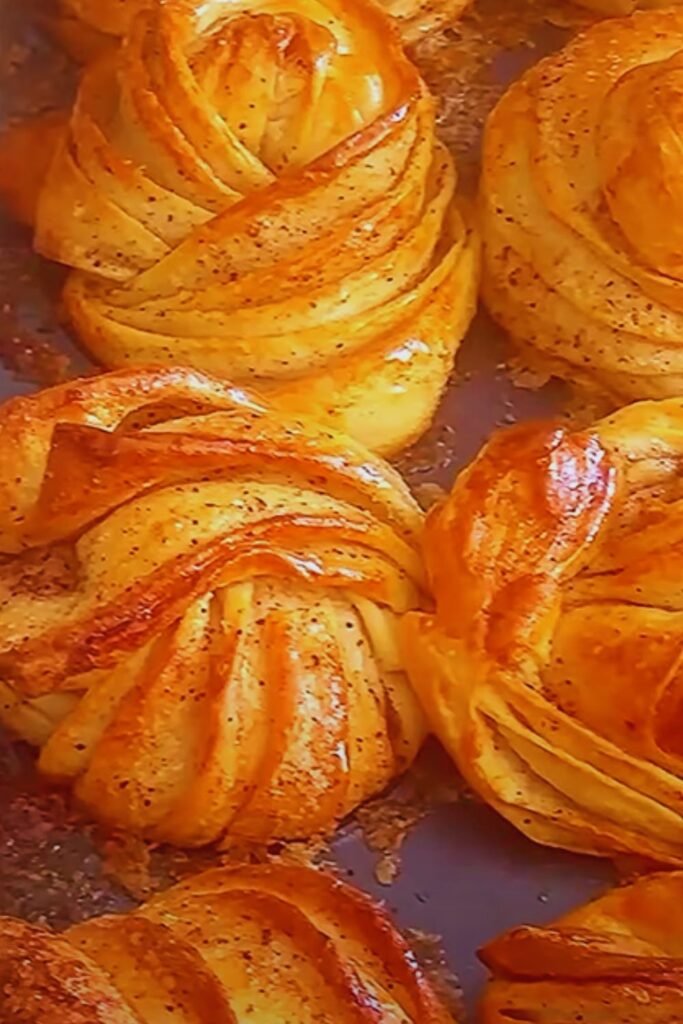
- Shape the cruffins:
- Trim the edges to create a clean rectangle.
- Cut the dough into 12 strips, each about 2 inches wide and 16 inches long.
- Roll each strip tightly from one end to create a spiral.
- Place each spiral into a muffin cavity, with the end of the strip facing down to prevent unraveling.
- Final proof:
- Cover the muffin tin loosely with plastic wrap.
- Let the cruffins proof at room temperature until noticeably puffy, about 1-2 hours.
- Bake to perfection:
- Preheat your oven to 375°F (190°C).
- Brush the tops of the cruffins lightly with egg wash for a golden finish.
- Bake for 25-30 minutes until deeply golden brown.
- Allow to cool in the tin for 5 minutes, then transfer to a wire rack.
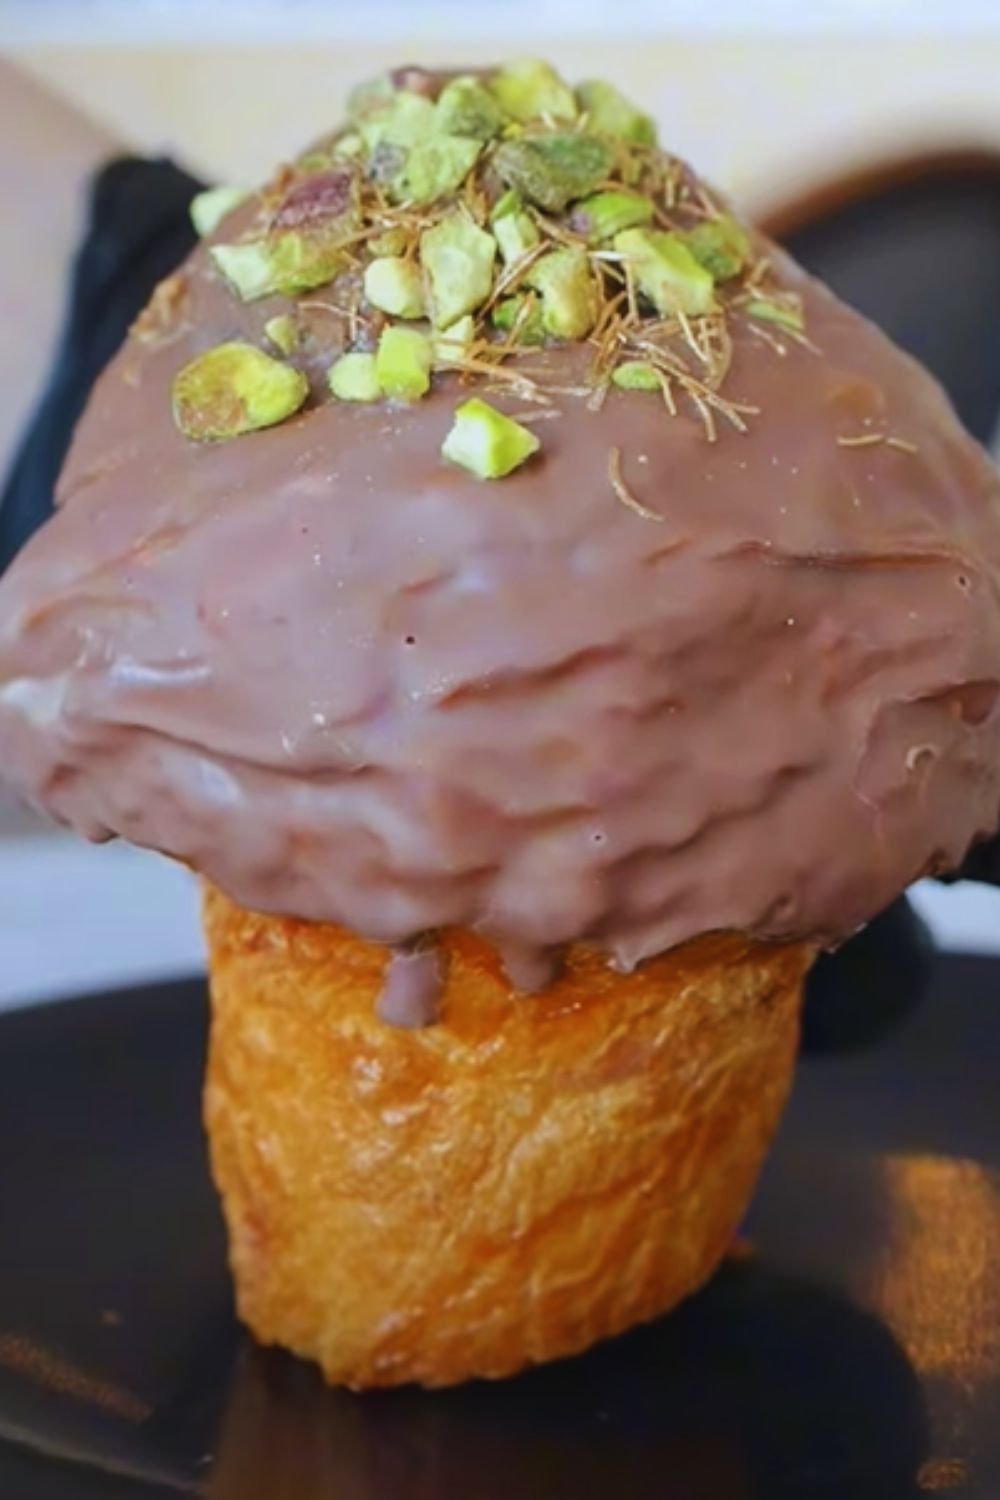
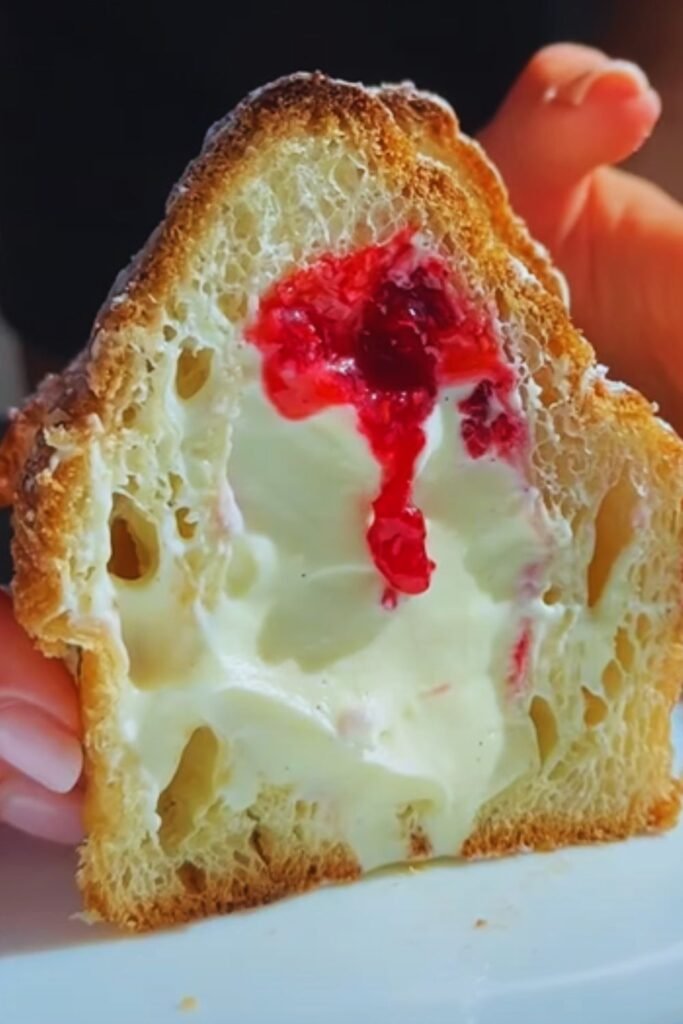
- Finish and fill:
- While still warm, roll the cruffins in granulated sugar if desired.
- Once cooled to room temperature, use a small knife or apple corer to create a hole in the center.
- Fill with your chosen filling using a piping bag.
Common Cruffin-Making Mistakes and How to Avoid Them
In my journey to cruffin mastery, I’ve made every mistake possible. Learn from my failures:
| Mistake | Consequence | How to Avoid |
|---|---|---|
| Butter too cold | Butter breaks through dough during rolling | Let butter soften slightly before laminating |
| Butter too warm | Layers merge together, no flakiness | Keep everything cold; work in a cool kitchen |
| Overproofing | Collapsed structure, dense texture | Watch dough, not the clock; proof until just puffy |
| Underproofing | Dense, heavy cruffins | Allow sufficient time for final rise |
| Rolling dough too thin | Layers may merge or tear | Maintain consistent thickness throughout |
| Uneven rolling | Inconsistent baking and texture | Use guides or rulers while rolling |
| Oven too cool | Pale, undercooked pastry | Use an oven thermometer to verify temperature |
| Overfilling | Filling leaks or makes pastry soggy | Fill just before serving; don’t overfill |
| Improper sealing | Unraveling during baking | Secure the end of the strip when rolling |
| Skipping resting periods | Tough, shrinking dough | Never rush the process; patience is key |
Irresistible Filling Combinations to Try
This is where you can really let your creativity shine! Here are some of my favorite combinations that have been huge hits with family and friends:
Sweet Fillings
- Classic Vanilla Bean Custard: Rich, creamy, and timeless
- Chocolate Hazelnut: With crushed hazelnuts for texture
- Lemon Curd and Blueberry Compote: Bright, tangy, and slightly sweet
- Salted Caramel: With a sprinkle of flaky sea salt on top
- Raspberry Rose: Fresh raspberry jam infused with rose water
- Matcha White Chocolate: Earthy matcha custard with white chocolate chunks
- Maple Cinnamon: Maple custard with cinnamon sugar coating
Savory Fillings
- Herb and Garlic Cream Cheese: Perfect for breakfast
- Pesto and Sundried Tomato: Mediterranean-inspired
- Bacon Jam and Gruyère: Smoky-sweet with nutty cheese
- Caramelized Onion and Goat Cheese: Rich and tangy
- Smoked Salmon and Dill Cream: Elegant brunch option
Make-Ahead and Storage Tips
One of the things I love about cruffins is that certain parts of the process can be done ahead of time:
- Laminated dough: Can be refrigerated for up to 3 days or frozen for up to 1 month. Thaw overnight in the refrigerator before using.
- Shaped (unbaked) cruffins: Can be refrigerated overnight. Let come to room temperature for 30-45 minutes before baking.
- Baked (unfilled) cruffins: Best eaten fresh, but can be stored in an airtight container at room temperature for 1-2 days. Refresh in a 300°F (150°C) oven for 5 minutes before filling.
- Filled cruffins: Should be eaten immediately; the filling will eventually make the pastry soggy.
I’ve found that freezing the shaped, unbaked cruffins works surprisingly well. I often make a double batch and freeze half for later use. Just add about 5-7 minutes to the baking time when baking from frozen.
Serving Suggestions
A cruffin is a showstopper on its own, but here are some ways I like to elevate the experience:
- Serve warm cruffins with a scoop of vanilla ice cream for an indulgent dessert
- Pair with fresh seasonal fruit for a beautiful brunch spread
- Offer a variety of filled cruffins on a tiered stand for afternoon tea
- Create a cruffin tasting flight with different fillings and toppings
- Serve savory versions alongside a light salad for lunch
- Accompany with hot chocolate or a creamy latte
- Create a cruffin board with different fillings, sauces, and toppings for guests to customize their own
For an elegant presentation, dust the tops with powdered sugar, add a small edible flower, or drizzle with a complementary sauce just before serving.
Troubleshooting Your Cruffins
Even with the best intentions and careful technique, things can go wrong. Here’s how to diagnose and fix common issues:
| Problem | Possible Causes | Solutions |
|---|---|---|
| Dough not rising | Inactive yeast; too cold environment | Test yeast before using; proof in warmer location |
| Butter leaking during baking | Dough too warm; oven not hot enough | Chill shaped cruffins before baking; preheat oven thoroughly |
| Tough, not flaky texture | Overworked dough; improper lamination | Handle dough gently; ensure proper folding technique |
| Uneven baking | Oven hot spots; inconsistent shaping | Rotate pan during baking; practice consistent rolling |
| Dense, heavy cruffins | Underproofed; improper lamination | Allow sufficient proofing time; maintain clean folds |
| Pale color | Insufficient egg wash; too low temperature | Apply egg wash thoroughly; increase oven temperature slightly |
| Filling leaking out | Too much filling; filling too runny | Use less filling; thicken filling with cornstarch |
| Cruffins collapsing | Overproofed; underbaked | Watch proofing time carefully; ensure complete baking |
| Bottom too dark | Pan too close to heat source | Use light-colored muffin tins; place rack in middle of oven |
| Unraveling during baking | End not properly secured | Tuck end of strip under or use a dab of egg wash to secure |
Adapting Your Cruffins for Dietary Needs
I’ve experimented with several variations to accommodate different dietary requirements:
- Gluten-Free: Use a high-quality gluten-free flour blend with xanthan gum. The texture won’t be identical, but still delicious.
- Vegan: Replace butter with a high-quality plant-based butter stick (not spread), use plant milk, and replace the egg with a flax egg or commercial egg replacer.
- Reduced Sugar: Cut sugar in the dough by half and use naturally sweetened fillings like fruit compotes.
- Whole Grain: Replace up to 25% of the all-purpose flour with whole wheat pastry flour for added nutrition without sacrificing too much texture.
Note that these adaptations will change the final product somewhat, but they still yield delicious results. The vegan version, in particular, requires careful temperature control as plant-based butters have different melting points.
Frequently Asked Questions
Q: Can I make cruffins without a stand mixer?
Absolutely! While a stand mixer makes the initial dough mixing easier, you can certainly mix and knead by hand. Just be careful not to overwork the dough, which can develop too much gluten and result in tough cruffins.
Q: How can I tell when my cruffins are properly proofed?
The cruffins should look noticeably puffy but not doubled in size. When you gently press a finger into the dough, it should spring back slowly, leaving a slight indentation. If it springs back immediately, it needs more time; if the indentation remains, it’s overproofed.
Q: My kitchen is very warm. How can I successfully make laminated dough?
Working in a warm environment is challenging but not impossible. Use these strategies: chill your tools (rolling pin, work surface if possible), work in short intervals with frequent refrigeration breaks, use ice packs under your work surface, and consider working very early in the morning when temperatures are cooler.
Q: Can I make mini cruffins instead of standard size?
Yes! Use a mini muffin tin and cut your dough strips proportionally narrower. Reduce the baking time to about 15-18 minutes, watching carefully for doneness.
Q: Why did my layers disappear during baking?
This typically happens when the butter melts into the dough before baking. Ensure your dough stays cold throughout the process, particularly after shaping and during the final proof.
Q: How far in advance can I prepare the filling?
Most fillings can be made 2-3 days in advance and stored in the refrigerator. Just be sure to bring them to the proper consistency before filling. For example, custards and ganaches should be soft enough to pipe but firm enough to hold their shape.
Q: My cruffins taste too yeasty. What went wrong?
This usually indicates overproofing. The yeast has produced too much flavor as the dough sat too long. Reduce proofing time or use slightly less yeast in your next batch.
Q: Can I brush the tops with anything besides egg wash?
Yes! Milk will give a softer shine, cream creates a richer color, or you can use butter for a more brioche-like finish. For a vegan option, use plant milk mixed with a little maple syrup.
Final Thoughts on Cruffin Mastery
Making cruffins is truly a labor of love. The process demands time, attention to detail, and respect for the ingredients and techniques. But with practice, patience, and the tips I’ve shared, you’ll be creating bakery-worthy cruffins that will impress even the most discerning pastry enthusiasts.
I remember my early attempts – butter leaking everywhere, dough tearing in frustration, and results that were more “rustic” than refined. But each batch taught me something new, and gradually, those failures transformed into successes. That’s the beauty of baking – it rewards persistence.
So don’t be discouraged if your first batch isn’t perfect. Take notes, adjust, and try again. The journey to cruffin mastery is just as rewarding as the destination. And when you finally bite into that perfectly flaky, beautifully laminated creation filled with your favorite filling – well, that moment of culinary triumph makes it all worthwhile.
Happy baking, and may your cruffins rise high and your layers stay distinct!