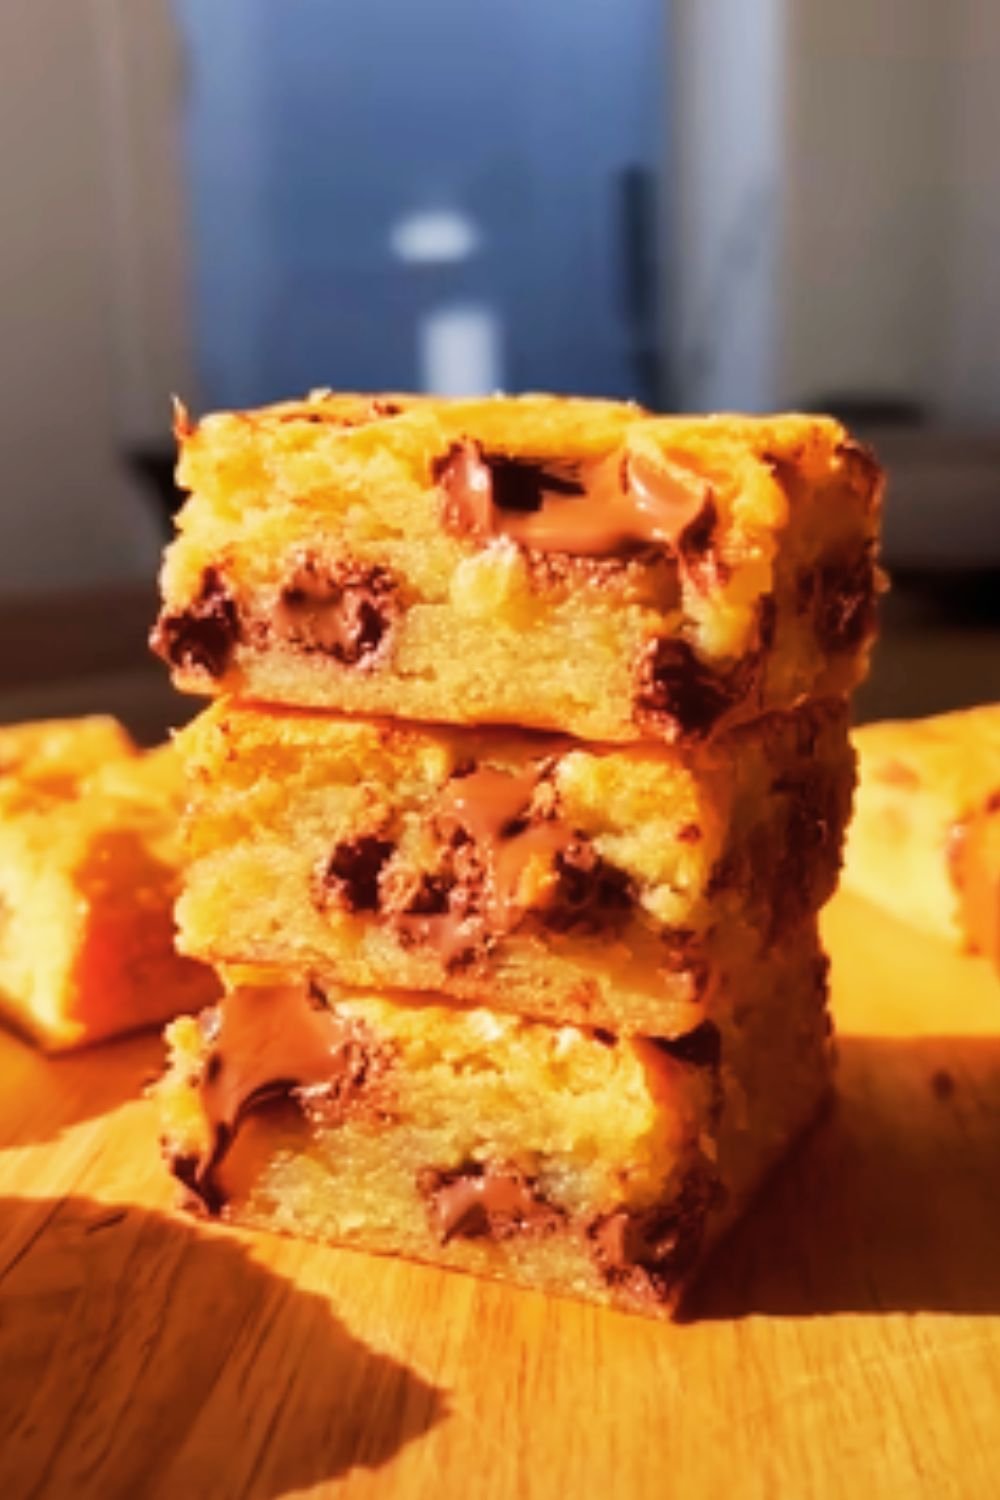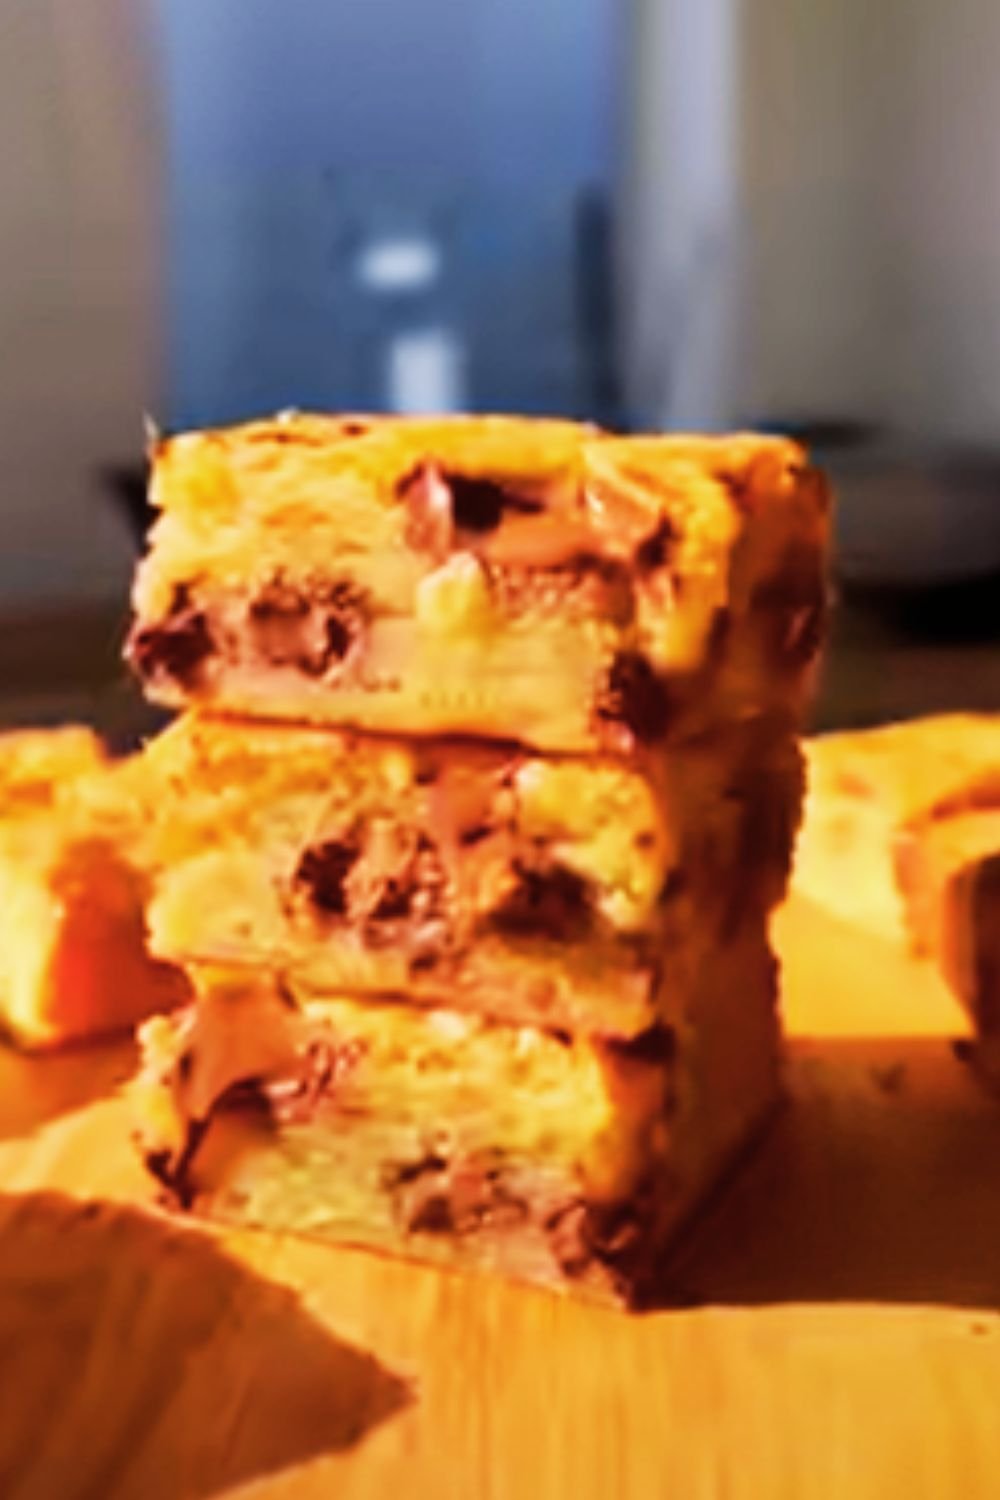
Have you ever bitten into a brownie so rich and decadent that it made your taste buds dance? That’s exactly what happens with these salted caramel fudge brownies. I’ve been perfecting this recipe for years, and I’m thrilled to finally share my secrets for creating the most indulgent brownies you’ll ever taste.
The combination of dark chocolate fudge brownies with ribbons of salted caramel creates a flavor profile that’s simply irresistible. The slight saltiness cuts through the sweetness, creating the perfect balance that keeps you coming back for more. Trust me when I say these brownies will disappear from your kitchen counter faster than you can say “salted caramel.”
What Makes These Brownies Special
When I first started experimenting with brownie recipes, I found that many homemade versions either turned out too cakey or too dry. After countless attempts (and many happy taste-testers), I discovered the key elements that create the perfect fudgy texture:
- Using both melted chocolate AND cocoa powder for depth of flavor
- Adding just the right amount of flour for that fudgy-not-gooey texture
- Incorporating brown sugar for moisture and caramel notes
- Adding a hint of espresso powder to enhance the chocolate flavor
- Creating a homemade salted caramel sauce that stays slightly gooey
The result is a brownie with a crackly top, fudgy center, and pockets of salted caramel that create an unforgettable dessert experience.
Ingredients You’ll Need
For the Brownies:
- 8 oz (226g) high-quality dark chocolate (70% cocoa), chopped
- 1 cup (226g) unsalted butter
- 1 cup (200g) granulated sugar
- 1 cup (220g) light brown sugar, packed
- 4 large eggs, room temperature
- 2 teaspoons pure vanilla extract
- 1 cup (125g) all-purpose flour
- 1/2 cup (50g) Dutch-processed cocoa powder
- 1 teaspoon salt
- 1 teaspoon espresso powder (optional, but recommended)
For the Salted Caramel:
- 1 cup (200g) granulated sugar
- 6 tablespoons (85g) unsalted butter, room temperature, cut into pieces
- 1/2 cup (120ml) heavy cream, room temperature
- 1 1/2 teaspoons flaky sea salt (like Maldon), plus extra for topping
Equipment Needed
Before we get started, let’s make sure you have all the necessary tools:
- 9×9-inch (23×23 cm) baking pan
- Parchment paper
- Medium saucepan
- Heat-resistant spatula
- Mixing bowls (large and medium)
- Whisk
- Electric mixer (hand or stand)
- Cooling rack
- Medium heavy-bottomed saucepan (for caramel)
The Science Behind Perfect Brownies
I’m a bit of a baking nerd, so let me share some baking science that will help you understand why this recipe works so well:
| Factor | Role in Brownies | Impact on Texture |
|---|---|---|
| Chocolate percentage | Provides richness and flavor base | Higher percentage (70%+) creates deeper flavor |
| Butter amount | Creates richness and carries flavor | Too much = greasy, too little = dry |
| Sugar ratio | Sweetness, moisture, and structure | Brown sugar adds moisture and chewiness |
| Egg quantity | Structure, rise, and richness | More eggs = cakier texture, fewer = denser |
| Flour quantity | Primary structure provider | Less flour = fudgier brownies |
| Mixing method | Incorporates air | Overmixing after adding flour develops gluten = tougher brownies |
| Baking time | Sets structure while maintaining moisture | Critical for fudgy center with set edges |
| Pan material | Heat conductivity | Dark pans cook faster than light ones |
Understanding these factors has helped me create the perfect balance for truly fudgy brownies with the ideal texture.
Let’s Make the Salted Caramel First
The caramel should be made ahead and cooled slightly before adding to the brownie batter. Here’s my foolproof method:
- Place sugar in a medium, heavy-bottomed saucepan over medium heat.
- Watch carefully as the sugar begins to melt. Resist the urge to stir! Instead, gently swirl the pan occasionally.
- Once the sugar has completely melted and turned a deep amber color (around 350°F/175°C if you have a candy thermometer), carefully add the butter pieces. The mixture will bubble vigorously – this is normal!
- Whisk until the butter is completely incorporated, about 2-3 minutes.
- Slowly pour in the heavy cream while whisking constantly. Again, the mixture will bubble dramatically.
- Continue cooking for 1 minute, whisking constantly.
- Remove from heat and stir in 1 teaspoon of the sea salt.
- Transfer to a heat-proof container and allow to cool to room temperature. The caramel will thicken as it cools.
Caramel Troubleshooting Tips:
| Issue | Possible Cause | Solution |
|---|---|---|
| Crystallized sugar | Stirring too early or sugar crystals on side of pan | Start over, keep sides of pan clean with wet pastry brush |
| Caramel too thin | Undercooked | Return to heat and cook longer |
| Caramel too thick | Overcooked or cooled too much | Gently warm and/or add a splash more cream |
| Burnt caramel | Overheated sugar | Start over with lower heat |
| Lumpy caramel | Butter or cream too cold | Ensure all ingredients are room temperature |
Now for the Brownie Batter
With the caramel cooling, let’s make our fudgy brownie base:
- Preheat your oven to 350°F (175°C). Line your 9×9-inch baking pan with parchment paper, leaving overhang on the sides for easy removal.
- In a medium saucepan over low heat, melt the chopped chocolate and butter together, stirring occasionally until completely smooth. Remove from heat and allow to cool slightly.
- In a large bowl, whisk together the granulated sugar, brown sugar, eggs, and vanilla extract until well combined and slightly lighter in color.
- Slowly pour the melted chocolate mixture into the egg mixture, whisking continuously to prevent cooking the eggs.
- In a separate bowl, whisk together the flour, cocoa powder, salt, and espresso powder (if using).
- Gently fold the dry ingredients into the wet ingredients just until combined. Be careful not to overmix – this is key for fudgy brownies!
The Assembly: Creating Caramel Magic
Now comes the fun part – creating those glorious pockets of salted caramel:
- Pour about 2/3 of the brownie batter into the prepared pan and spread evenly.
- Drizzle about 1/2 of the cooled salted caramel sauce over the batter. No need to be precise – random drizzles create those beautiful caramel pockets.
- Using a knife or skewer, lightly swirl the caramel into the batter. Don’t overmix – you want distinct caramel ribbons.
- Pour the remaining brownie batter on top and spread carefully to cover the caramel layer.
- Drizzle the remaining caramel over the top (save a small amount for serving if desired). Swirl again lightly.
- Sprinkle the top with the remaining 1/2 teaspoon of flaky sea salt.

Baking to Perfection
The baking process is just as crucial as the preparation:
- Bake in the preheated oven for 30-35 minutes. The ideal brownie is set at the edges but still slightly soft in the center. A toothpick inserted 2 inches from the edge should come out with a few moist crumbs (not wet batter).
- Allow the brownies to cool completely in the pan on a wire rack – this is perhaps the hardest part of the recipe! The brownies will continue to set as they cool, and cutting them too soon will result in a messy (albeit delicious) experience.
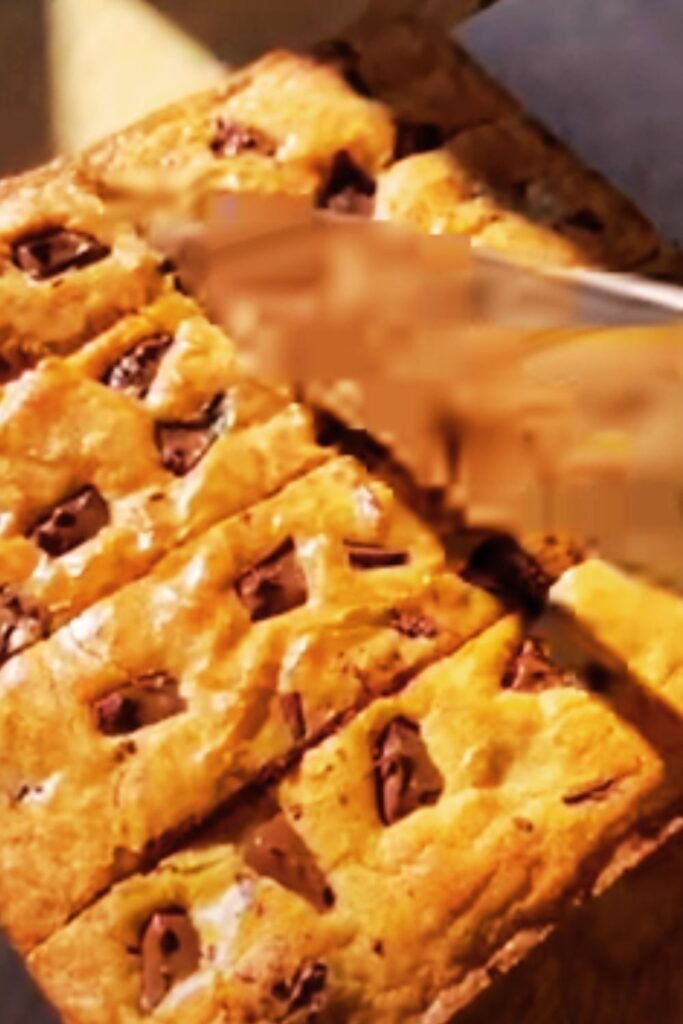
- Once completely cool, use the parchment paper overhang to lift the brownies out of the pan. For the cleanest cuts, refrigerate for about 30 minutes before cutting with a sharp knife, wiping the blade clean between cuts.
Storage and Serving Suggestions
These brownies are incredibly versatile and can be enjoyed in various ways:
| Storage Method | Duration | Notes |
|---|---|---|
| Room temperature in airtight container | 3-4 days | Best for maintaining fudgy texture |
| Refrigerated in airtight container | Up to 1 week | Will become more firm but still delicious |
| Frozen (individually wrapped) | Up to 3 months | Thaw overnight in refrigerator |
My favorite serving suggestions:
- Slightly warmed (10 seconds in microwave) with a scoop of vanilla ice cream
- With a dollop of lightly whipped cream and fresh raspberries
- Alongside a steaming cup of coffee or hot chocolate
- Drizzled with any remaining salted caramel sauce
- With a dusting of cocoa powder and a pinch of extra flaky salt
Tips for Brownie Success
After making these brownies countless times, I’ve collected some key tips to ensure your success:
- Use quality ingredients – Especially for the chocolate and cocoa powder, as they provide the primary flavor.
- Don’t skip the parchment paper – It makes removal and cutting so much easier.
- Room temperature eggs – Cold eggs can cause the melted chocolate to seize.
- Don’t overmix the batter – This develops gluten, resulting in tougher brownies.
- Watch the caramel carefully – It can go from perfect to burnt in seconds.
- Don’t overbake – Slightly underbaked is better than overbaked for fudgy brownies.
- Let them cool completely – Patience is rewarded with perfect texture and easier cutting.
- Use a warm knife for cutting – Run your knife under hot water and wipe dry between cuts for the cleanest edges.
Variations to Try
While the original recipe is perfection in my eyes, here are some delicious variations I’ve experimented with:
- Chocolate Chip Caramel Brownies: Add 1/2 cup chocolate chips to the batter
- Nutty Caramel Brownies: Add 1/2 cup toasted chopped pecans or walnuts
- Espresso Caramel Brownies: Increase espresso powder to 2 teaspoons for a more pronounced coffee flavor
- Bourbon Caramel Brownies: Add 2 tablespoons bourbon to the caramel sauce
- Orange-Infused Caramel Brownies: Add orange zest to the brownie batter
Nutritional Information
For those who are curious (though I believe desserts should be enjoyed without too much counting!), here’s the approximate nutritional breakdown per brownie (assuming you cut into 16 pieces):
| Nutrient | Amount per Serving |
|---|---|
| Calories | 385 |
| Total Fat | 22g |
| Saturated Fat | 13g |
| Cholesterol | 98mg |
| Sodium | 220mg |
| Total Carbohydrates | 45g |
| Dietary Fiber | 2g |
| Sugars | 36g |
| Protein | 4g |
Common Mistakes and How to Avoid Them
Even experienced bakers make mistakes sometimes. Here are common issues and how to prevent them:
| Common Mistake | How to Avoid It |
|---|---|
| Grainy caramel | Don’t stir sugar until it’s fully melted |
| Dry brownies | Don’t overbake; measure flour correctly |
| Caramel that sinks completely | Cool caramel properly before adding to batter |
| Brownies that stick to the pan | Always use parchment paper with overhang |
| Crumbly rather than fudgy texture | Don’t overmix; use correct flour amount |
| Caramel that hardens too much | Ensure proper temperature when making caramel |
| Brownies without crackly top | Be sure to beat eggs and sugar properly |
Why the Salt Matters
The salt isn’t just a trendy addition – it serves several important purposes in this recipe:
- Flavor enhancement: Salt amplifies the chocolate flavor, making it taste richer
- Contrast creation: The occasional salt crystal provides a delightful contrast to the sweet caramel
- Balance: Salt balances the sweetness, preventing the brownies from becoming cloying
- Complexity: The interplay of sweet, bitter (chocolate), and salty creates a more complex flavor profile
I recommend using flaky sea salt rather than table salt for the best texture and flavor distribution. My personal favorite is Maldon sea salt, but any flaky sea salt will work beautifully.
Questions and Answers
Q: Can I use milk chocolate instead of dark chocolate?
Yes, you can use milk chocolate, but the brownies will be significantly sweeter and less rich. If using milk chocolate, I recommend reducing the granulated sugar by 1/4 cup to compensate for the added sweetness.
Q: Can I make these brownies gluten-free?
Absolutely! I’ve successfully made these with a 1:1 gluten-free flour blend. Look for one that contains xanthan gum for the best texture. The rest of the recipe remains the same.
Q: How can I tell when the brownies are done?
For fudgy brownies, look for edges that are set and pulling away slightly from the pan, while the center should still look slightly underdone but not raw. A toothpick inserted 2 inches from the edge should come out with a few moist crumbs. Remember that brownies continue to cook slightly as they cool.
Q: Can I double the recipe?
Yes! Double all ingredients and use a 9×13-inch pan. The baking time will need to be increased by about 5-10 minutes, but still use the toothpick test to determine doneness.
Q: My caramel crystallized. What went wrong?
Crystallization usually happens when sugar crystals remain on the side of the pan or when the mixture is stirred too early in the process. To prevent this, make sure your pan is clean, avoid stirring until the sugar is completely melted, and consider using a wet pastry brush to wash down any crystals from the sides of the pan during cooking.
Q: Can I make the caramel ahead of time?
Definitely! The caramel sauce can be made up to a week in advance and stored in an airtight container in the refrigerator. Bring it to room temperature before using in the brownie recipe.
Q: How do I stop the caramel from hardening too much?
Make sure you’re not overcooking the caramel. Also, the addition of butter and cream helps keep it soft. If your caramel does harden too much after refrigeration, gently warm it in the microwave in 10-second increments, stirring between each interval.
Q: Can I freeze these brownies?
Yes! These brownies freeze beautifully. Cut them into individual squares, wrap each one in plastic wrap, and then store in a freezer-safe container or bag for up to 3 months. Thaw overnight in the refrigerator or for about an hour at room temperature.
Final Thoughts
Creating these salted caramel fudge brownies has been a journey of delicious discovery for me. The combination of rich chocolate brownies with homemade salted caramel creates something truly special – a dessert that feels both indulgent and comforting at the same time.
What I love most about this recipe is how it brings people together. I’ve never seen faces light up quite like they do when I bring out a plate of these brownies. There’s something magical about the sweet-salty combination that makes them irresistible to just about everyone.
Remember that baking is both a science and an art. Don’t be discouraged if your first batch isn’t perfect – each time you make these brownies, you’ll learn something new and they’ll get even better. The most important ingredient, as always, is the love and care you put into making them.
I hope these brownies bring as much joy to your kitchen as they have to mine. Happy baking!