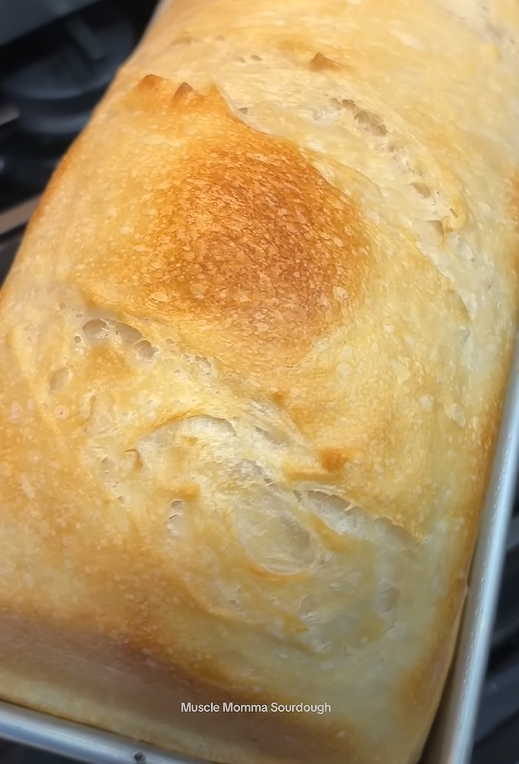
When I first experimented with adding fruit to my sourdough bread, I never imagined how transformative the combination of tart raspberries and creamy white chocolate could be. This Raspberry White Chocolate Sourdough Bread has become my signature loaf, perfectly balancing the tangy complexity of fermented dough with bursts of sweet and tart flavors that dance on your palate.
The magic happens when the natural acidity of sourdough meets the brightness of fresh raspberries, while white chocolate adds luxurious richness without overwhelming the delicate sourdough flavor. I’ve spent countless hours perfecting this recipe, and I’m thrilled to share every detail with you.
Understanding Sourdough with Add-ins
Sourdough fermentation: The natural process where wild yeast and bacteria break down flour starches into digestible sugars and acids, creating the characteristic tangy flavor and improved digestibility.
Fruit integration: The technique of incorporating fresh or dried fruits into bread dough while maintaining proper fermentation balance and preventing excessive moisture interference.
Gluten development: The formation of protein networks in dough that trap gas bubbles during fermentation, creating the bread’s structure and texture.
Hydration balance: The critical ratio of liquid to flour that determines dough consistency, especially important when adding moisture-rich ingredients like fresh fruit.
Working with fruit in sourdough requires understanding how additional moisture and natural sugars affect fermentation timing. Raspberries contain natural acids that can slightly accelerate fermentation, while their moisture content requires careful flour adjustments to maintain proper dough consistency.
Essential Ingredients Breakdown
| Ingredient | Amount | Purpose | Quality Tips |
|---|---|---|---|
| Active sourdough starter | 100g | Leavening agent and flavor base | Should pass float test, fed 4-12 hours prior |
| Bread flour | 400g | Main structure, high protein content | Choose 12-14% protein content for best gluten |
| Whole wheat flour | 50g | Additional flavor and nutrition | Stone-ground preferred for better taste |
| Water | 300ml | Hydration and dough formation | Room temperature, filtered if heavily chlorinated |
| Fresh raspberries | 150g | Primary fruit flavor | Firm, dry berries, avoid overripe ones |
| White chocolate chips | 100g | Sweet contrast element | High-quality, avoid compound chocolate |
| Sea salt | 10g | Flavor enhancement and gluten strength | Fine sea salt distributes more evenly |
| Honey | 15g | Subtle sweetness and fermentation aid | Raw honey adds complexity |
The quality of your sourdough starter makes the biggest difference in this recipe. I maintain my starter with a 1:1:1 ratio of starter, flour, and water, feeding it twice daily when kept at room temperature. A healthy starter should double in size within 4-8 hours of feeding and have a pleasant, slightly alcoholic aroma.
Step-by-Step Baking Process
Preparing Your Workspace
Before beginning, I always set up my workspace completely. This includes having a kitchen scale ready, bowls for mixing, a bench scraper, and clean kitchen towels. Temperature matters significantly in sourdough baking, so I ensure my kitchen is between 70-75°F for optimal fermentation.
Initial Mix and Autolyse
I start by combining the bread flour and whole wheat flour in a large mixing bowl. Creating a well in the center, I add the room temperature water and mix until no dry flour remains. This initial mixing without starter or salt is called autolyse, and I let it rest for 30 minutes.
During autolyse, flour proteins begin forming gluten networks naturally. This process improves dough texture and reduces kneading requirements later. The dough should look shaggy and feel slightly sticky after the rest period.
Incorporating the Starter
After autolyse, I add my active sourdough starter to the dough. Using wet hands prevents sticking as I fold and squeeze the mixture until the starter distributes evenly throughout. The dough texture changes noticeably, becoming more elastic and cohesive.
I then add the salt and honey, continuing to fold until completely incorporated. Salt strengthens gluten development while honey provides subtle sweetness and aids fermentation. The dough should feel smooth and slightly tacky at this stage.
Bulk Fermentation Process
| Time | Action | Temperature | Visual Cues |
|---|---|---|---|
| 0-30 min | Rest after mixing | 72-75°F | Dough relaxes, slight rise |
| 30 min | First fold | 72-75°F | Increased elasticity |
| 1 hour | Second fold | 72-75°F | Noticeable strength |
| 1.5 hours | Third fold | 72-75°F | Smooth surface |
| 2 hours | Fourth fold | 72-75°F | Holds shape well |
| 3-5 hours | Final rise | 72-75°F | 50-75% size increase |
During bulk fermentation, I perform a series of folds every 30 minutes for the first 2 hours. Each fold involves gently lifting one side of the dough and folding it over to the opposite side, rotating the bowl and repeating for all four sides.
Adding Raspberries and White Chocolate
Timing is crucial when adding delicate ingredients like raspberries. I wait until the final fold to incorporate them, ensuring they don’t break down during extended fermentation. I gently fold the raspberries and white chocolate chips into the dough, being careful not to crush the berries.
The fruit and chocolate should distribute evenly without overmixing. Some raspberry juice will inevitably stain the dough slightly pink, which creates beautiful marbled effects in the finished bread.
Shaping and Final Proof
Pre-shaping
When bulk fermentation completes (the dough should feel jiggly and have increased by 50-75%), I turn it onto a lightly floured surface. Using a bench scraper, I gently shape it into a loose round, being careful not to deflate the dough completely.
I let the pre-shaped dough rest for 20-30 minutes, allowing the gluten to relax before final shaping. This rest period, called bench rest, makes final shaping much easier and prevents tearing.
Final Shaping
For final shaping, I create tension on the dough surface by gently pulling and folding edges toward the center. The goal is creating a tight, smooth surface that will support the bread’s structure during the final rise.
I place the shaped dough seam-side up in a banneton or bowl lined with a floured cloth. The seam side up positioning allows the bread to open naturally along the seam when baked.
Cold Retardation
I refrigerate the shaped dough for 12-24 hours, a process called cold retardation. This slow, cold fermentation develops complex flavors and makes the dough easier to score. The cold temperature slows yeast activity while allowing beneficial bacteria to continue working.
Baking Techniques
Equipment Setup
| Equipment | Purpose | Temperature |
|---|---|---|
| Dutch oven with lid | Steam retention | Preheated to 500°F |
| Parchment paper | Easy transfer | Heat-resistant type |
| Sharp knife or lame | Scoring | Room temperature |
| Oven thermometer | Accurate temperature | 450-500°F range |
I preheat my Dutch oven for at least 45 minutes before baking. The heavy pot retains heat excellently and creates the steam necessary for proper crust development.
Scoring and Loading
Scoring sourdough requires confidence and speed. I make one decisive slash across the bread’s surface, about ½ inch deep. The cut should be at a 45-degree angle to create the classic “ear” that opens during baking.
Using parchment paper as a sling, I carefully lower the bread into the preheated Dutch oven. The sizzling sound indicates proper temperature, and I quickly cover with the lid to trap steam.
Baking Timeline
I bake covered at 450°F for 20 minutes, then remove the lid and continue baking for 25-30 minutes until the crust reaches deep golden brown. Internal temperature should reach 205-210°F for fully baked bread.
The contrast between the initial high-heat steam phase and the uncovered browning phase creates the perfect combination of crispy crust and tender crumb.
Cooling and Storage
Proper cooling is essential for texture development. I resist the temptation to cut into the bread immediately, instead cooling it on a wire rack for at least 2 hours. During cooling, moisture redistributes throughout the crumb, creating the final texture.
The bread continues cooking internally during cooling, and cutting too early results in gummy texture. I know it’s ready when tapping the bottom produces a hollow sound.
Flavor Profile and Texture
This bread offers incredible complexity in every bite. The sourdough tang provides a sophisticated base, while raspberries contribute bright acidity and natural sweetness. White chocolate adds creamy richness without overwhelming the delicate fermented flavors.
The crumb structure features an open, irregular pattern typical of well-fermented sourdough, with pockets of melted white chocolate and jammy raspberry pieces throughout. The crust develops a beautiful golden color with a satisfying crunch that gives way to the tender interior.
Nutritionally, this bread provides the digestive benefits of fermented grains, antioxidants from raspberries, and the satisfaction of a naturally leavened product. The long fermentation process breaks down complex proteins and starches, making nutrients more bioavailable.
Serving Suggestions and Pairings
Breakfast Options
This bread shines at breakfast, toasted lightly to warm the chocolate without melting it completely. I love it with a thin spread of cream cheese or Greek yogurt, which complements the tart raspberries beautifully.
For a more indulgent morning treat, I serve it with mascarpone cheese and a drizzle of honey. The creamy cheese balances the bread’s acidity while honey enhances the fruit flavors.
Afternoon Tea Combinations
Sliced thin, this bread makes elegant tea sandwiches. I pair it with soft cheeses like brie or camembert, creating sophisticated flavor combinations perfect for entertaining.
Dessert Applications
As an evening dessert, I serve warmed slices with vanilla ice cream or whipped cream. The contrast between cold, creamy accompaniments and warm, fragrant bread creates restaurant-quality dessert experiences at home.
Troubleshooting Common Issues
| Problem | Likely Cause | Solution |
|---|---|---|
| Dense, heavy texture | Under-fermented dough | Extend bulk fermentation time |
| Gummy crumb | Cut too early | Cool completely before slicing |
| Burst raspberries | Added too early | Incorporate during final fold only |
| Pale crust | Insufficient heat | Ensure Dutch oven fully preheated |
| Flat loaf | Weak gluten development | Improve folding technique |
| Overly sour | Over-fermented | Reduce fermentation time |
Understanding these common issues helps you adjust the recipe to your specific environment and preferences. Every kitchen has different temperatures and humidity levels that affect fermentation timing.
Variations and Adaptations
Seasonal Fruit Substitutions
While raspberries work beautifully, I’ve successfully used blackberries, chopped strawberries, and even frozen wild blueberries. Each fruit brings its own character while maintaining the bread’s fundamental appeal.
Chocolate Alternatives
Dark chocolate chips create a more sophisticated flavor profile, while milk chocolate appeals to those preferring sweeter combinations. I’ve even used chopped white chocolate bars for more irregular pieces.
Dietary Modifications
For those avoiding refined sugar, I’ve replaced white chocolate with unsweetened cacao nibs and increased honey slightly. The result lacks sweetness but offers intense chocolate flavor and crunch.
Advanced Techniques
Hydration Adjustments
Experienced bakers can increase hydration to 75-80% for more open crumb structure. This requires stronger gluten development and careful handling but creates incredibly light texture.
Flour Blending
I sometimes substitute 10% of the bread flour with rye flour for earthier complexity that complements the fruit beautifully. Spelt flour creates nuttier flavors, while adding vital wheat gluten helps maintain structure.
Extended Fermentation
Cold retardation can extend to 48-72 hours for maximum flavor development. Longer fermentation creates more complex acidity and improves digestibility further.
Q&A Section
Q: Why do my raspberries always burst and make the dough too wet? A: The key is using firm, dry raspberries and adding them during the final fold only. Avoid washing berries before use, and gently pat them dry if needed. Frozen raspberries work well too since they release less juice during mixing.
Q: Can I use a different type of chocolate in this recipe? A: Absolutely! Dark chocolate creates a more sophisticated flavor, while milk chocolate offers sweeter results. I recommend chopping bar chocolate into irregular pieces rather than using uniform chips for better distribution and visual appeal.
Q: My bread didn’t rise much during bulk fermentation. What went wrong? A: This usually indicates your starter wasn’t active enough or your kitchen temperature was too cool. Ensure your starter doubles within 4-8 hours of feeding, and maintain dough temperature between 70-75°F throughout fermentation.
Q: How do I know when bulk fermentation is complete? A: Look for a 50-75% increase in size, jiggly texture when gently shaken, and visible bubbles on the surface. The dough should feel alive and slightly springy. In cooler temperatures, this process can take 6-8 hours.
Q: Can I make this bread without a Dutch oven? A: Yes, though results will differ slightly. Place a metal pan on the oven bottom and add boiling water when loading the bread to create steam. Cover the bread with an inverted metal bowl for the first 20 minutes if possible.
Q: Why is my crust too thick and hard? A: This often results from excessive baking time or temperature. Check internal temperature (should reach 205-210°F) rather than relying solely on visual cues. Also ensure your oven temperature is accurate using an oven thermometer.
Q: How long will this bread stay fresh? A: Properly stored at room temperature in a paper bag or bread box, it maintains quality for 3-4 days. The crust will soften slightly, but toasting revives texture beautifully. For longer storage, slice and freeze individual portions.
Q: Can I reduce the amount of white chocolate? A: Certainly! The chocolate amount is flexible based on preference. I’ve made versions with as little as 50g for subtle sweetness or as much as 150g for chocolate lovers. Adjust to your taste preferences.
Q: My bread has a very open crumb but lacks flavor. What’s happening? A: This suggests good fermentation technique but possibly weak starter flavor. Try using your starter when it’s slightly more mature (12-24 hours after feeding) for more developed acidity, or extend bulk fermentation slightly.
Q: Is it normal for the dough to be quite sticky? A: Yes, higher hydration sourdough doughs are naturally sticky. Resist adding extra flour, which creates dense texture. Instead, keep your hands slightly wet when handling, and use a bench scraper for turning and folding.
This Raspberry White Chocolate Sourdough Bread represents the beautiful intersection of traditional fermentation techniques and creative flavor combinations. Each loaf tells a story of patience, skill, and the magical transformation that occurs when simple ingredients meet time and technique. The journey from starter to finished bread connects us to generations of bakers while creating something uniquely personal and delicious.