There’s something magical about pulling apart a warm, gooey garlic cheese breadstick that makes any meal feel special. I’ve spent years perfecting this recipe, and today I’m thrilled to share my secrets for creating restaurant-quality garlic cheese breadsticks right in your own kitchen. Whether you’re serving them alongside your favorite pasta dish or enjoying them as an appetizer for game night, these breadsticks will quickly become your new go-to recipe.
The Magic of Homemade Breadsticks
Store-bought breadsticks never quite match the flavor and texture of homemade ones. There’s something about the aroma of freshly baked bread mingling with garlic and herbs that creates an irresistible combination. I still remember the first time I made these for my family—the kitchen filled with that incredible scent and everyone hovered nearby, waiting impatiently for them to come out of the oven.
What makes these breadsticks special is the perfect balance of a soft, chewy interior with a slightly crisp exterior, all enhanced by the rich flavors of garlic butter and cheese. Let me walk you through creating this crowd-pleasing treat that will elevate any meal from ordinary to extraordinary.
Ingredients You’ll Need
For the dough:
- 3½ cups all-purpose flour
- 1 tablespoon granulated sugar
- 2¼ teaspoons (1 packet) instant yeast
- 1¼ cups warm water (110-115°F)
- 2 tablespoons olive oil
- 1½ teaspoons salt
For the garlic butter coating:
- 6 tablespoons unsalted butter
- 4 cloves garlic, minced
- 1 tablespoon fresh parsley, finely chopped
- ½ teaspoon dried oregano
- ¼ teaspoon red pepper flakes (optional)
- ½ teaspoon salt
For the cheese topping:
- 2 cups mozzarella cheese, shredded
- ½ cup parmesan cheese, grated
- 1 teaspoon Italian seasoning
Equipment Required
Having the right tools makes bread-making much easier. Here’s what you’ll need:
- Stand mixer with dough hook (or a large bowl if mixing by hand)
- Large baking sheet
- Parchment paper
- Small saucepan
- Pastry brush
- Sharp knife or pizza cutter
- Measuring cups and spoons
- Cooling rack

The Step-by-Step Process
Preparing the Dough
- In the bowl of your stand mixer, combine the flour, sugar, and instant yeast.
- With the mixer on low speed, gradually add the warm water and olive oil.
- Once the ingredients are roughly combined, add the salt.
- Increase the mixer speed to medium-low and knead the dough for about 5-7 minutes until it becomes smooth and elastic.
- If mixing by hand, stir ingredients with a wooden spoon until combined, then turn out onto a floured surface and knead for 8-10 minutes.
- Form the dough into a ball and place it in a lightly oiled bowl, covering with plastic wrap or a damp kitchen towel.
- Allow the dough to rise in a warm spot for 60-90 minutes, or until it has doubled in size.
I’ve found that placing the dough in an oven with just the light on creates the perfect warm environment for rising, especially during colder months.
Creating the Garlic Butter
While the dough is rising, prepare the garlic butter mixture:
- Melt the butter in a small saucepan over medium-low heat.
- Add the minced garlic and cook for about 1 minute until fragrant, being careful not to brown it.
- Remove from heat and stir in the parsley, oregano, red pepper flakes (if using), and salt.
- Set aside to infuse while the dough rises.
Shaping and Baking
- Preheat your oven to 425°F (220°C) and line a large baking sheet with parchment paper.
- Once the dough has doubled in size, gently punch it down and turn it out onto a lightly floured surface.
- Roll the dough into a rectangle approximately 12×16 inches.
- Using a pizza cutter or sharp knife, cut the dough into 12-16 strips, depending on how thick you want your breadsticks.
- Carefully transfer each strip to the prepared baking sheet, spacing them about 1 inch apart.
- Brush each strip generously with half of the garlic butter mixture, reserving the other half for after baking.
- Sprinkle half of the cheese mixture evenly over the breadsticks.
- Allow the breadsticks to rest for 15 minutes before baking.
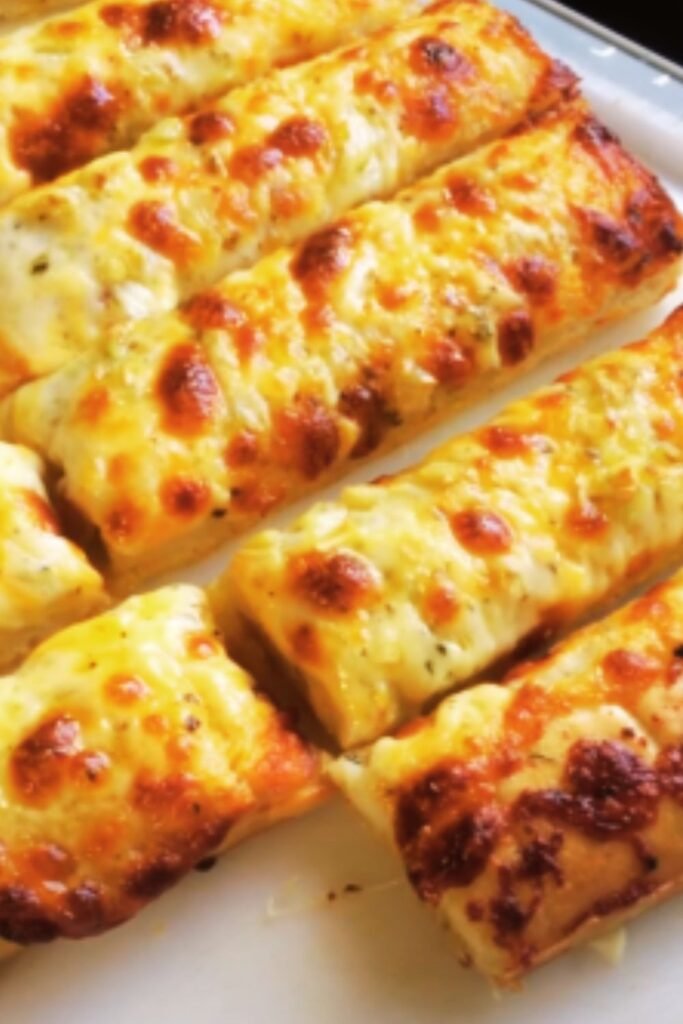
- Bake for 12-15 minutes, or until the breadsticks are golden brown and the cheese is bubbly.
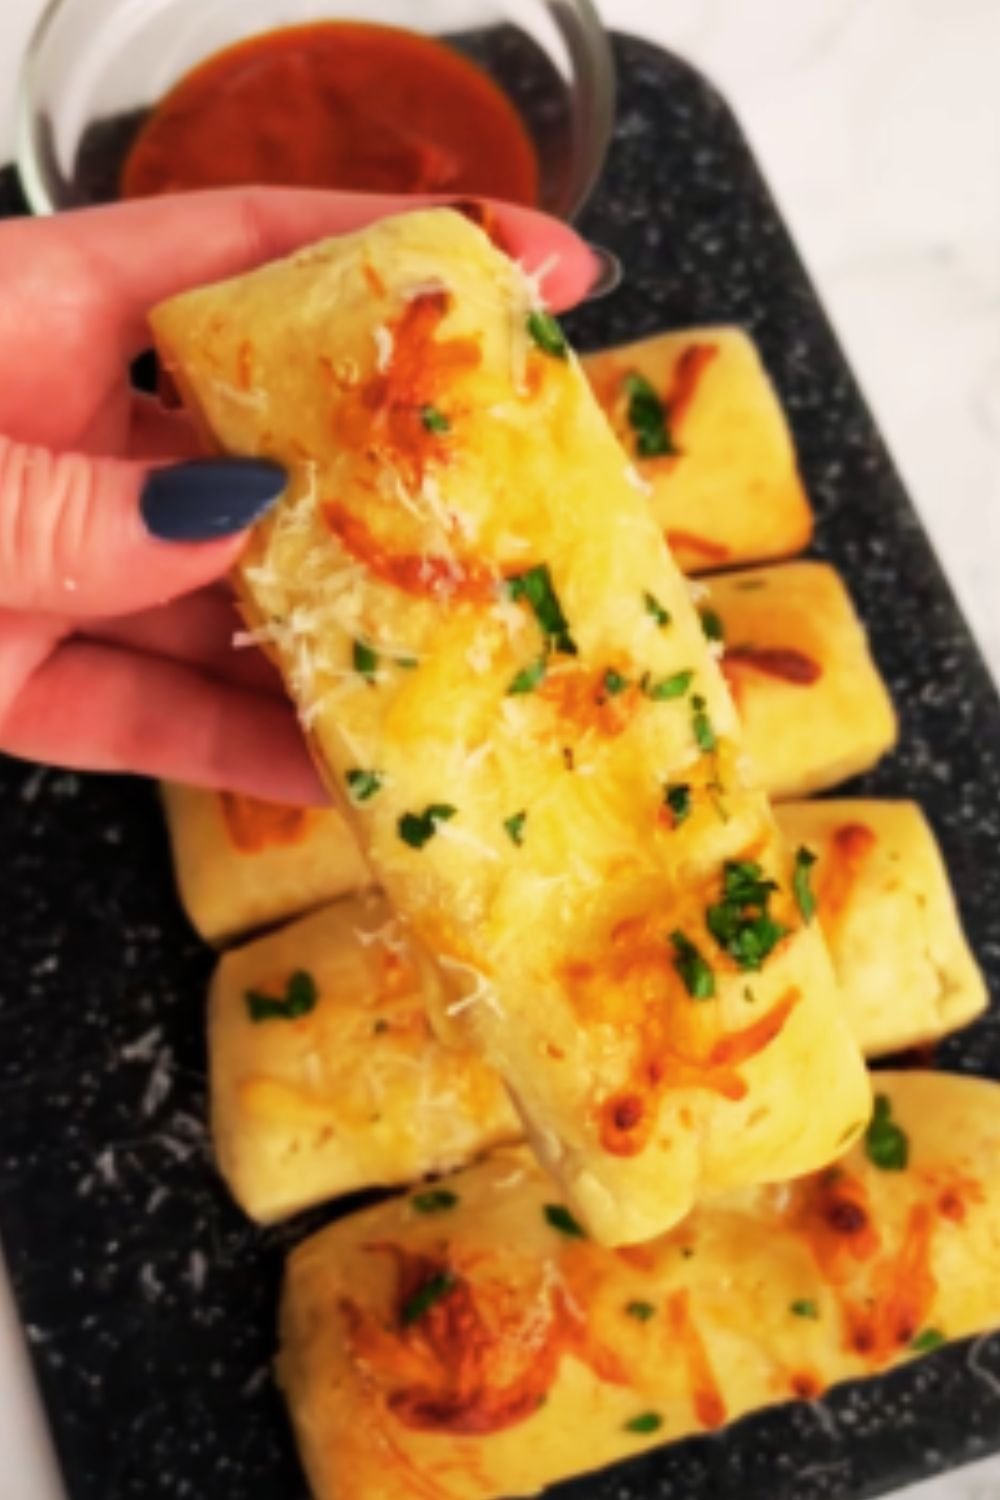
The Final Touch
- Remove the breadsticks from the oven and immediately brush with the remaining garlic butter.
- Sprinkle with the remaining cheese mixture while still hot.
- Allow to cool for just 5 minutes before serving.
Troubleshooting Common Issues
Even experienced bakers sometimes encounter challenges. Here are solutions to common breadstick problems:
Dough not rising properly: : Check the expiration date on your yeast. Also, ensure your water temperature is 110-115°F—any hotter will kill the yeast, while cooler water won’t activate it properly.
Breadsticks too dense: : You may have added too much flour or not kneaded the dough enough. The dough should be slightly tacky but not sticky.
Pale, soft breadsticks: : Your oven temperature might be too low, or you may need to bake them longer. Every oven is different, so adjust accordingly.
Burnt garlic taste: : Garlic burns easily and becomes bitter. Cook it just until fragrant in the butter, about 1 minute, and keep the heat low.
Nutritional Information
Understanding what’s in your food helps make informed choices. Here’s the nutritional breakdown per breadstick (based on 14 breadsticks per recipe):
| Nutrient | Amount per Breadstick |
|---|---|
| Calories | 210 |
| Total Fat | 10g |
| Saturated Fat | 5g |
| Cholesterol | 20mg |
| Sodium | 350mg |
| Total Carbohydrates | 24g |
| Dietary Fiber | 1g |
| Sugars | 1g |
| Protein | 7g |
| Calcium | 15% DV |
| Iron | 6% DV |
Variations to Try
One of the joys of cooking is making a recipe your own. Here are some delicious variations to try:
Herb and Garlic Breadsticks
Add 1 tablespoon each of fresh chopped rosemary and thyme to the dough for an herbal twist that pairs beautifully with the garlic.
Spicy Pepperoni Breadsticks
Sprinkle 1/2 cup of finely diced pepperoni over the breadsticks before adding the cheese for a pizza-inspired treat.
Pesto Breadsticks
Replace half of the garlic butter with 3 tablespoons of basil pesto for a fresh, aromatic flavor that’s perfect for summer meals.
Whole Wheat Breadsticks
Substitute half of the all-purpose flour with whole wheat flour for a nuttier taste and added nutritional benefits.
Stuffed Breadsticks
After rolling out the dough, add a thin layer of cheese and herbs down the center of each strip, then fold the dough over and seal the edges before baking.
Make-Ahead and Storage Tips
Preparing components ahead of time can make dinner assembly much quicker:
Make-Ahead Options:
- Prepare the dough up to 24 hours in advance and store it in the refrigerator for a slow rise. This actually develops more flavor!
- Pre-mix the dry ingredients and store in an airtight container until ready to use.
- The garlic butter can be made up to 3 days ahead and kept refrigerated. Just warm it slightly before using.
Storage Solutions:
Leftover breadsticks (if there are any!) can be stored in an airtight container at room temperature for up to 2 days. For longer storage, freeze them for up to 1 month.
Reheating Methods:
- Oven: Wrap breadsticks in foil and heat at 350°F for 5-7 minutes until warmed through.
- Air Fryer: 2-3 minutes at 350°F restores much of the original texture.
- Microwave: 15-20 seconds will warm them, though they won’t be as crisp.
I always make a double batch—one for dinner and one for the freezer. It’s such a time-saver on busy weeknights!
Serving Suggestions
These garlic cheese breadsticks are versatile and pair wonderfully with many dishes:
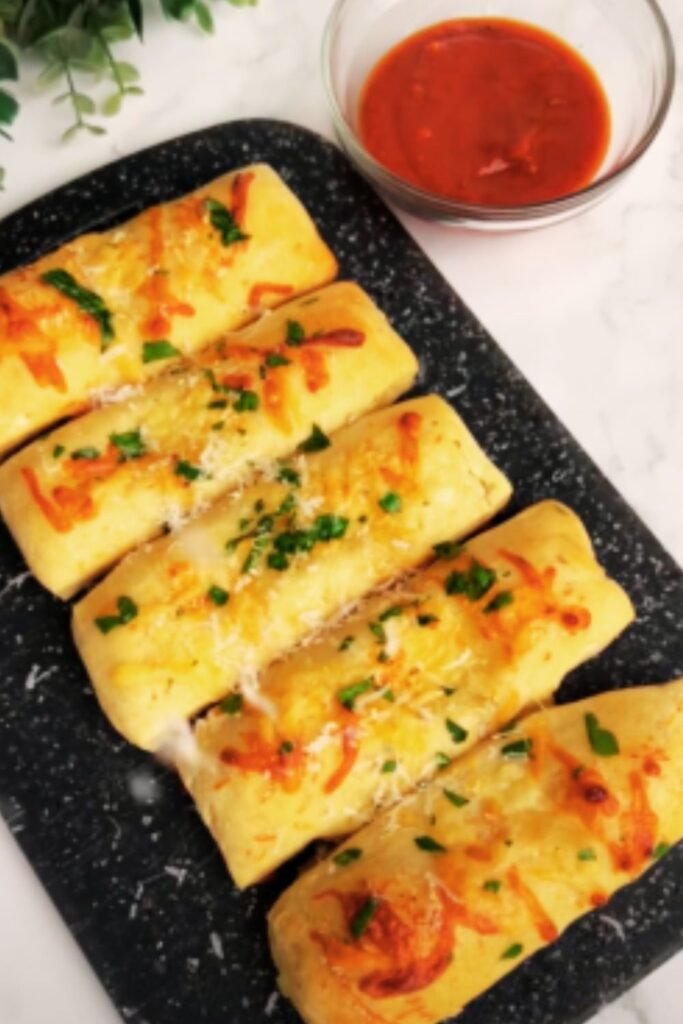
- Dip them in marinara sauce or alfredo sauce for an appetizer
- Serve alongside a Caesar salad for a light lunch
- Accompany your favorite pasta dishes like spaghetti bolognese or fettuccine alfredo
- Offer as a side to hearty soups like minestrone or tomato bisque
- Create a Mediterranean platter with hummus, olives, and these breadsticks
- Serve with a spinach artichoke dip for game day snacking
Special Diet Adaptations
With a few adjustments, these breadsticks can accommodate various dietary needs:
Dairy-Free Option:
Replace the butter with olive oil or a plant-based butter alternative, and use dairy-free cheese substitutes. The texture will be slightly different, but still delicious.
Gluten-Free Version:
Substitute the all-purpose flour with a 1:1 gluten-free flour blend that contains xanthan gum. The dough won’t have quite the same elasticity, but you’ll still achieve good results.
Lower-Sodium Adaptation:
Reduce the salt in both the dough and garlic butter by half, and use a low-sodium cheese blend.
Vegan Breadsticks:
Use plant-based butter, vegan cheese alternatives, and verify that your sugar is vegan (some are processed with bone char).
Why This Recipe Works
After years of tweaking this recipe, I’ve discovered why certain techniques make such a difference:
- The sugar in the dough feeds the yeast, creating a lighter texture
- Brushing with garlic butter both before and after baking ensures maximum flavor penetration
- The brief rest after shaping allows the dough to relax, preventing tough breadsticks
- Baking at a high temperature creates that perfect contrast between the crisp exterior and soft interior
- Using both mozzarella and parmesan provides the ideal balance of meltability and sharp flavor
Frequently Asked Questions
Can I make these breadsticks without a stand mixer? Absolutely! While a stand mixer makes the process easier, you can mix the dough with a wooden spoon and then knead by hand on a floured surface for 8-10 minutes until smooth and elastic.
How do I know when my dough has risen enough? The dough should roughly double in size. An easy test is to gently press your finger about half an inch into the dough—if the indentation remains, it’s ready.
Can I use active dry yeast instead of instant? Yes, but you’ll need to activate it first. Dissolve the active dry yeast in the warm water with a pinch of the sugar and let it sit for 5-10 minutes until foamy, then proceed with the recipe.
Why didn’t my cheese get bubbly and golden? Make sure your oven is fully preheated. If your cheese isn’t browning, you can turn on the broiler for the last minute of baking, but watch carefully to prevent burning.
How can I get evenly sized breadsticks? I recommend using a ruler and a pizza cutter for precise cuts. For perfectly even portions, you can also weigh the entire dough and divide by the number of breadsticks you want to make.
What’s the best cheese to use if I don’t have mozzarella? Provolone, fontina, or even a young Gouda would work well. Look for cheeses with good melting properties.
Can I add different seasonings to the garlic butter? Absolutely! Try adding a pinch of smoked paprika, a dash of Italian seasoning, or even some lemon zest for a bright twist.
My breadsticks stuck to the pan. What happened? Always use parchment paper or a silicone baking mat to prevent sticking. If you don’t have either, make sure to generously grease your baking sheet.
Final Thoughts
Homemade garlic cheese breadsticks might seem like a small thing, but there’s something deeply satisfying about creating such a beloved comfort food from scratch. When I see people’s faces light up as they pull apart a warm breadstick, watching the cheese stretch and smelling that irresistible garlic aroma, I’m reminded of why I love cooking so much.
These breadsticks have become a tradition in my home—appearing at holiday meals, family gatherings, and whenever someone needs a little extra comfort. I hope they bring as much joy to your table as they have to mine. Happy baking!