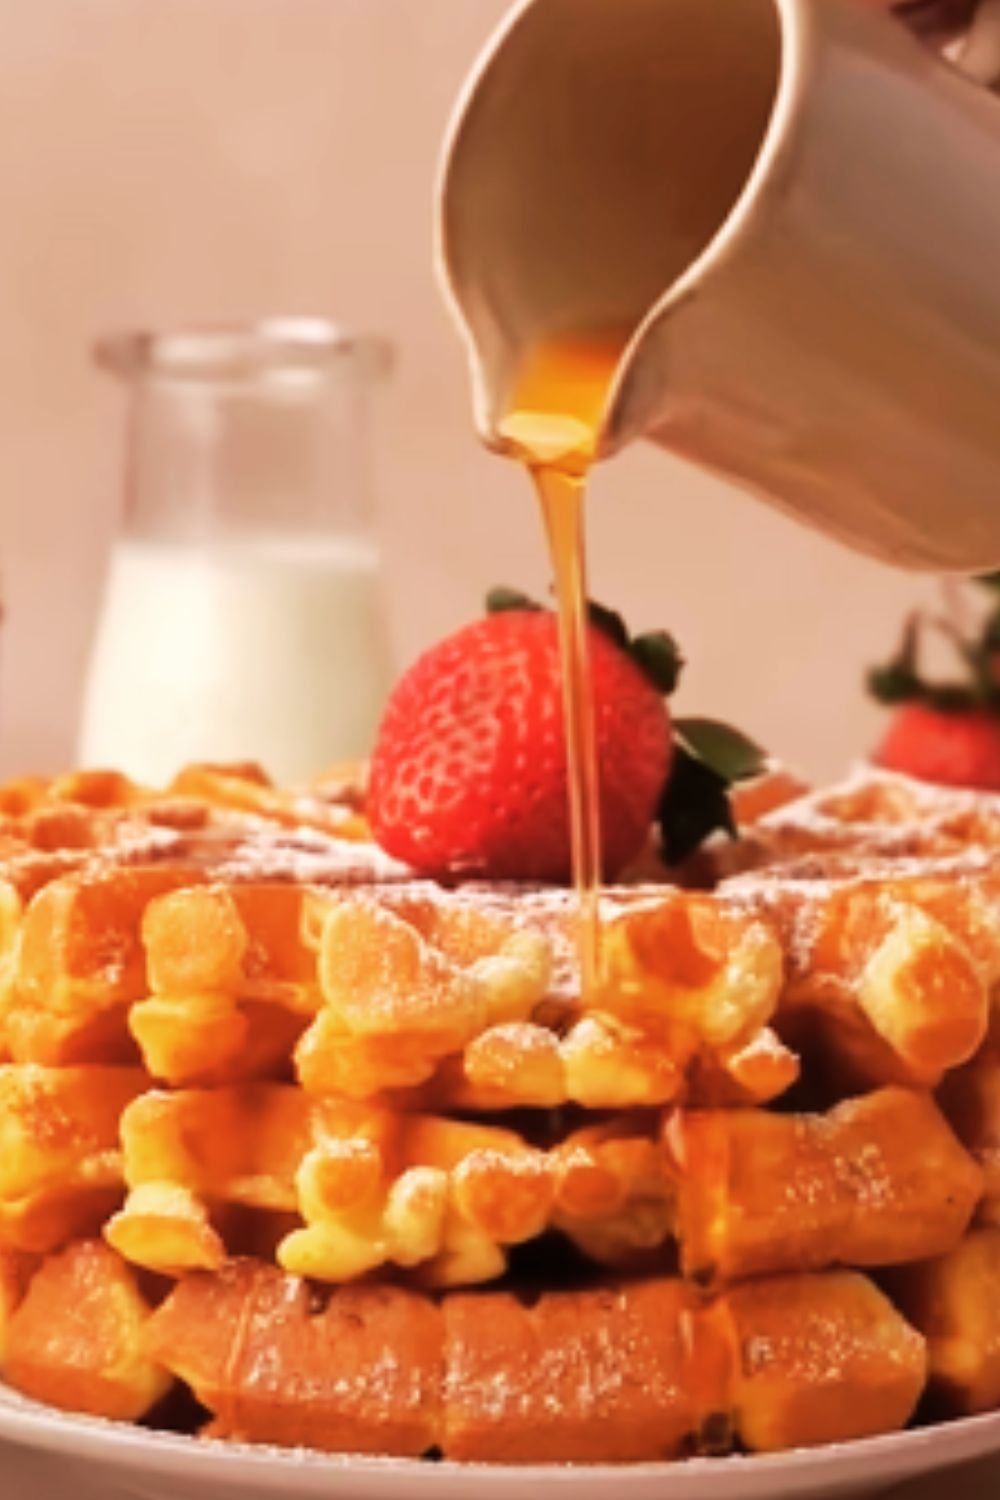
There’s something magical about the smell of waffles wafting through the house on a lazy weekend morning. I’ve spent years perfecting my waffle recipe, and today I’m sharing all my secrets for creating the most delicious homemade waffles you’ve ever tasted. These golden beauties boast the perfect balance – crispy on the outside, yet fluffy and tender on the inside. Whether you’re hosting a special brunch or simply treating yourself to a delightful breakfast, these waffles are guaranteed to impress. Let’s dive into everything you need to know about making exceptional waffles right in your own kitchen.
The Secret to Perfect Waffles
What separates an ordinary waffle from an extraordinary one? After countless Sunday mornings experimenting in my kitchen, I’ve discovered that the perfect waffle comes down to a few key elements:
- The right batter consistency: Not too thick, not too thin
- Proper technique: Gentle folding instead of overmixing
- Quality ingredients: Real butter, fresh eggs, and pure vanilla extract
- Temperature mastery: Having your waffle iron at the optimal heat
- Patience: Allowing the batter to rest before cooking
I’ve learned these lessons through plenty of trial and error, and I’m thrilled to share them with you today. No more soggy middles or burnt edges – just perfectly golden, crispy waffles every single time.
Essential Equipment
Before we jump into the recipe, let’s make sure you have the proper tools on hand. While waffles aren’t particularly demanding in terms of equipment, having the right items will make the process smoother and more enjoyable.
| Equipment | Purpose | Recommendation |
|---|---|---|
| Waffle Iron | The star of the show; determines waffle shape and cooking | Belgian-style for deeper pockets or traditional for thinner waffles |
| Large Mixing Bowls | Separate wet and dry ingredients before combining | Glass or stainless steel for stability |
| Whisk | Creates a smooth batter and incorporates air | Balloon whisk for maximum aeration |
| Measuring Cups & Spoons | Precision is key for consistent results | Standard and metric measurements |
| Rubber Spatula | Gently fold ingredients without deflating | Heat-resistant silicone preferred |
| Ladle or Measuring Cup | Portion batter evenly onto waffle iron | 1/4 cup works for most standard waffles |
| Cooling Rack | Prevents condensation and maintains crispness | Wire rack elevated above counter |
| Timer | Prevents under or overcooking | Digital for precision |
Having these tools ready before you begin will make the waffle-making process a breeze. Trust me, there’s nothing worse than scrambling to find equipment while your batter sits waiting!
The Classic Waffle Recipe
Now for the moment you’ve been waiting for – my tried and true waffle recipe that never fails to impress. This recipe yields approximately 8-10 medium-sized waffles, depending on your waffle iron.
Ingredients
For the dry ingredients:
- 2 cups (250g) all-purpose flour
- 2 tablespoons (25g) granulated sugar
- 1 tablespoon baking powder
- 1/2 teaspoon baking soda
- 1/2 teaspoon salt
- 1/4 teaspoon ground cinnamon (optional)
For the wet ingredients:
- 2 large eggs, separated
- 1 3/4 cups (420ml) buttermilk
- 1/2 cup (115g) unsalted butter, melted and slightly cooled
- 2 teaspoons pure vanilla extract
- 1 tablespoon vegetable oil (for greasing the waffle iron)
Step-by-Step Instructions
- Preheat your waffle iron according to the manufacturer’s instructions. This typically takes about 5-10 minutes to reach the optimal temperature.
- Prepare the dry ingredients: In a large mixing bowl, whisk together the flour, sugar, baking powder, baking soda, salt, and cinnamon (if using). Make a well in the center of the dry ingredients.
- Separate the eggs: Carefully crack the eggs, placing the whites in a medium bowl and the yolks in another bowl. Set aside the whites for now.
- Mix the wet ingredients: To the bowl with the egg yolks, add the buttermilk, melted butter, and vanilla extract. Whisk until well combined.
- Combine wet and dry mixtures: Pour the wet ingredients into the well you created in the dry ingredients. Stir gently with a rubber spatula until just combined. The batter will be slightly lumpy – that’s perfectly fine! Overmixing will develop gluten and result in tough waffles.
- Beat the egg whites: Using a hand mixer or whisk, beat the egg whites until stiff peaks form. This usually takes 2-3 minutes with an electric mixer.
- Fold in egg whites: Gently fold the beaten egg whites into the batter using a rubber spatula. This adds air to the batter, resulting in lighter, fluffier waffles. Be careful not to overmix and deflate the egg whites.
- Let the batter rest: Allow the batter to rest for 10-15 minutes. This gives the flour time to absorb the liquid ingredients and the leavening agents time to activate.
- Cook the waffles: Lightly grease the waffle iron with vegetable oil or cooking spray. Pour approximately 1/4 to 1/3 cup of batter onto the center of the preheated waffle iron (the exact amount will depend on your waffle iron size). Close the lid and cook until golden brown and crisp, about 3-5 minutes.
- Keep warm: Transfer the cooked waffles to a wire cooling rack. If serving all at once, place them in a single layer on a baking sheet in a 200°F (95°C) oven to keep warm while cooking the remaining batter.

Troubleshooting Common Waffle Problems
Even with the best recipe, you might encounter some issues when making waffles. Here’s how to solve common problems:
| Problem | Possible Cause | Solution |
|---|---|---|
| Waffles sticking to iron | Insufficient greasing | Apply more oil to the waffle iron before each batch |
| Soggy waffles | Undercooked or too much moisture | Cook longer; reduce liquid in recipe slightly |
| Tough, chewy waffles | Overmixing the batter | Mix just until ingredients are combined |
| Waffles not crispy | Iron not hot enough | Preheat iron thoroughly before cooking |
| Pale, bland waffles | Not enough sugar or salt | Adjust seasonings in your next batch |
| Uneven cooking | Uneven batter distribution | Use a ladle to place batter in center of iron |
| Batter overflow | Too much batter used | Use less batter per waffle |
| Waffles deflating | Opening the iron too soon | Wait for steam to subside before checking |
Remember, waffle-making is part science, part art. Don’t be discouraged if your first few attempts aren’t perfect. With practice, you’ll develop an intuition for exactly how your waffle iron works and how to achieve your ideal texture.
Delicious Variations
Once you’ve mastered the classic recipe, why not experiment with some delicious variations? Here are some of my favorite ways to customize the basic waffle batter:
Chocolate Waffles
Add 1/4 cup unsweetened cocoa powder to the dry ingredients and increase the sugar to 1/4 cup. For extra indulgence, fold in 1/2 cup chocolate chips after combining the wet and dry ingredients.
Blueberry Waffles
Gently fold 1 cup fresh or frozen blueberries (if using frozen, do not thaw) into the batter just before cooking. Be careful not to overmix, which would turn the entire batter purple.
Cinnamon Roll Waffles
Increase cinnamon to 1 tablespoon and add 1/4 teaspoon nutmeg to the dry ingredients. After cooking, drizzle with a simple glaze made from 1 cup powdered sugar, 2 tablespoons milk, and 1/2 teaspoon vanilla extract.
Savory Cheese and Herb Waffles
Reduce sugar to 1 teaspoon, omit vanilla, and add 1 cup shredded sharp cheddar cheese, 2 tablespoons chopped fresh chives, and 1 teaspoon dried herbs (such as thyme or rosemary).
Pumpkin Spice Waffles
Replace 1/2 cup of the buttermilk with 1/2 cup pumpkin puree and add 1 1/2 teaspoons pumpkin pie spice to the dry ingredients.

Nutritional Information
For those who are mindful of their nutritional intake, here’s a breakdown of the approximate nutritional content per waffle (based on a recipe yielding 8 waffles):
| Nutrient | Amount per Waffle | % Daily Value* |
|---|---|---|
| Calories | 275 | 14% |
| Total Fat | 14g | 18% |
| Saturated Fat | 8g | 40% |
| Cholesterol | 77mg | 26% |
| Sodium | 365mg | 16% |
| Total Carbohydrates | 30g | 11% |
| Dietary Fiber | 1g | 4% |
| Sugars | 6g | – |
| Protein | 7g | 14% |
| Calcium | 175mg | 13% |
| Iron | 1.8mg | 10% |
*Percent Daily Values are based on a 2,000 calorie diet.
Make-Ahead and Storage Tips
Waffles are perfect for meal prep. Here’s how to make them ahead and store them properly:
Batter Storage
The waffle batter can be made up to 24 hours in advance and stored in an airtight container in the refrigerator. However, if using the separated egg white method, it’s best to beat and fold in the egg whites just before cooking.
Freezing Cooked Waffles
- Allow waffles to cool completely on a wire rack.
- Place in a single layer on a baking sheet and freeze until solid (about 2 hours).
- Transfer to a freezer-safe bag or container, separating layers with parchment paper.
- Label with the date and freeze for up to 3 months.
Reheating
- Toaster: For the crispiest results, pop frozen waffles directly into the toaster on a medium-high setting.
- Oven: Preheat to 350°F (175°C) and bake frozen waffles for 8-10 minutes until heated through and crisp.
- Microwave: For a softer texture, microwave for 30-45 seconds. Not recommended if you prefer crispy waffles.
Serving Suggestions
Waffles are incredibly versatile when it comes to toppings and accompaniments. Here are some delicious serving ideas:
Sweet Toppings
- Pure maple syrup (the real stuff makes a difference!)
- Fresh berries (strawberries, blueberries, raspberries)
- Sliced bananas and a drizzle of honey
- Whipped cream and chocolate sauce
- Nut butters (almond, peanut, or cashew)
- Apple or pear compote with cinnamon
- Fruit preserves or jams
- Vanilla yogurt with granola
- Candied nuts and caramel sauce
Savory Accompaniments (for classic or savory waffles)
- Fried or poached eggs
- Crispy bacon or ham
- Avocado and tomato slices
- Smoked salmon and cream cheese
- Sautéed mushrooms
- Grilled chicken and maple butter
- Creamed spinach
- Hot honey and fried chicken (for chicken and waffles)

Special Dietary Adaptations
Waffles can be adapted for various dietary needs without sacrificing flavor. Here are some modifications:
Gluten-Free Waffles
Replace the all-purpose flour with a gluten-free flour blend. Add 1/4 teaspoon xanthan gum if your blend doesn’t already include it. The rest of the recipe remains the same.
Dairy-Free Waffles
Substitute the buttermilk with a plant-based milk (such as almond or oat) mixed with 1 tablespoon of lemon juice or vinegar. Replace the butter with coconut oil or a plant-based butter alternative.
Vegan Waffles
In addition to the dairy substitutions above, replace the eggs with one of these options:
- 2 flax eggs (2 tablespoons ground flaxseed mixed with 6 tablespoons water, let sit for 5 minutes)
- 1/2 cup unsweetened applesauce plus 1/2 teaspoon additional baking powder
- 2 tablespoons cornstarch mixed with 6 tablespoons water
Lower-Sugar Option
Reduce the sugar to 1 teaspoon for a less sweet base. This works well when using sweet toppings like maple syrup or fruit.
Whole Grain Waffles
Replace half or all of the all-purpose flour with whole wheat flour. If using 100% whole wheat, add an extra 2 tablespoons of buttermilk to prevent dryness.
Waffle Etiquette Around the World
Waffles have a rich history and are enjoyed differently across cultures. Here’s a glimpse at waffle traditions around the world:
| Country | Waffle Type | Typical Serving Style |
|---|---|---|
| Belgium (Brussels) | Brussels Waffle | Rectangular with deep pockets, served with powdered sugar |
| Belgium (Liège) | Liège Waffle | Denser, sweeter, with pearl sugar that caramelizes when cooked |
| United States | American Waffle | Round, often served with butter and maple syrup for breakfast |
| Netherlands | Stroopwafel | Thin waffles sandwiched with caramel syrup, served with coffee |
| Sweden | Våffeldagen | Heart-shaped, celebrated on “Waffle Day” (March 25) with jam and cream |
| Hong Kong | Egg Waffle | Spherical “bubbles” connected in a grid, eaten plain as street food |
| France | Gaufre | Similar to Brussels style, often topped with Nutella or fruit |
| Norway | Vafler | Thin, heart-shaped, served with sour cream and jam |
Frequently Asked Questions
Q: Why are my waffles not as crispy as I’d like? A: For crispier waffles, make sure your waffle iron is properly preheated. Also, try replacing some of the buttermilk with malted milk or adding 1-2 tablespoons of cornstarch to the dry ingredients, which helps create a crispier exterior. Another tip is to let the cooked waffles rest on a wire rack instead of stacking them, which prevents steam from making them soggy.
Q: Can I make these waffles without a waffle iron? A: Unfortunately, you do need a waffle iron to make proper waffles. The specific grid pattern creates the characteristic pockets that hold toppings and gives waffles their unique texture. This batter can be adapted for pancakes, but the result will be different.
Q: What’s the difference between pancake batter and waffle batter? A: Waffle batter typically contains more fat (usually butter) than pancake batter, which helps create that crispy exterior. Waffle batter also often incorporates beaten egg whites for additional lightness, whereas pancake batter is generally simpler and more fluid.
Q: My waffle iron doesn’t have temperature settings. How do I know when it’s ready? A: Most waffle irons have an indicator light that shows when they’re preheated. If yours doesn’t, place a few drops of water on the cooking surface – if they sizzle and evaporate quickly, your iron is ready. Another sign is that the surface will stop steaming once it’s fully heated.
Q: Is it necessary to separate the eggs and beat the whites? A: No, it’s not absolutely necessary, but it does create lighter, fluffier waffles with a better texture contrast between the crisp exterior and soft interior. If you’re short on time, you can skip this step and simply add the whole eggs to the wet ingredients.
Q: Can buttermilk be substituted? A: Yes, if you don’t have buttermilk, you can make a substitute by adding 1 tablespoon of white vinegar or lemon juice to 1 3/4 cups of regular milk. Let it sit for 5-10 minutes until slightly thickened before using.
Q: Why do I need to let the batter rest? A: Resting the batter allows the flour to fully hydrate and the leavening agents (baking powder and baking soda) to activate. This results in a more tender waffle with better texture. Even a short 10-minute rest makes a noticeable difference.
Q: How can I keep my waffles warm while cooking the entire batch? A: Place cooked waffles in a single layer on a baking sheet in a 200°F (95°C) oven. Avoid stacking them, as this traps steam and makes them soggy. Using a wire rack on the baking sheet allows for better air circulation and helps maintain crispness.
Final Thoughts
Mastering homemade waffles is truly a rewarding culinary skill. There’s something deeply satisfying about creating these golden, crispy treats from scratch in your own kitchen. While it might take a few attempts to get them exactly right, the process is enjoyable, and even the “mistakes” are delicious!
I encourage you to view this recipe as a starting point for your own waffle journey. Feel free to experiment with different flavors, toppings, and techniques until you find your perfect waffle. Whether you’re cooking for a special holiday breakfast, hosting a weekend brunch with friends, or simply treating yourself to a delightful morning meal, homemade waffles are sure to bring smiles all around.
Remember that the best waffles come from quality ingredients, proper technique, and a little patience. Take your time, enjoy the process, and soon you’ll be creating waffle masterpieces that would make any professional chef proud. Happy waffle-making!
