Have you ever found yourself torn between choosing a croissant or a muffin for breakfast? Well, I’m thrilled to tell you that you no longer have to choose! Enter the cruffin – a delightful hybrid pastry that combines the buttery, flaky layers of a croissant with the shape and versatility of a muffin. As someone who has spent countless hours perfecting my cruffin technique, I’m excited to share everything I know about these scrumptious treats that have taken the pastry world by storm.
What Exactly Is a Cruffin?
A cruffin (croissant + muffin) is a pastry innovation that originated in San Francisco around 2013. Made from laminated croissant dough that’s rolled, filled, and baked in a muffin tin, cruffins offer the best of both worlds: the distinct layered texture of croissants with the portable, fillable format of muffins.
I fell in love with cruffins during a trip to San Francisco, where I waited in a line that wrapped around the block just to taste one. After that first bite of orange-scented cruffin filled with vanilla pastry cream, I knew I had to learn to make them at home. It took me months of trial and error, but the results were worth every failed attempt.
The Origin Story: How Cruffins Came to Be
Before we dive into making our own cruffins, let’s take a moment to appreciate their origin. The story of the cruffin is a perfect example of culinary innovation and experimentation.
The cruffin was reportedly created by Kate Reid at Lune Croissanterie in Melbourne, Australia, though it was Mr. Holmes Bakehouse in San Francisco that truly popularized the pastry and gave it its now-famous name. Within weeks of its debut, people were lining up for hours just to get their hands on these delectable treats, and bakeries around the world soon began creating their own versions.
I love how the cruffin represents the beautiful evolution of baking traditions. It’s a reminder that even centuries-old techniques like laminated dough can be reimagined into something fresh and exciting.
Essential Ingredients for Perfect Cruffins
The magic of cruffins lies in their simplicity. While the technique might be complex, the ingredient list is surprisingly straightforward. Here’s what you’ll need to create cruffin perfection:
- High-quality Flour: I recommend using bread flour for its higher protein content, which provides better structure.
- European-style Butter: The higher fat content makes for flakier layers.
- Active Dry Yeast: To give your dough the perfect rise.
- Sugar: Just enough to add a hint of sweetness.
- Salt: To enhance all the flavors.
- Milk: For richness and tenderness.
- Fillings: From simple (cinnamon sugar) to sophisticated (lemon curd or chocolate ganache).
The quality of your ingredients truly matters when making cruffins. I’ve found that using European-style butter with at least 82% fat content makes a noticeable difference in the final texture of the pastry.
Detailed Comparison: Cruffins vs. Croissants vs. Muffins
To understand what makes cruffins special, it helps to compare them with their parent pastries:
| Feature | Cruffins | Croissants | Muffins |
|---|---|---|---|
| Texture | Flaky exterior, soft interior with distinct layers | Uniformly flaky and layered throughout | Soft and cakey throughout |
| Shape | Cylindrical with a muffin-like top | Crescent or straight | Rounded top with a cup-like bottom |
| Dough Type | Laminated yeast dough | Laminated yeast dough | Quick bread batter |
| Preparation Time | 24-48 hours | 24-48 hours | 30-45 minutes |
| Filling | Often filled after baking | Sometimes filled before baking | Mix-ins incorporated into batter |
| Baking Vessel | Muffin tin | Baking sheet | Muffin tin |
| Key Technique | Lamination + shaping in muffin tins | Lamination + traditional shaping | Minimal mixing |
| Calories (average) | 380-450 | 300-400 | 250-400 |
| Difficulty Level | Advanced | Intermediate to Advanced | Beginner |
As you can see, cruffins inherit the time-intensive preparation of croissants but take on the versatile shape and filling capabilities of muffins. The result is truly greater than the sum of its parts!
Tools You’ll Need for Cruffin Success
Before embarking on your cruffin adventure, make sure you have these essential tools:
- Rolling Pin: Preferably a straight (non-tapered) one for even pressure.
- Ruler: For measuring dough thickness and dimensions.
- Bench Scraper: To cut dough cleanly and handle it easily.
- Pastry Brush: For removing excess flour and applying egg wash.
- Muffin Tins: Standard size or jumbo, depending on your preference.
- Piping Bags and Tips: For adding fillings after baking.
- Pastry Cutter or Pizza Wheel: For precise cutting of dough strips.
I learned the hard way that attempting to make cruffins without the right tools can lead to frustration. My first attempt involved using a wine bottle as a rolling pin and eyeballing the measurements – let’s just say the results were less than impressive!
Step-by-Step Cruffin Making Process
Now for the exciting part – let’s make some cruffins! I’ve broken down this complex process into manageable steps:
Day 1: Dough Preparation and Initial Lamination
- Make the dough base:
- Mix 500g bread flour, 10g salt, 60g sugar, and 10g active dry yeast in a large bowl.
- Add 300ml cold milk and mix until a shaggy dough forms.
- Knead for 5-7 minutes until smooth and elastic.
- Form into a rectangle, wrap in plastic, and refrigerate for 1 hour.
- Prepare the butter block:
- Place 350g cold European-style butter between two pieces of parchment paper.
- Beat with a rolling pin, then roll to form a 20×20 cm square.
- Refrigerate until firm but pliable (about 15 minutes).
- First lamination:
- Roll the chilled dough into a 30×30 cm square.
- Place the butter block in the center at a 45° angle (like a diamond on a square).
- Fold the corners of the dough over the butter to seal completely.
- First turn:
- Roll the dough into a rectangle approximately 15×45 cm.
- Fold the bottom third up, then the top third down (like a business letter).
- Wrap and refrigerate for 1 hour.
- Second and third turns:
- Repeat the rolling and folding process twice more, refrigerating for 1 hour between turns.
- After the third turn, wrap the dough well and refrigerate overnight.
When I first attempted lamination, I was terrified of butter breaking through the dough. The key is working quickly but gently, and keeping everything cold but not too cold. If the butter is too hard, it will break and tear the dough; if it’s too soft, it will melt and merge with the dough layers.
Day 2: Final Lamination, Shaping, and Baking
- Final roll and shaping:
- Roll the dough into a large rectangle, about 40×60 cm and 3mm thick.
- Trim the edges to create an even rectangle.
- Brush the surface with a thin layer of melted butter and sprinkle with cinnamon sugar (optional).
- Using a pastry cutter, cut the dough into strips 2.5 cm wide and 60 cm long.
- Creating the cruffin shape:
- Take one strip and roll it loosely from one end to create a spiral.
- When you reach the end of the first strip, place the end of a second strip against it and continue rolling.
- Tuck the end underneath and place in a greased muffin cup.
- Proofing:
- Cover the muffin tin loosely with plastic wrap.
- Let the cruffins proof at room temperature until visibly puffy (1-2 hours).
- Baking:
- Preheat oven to 375°F (190°C).
- Brush the tops with egg wash.
- Bake for 25-30 minutes, until deeply golden brown.
- Allow to cool in the tin for 5 minutes, then transfer to a wire rack.
My breakthrough moment came when I realized that getting the proofing right is crucial. Under-proofed cruffins will be dense, while over-proofed ones collapse during baking. Look for a visible increase in size and a slight jiggle when you gently shake the muffin tin.
Common Mistakes and How to Avoid Them
Throughout my cruffin-making journey, I’ve made plenty of mistakes. Here are the most common ones to watch out for:
- Butter Too Warm: If your kitchen is warm or you work too slowly, the butter can melt into the dough layers. Solution: Work in a cool room and return the dough to the refrigerator whenever it starts to feel soft.
- Uneven Rolling: This leads to inconsistent layers. Solution: Use a ruler and rotate your dough regularly to ensure even thickness.
- Overworking the Dough: This develops too much gluten, making the cruffins tough. Solution: Handle the dough gently and keep the rolling strokes long and smooth.
- Improper Proofing: Under-proofed cruffins will be dense; over-proofed ones will collapse. Solution: Learn to recognize when they’re ready by the increase in size and slight wobble.
- Oven Temperature Issues: Too hot, and they’ll burn before cooking through; too cool, and they won’t rise properly. Solution: Use an oven thermometer to verify your temperature and adjust as needed.
I once made a batch where I rushed the lamination process, not giving the dough enough rest time between folds. The result? The butter melted during baking, creating a greasy puddle around each cruffin. Patience truly is a virtue when it comes to laminated pastry!
Filling Ideas to Elevate Your Cruffins

While plain cruffins dusted with sugar are delicious on their own, fillings take them to the next level. Here are some of my favorite filling options:
Classic Fillings
- Vanilla Pastry Cream: Smooth, rich, and classic.
- Chocolate Ganache: Use high-quality chocolate for the best results.
- Lemon Curd: The tartness balances the buttery richness perfectly.
- Raspberry Jam: Fresh homemade jam brings a bright fruitiness.
Creative Combinations
- Matcha Pastry Cream with Black Sesame Drizzle: An elegant Japanese-inspired variation.
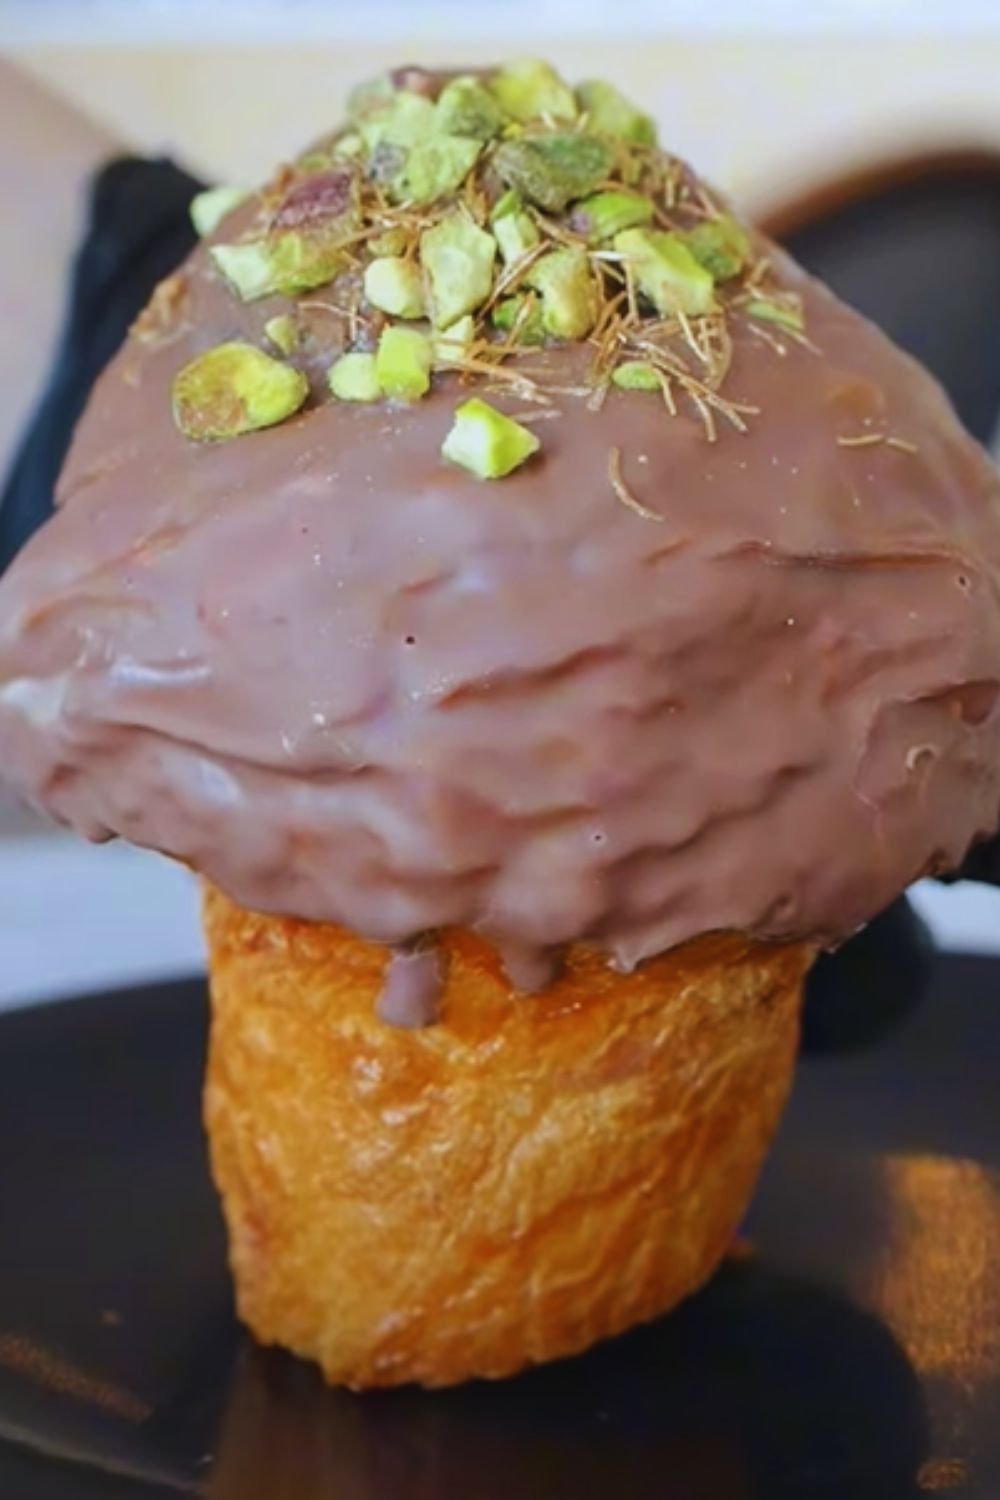
- Orange Blossom Water Cream with Pistachios: Fragrant and sophisticated.
- Dulce de Leche with Sea Salt: Sweet caramel with a savory hit.
- Mascarpone with Fresh Berries: Perfect for summer.
Seasonal Specialties
| Season | Filling Idea | Topping |
|---|---|---|
| Spring | Strawberry rhubarb compote | Fresh mint |
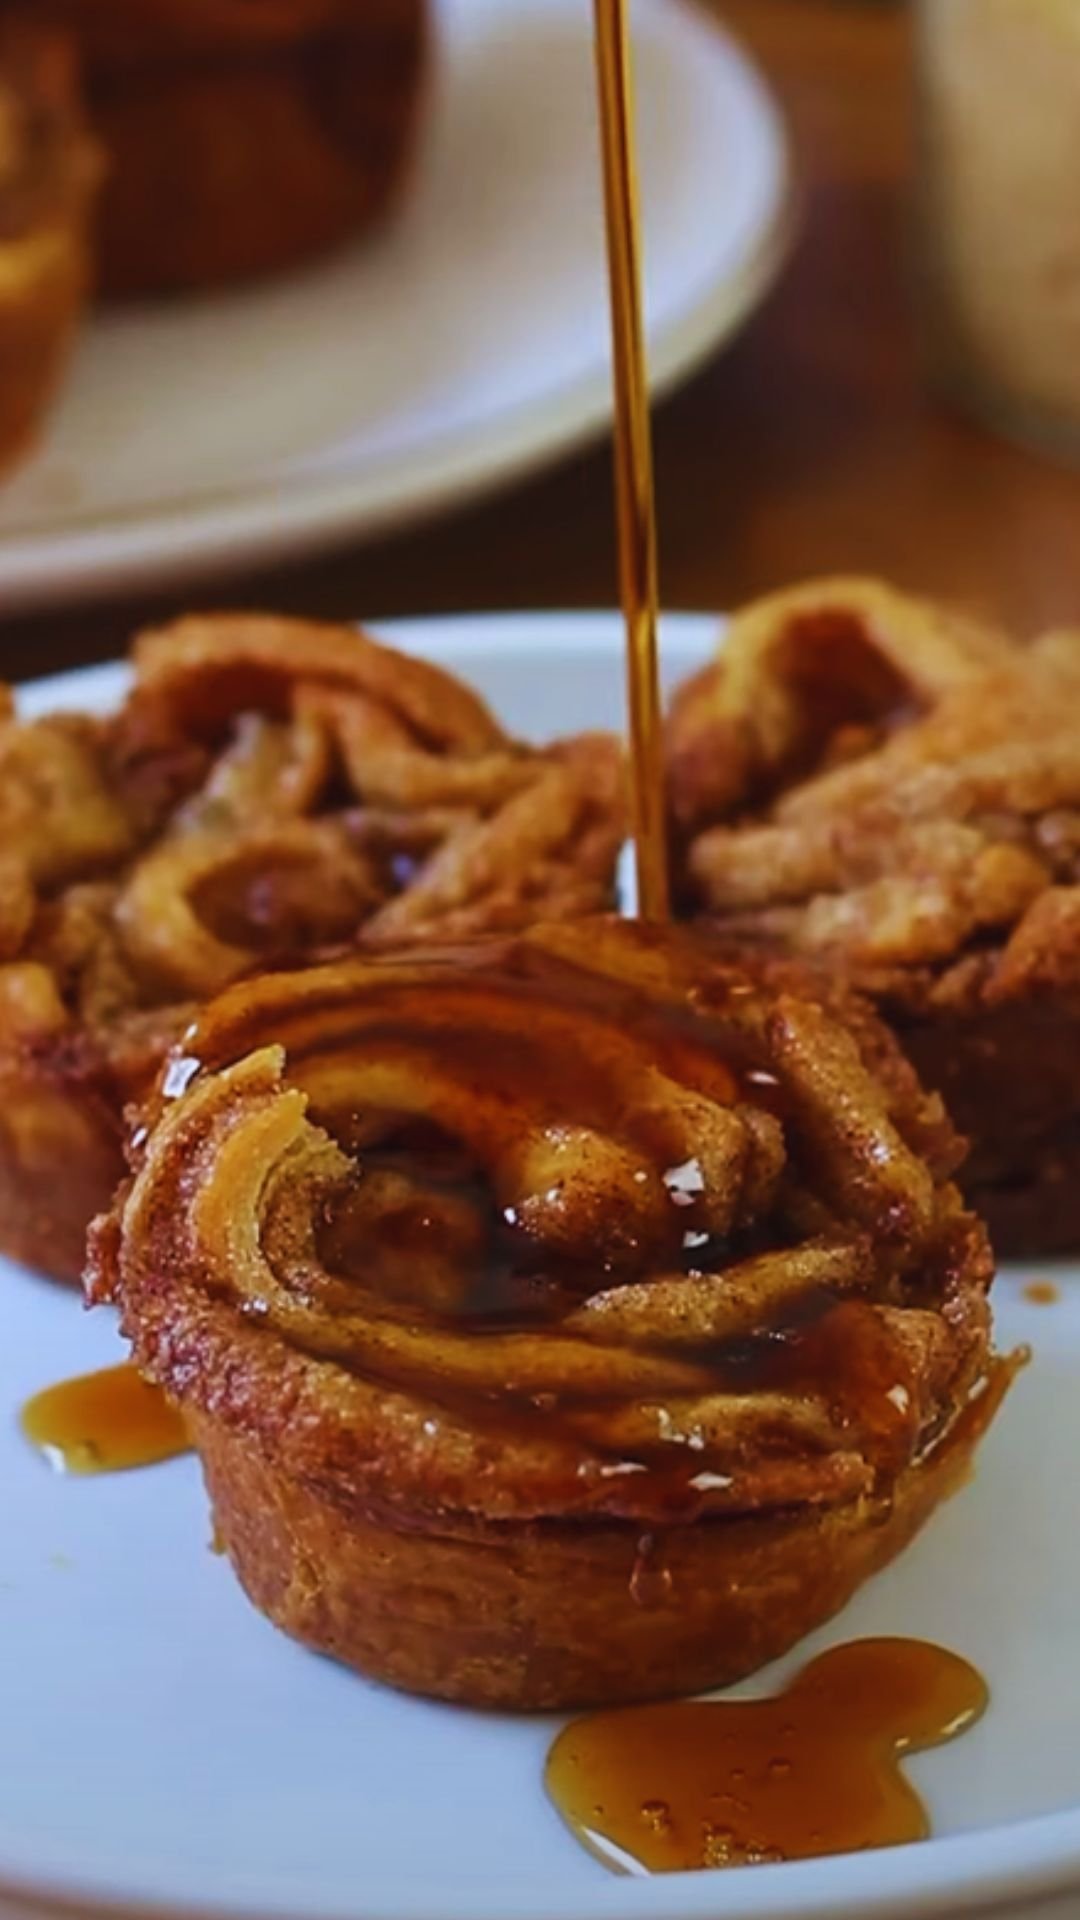
| Summer | Peach and lavender cream | Honey drizzle |
| Fall | Spiced apple butter | Cinnamon sugar |
| Winter | Dark chocolate peppermint ganache | Crushed candy canes |
I love experimenting with seasonal ingredients. My current obsession is a cruffin filled with blackberry lavender jam topped with a honey glaze – it’s the perfect balance of floral, sweet, and tart flavors!
Storage and Serving Suggestions
Like most laminated pastries, cruffins are best enjoyed fresh from the oven. However, here’s how to handle storage and serving:
Storage Tips
- Same Day: Keep at room temperature, uncovered or loosely covered to maintain crispness.
- Next Day: Store in an airtight container. Refresh in a 300°F (150°C) oven for 5 minutes before serving.
- Longer Storage: Freeze unfilled cruffins in an airtight container for up to 1 month. Thaw at room temperature and reheat before filling and serving.
Serving Suggestions
- Breakfast: Serve with fresh fruit and a café au lait.
- Brunch: Create a cruffin board with various filled options alongside a selection of cheeses and fruits.
- Dessert: Warm slightly and serve with a scoop of vanilla ice cream for an elegant dessert.
- Tea Time: Pair with Earl Grey or Darjeeling tea for a sophisticated afternoon treat.
I’ve found that a light dusting of powdered sugar can revive the appearance of day-old cruffins, while a quick trip to the oven restores their delightful crispness.
Troubleshooting Guide: Solving Common Cruffin Problems
Even with the best preparation, things can go wrong. Here’s how to solve common issues:
| Problem | Possible Cause | Solution |
|---|---|---|
| Dough tearing during rolling | Too cold or gluten too developed | Let rest 10 minutes at room temperature |
| Butter leaking during baking | Dough too warm during shaping | Chill shaped cruffins before baking |
| Dense, not flaky texture | Under-proofed or improper lamination | Ensure proper proofing time and lamination technique |
| Filling leaks out | Too much filling or improper piping technique | Use less filling and ensure piping reaches center |
| Uneven browning | Oven hot spots | Rotate pan halfway through baking |
| Collapsed cruffins | Over-proofed or oven temperature too low | Watch proofing time carefully and verify oven temperature |
| Soggy bottom | Under-baked or cooling in the tin too long | Bake fully and remove from tin promptly |
Once, I made a batch that completely collapsed during baking. After some research, I discovered I had over-proofed them. Now I know to look for that specific level of puffiness – when they’ve visibly expanded but still have some spring when gently pressed.
Making Cruffins Your Own: Customization Tips

The best part about cruffins is how versatile they are. Here are some ways to put your own spin on them:
Dough Variations
- Chocolate Dough: Add 3 tablespoons of cocoa powder to the base dough.
- Spiced Dough: Incorporate cinnamon, cardamom, or nutmeg into the dough.
- Herbal Infusions: Add finely chopped fresh herbs like rosemary or thyme for a savory version.
Shape Alternatives
- Mini Cruffins: Use a mini muffin tin for bite-sized treats.
- Cruffin Knots: Instead of rolling strips, tie them into knots before placing in the muffin tin.
- Cruffin Stars: Create a star pattern by folding the strips before rolling.
Serving Innovations
- Cruffin French Toast: Use day-old cruffins to make a decadent breakfast treat.
- Cruffin Bread Pudding: Transform leftover cruffins into a comforting dessert.
- Savory Cruffins: Fill with cream cheese, herbs, and smoked salmon for a brunch option.
I personally love creating “surprise” cruffins, where different fillings are hidden inside each one, making breakfast a delightful guessing game!
Health Considerations and Dietary Adaptations
While traditional cruffins are definitely an indulgence, there are ways to adapt them for different dietary needs:
Vegan Cruffins
- Replace butter with high-quality vegan butter alternatives designed for baking.
- Substitute milk with almond or oat milk.
- Use aquafaba or a flax egg for the egg wash.
Gluten-Free Options
- Use a gluten-free flour blend designed for pastry.
- Add xanthan gum to help with structure.
- Note that the texture will be different – more tender and less layered.
Reduced Sugar Variations
- Decrease sugar in the dough by up to half.
- Use naturally sweet fillings like fruit purees without added sugar.
- Skip the sugar coating or use alternatives like monk fruit sweetener.
While I believe in enjoying the full-butter, full-sugar experience occasionally, I have successfully made a version using a plant-based butter that was surprisingly delicious. The key was finding a vegan butter with a high fat content that mimics the behavior of dairy butter during lamination.
The Social Media Phenomenon: Why Cruffins Are Instagram’s Darling
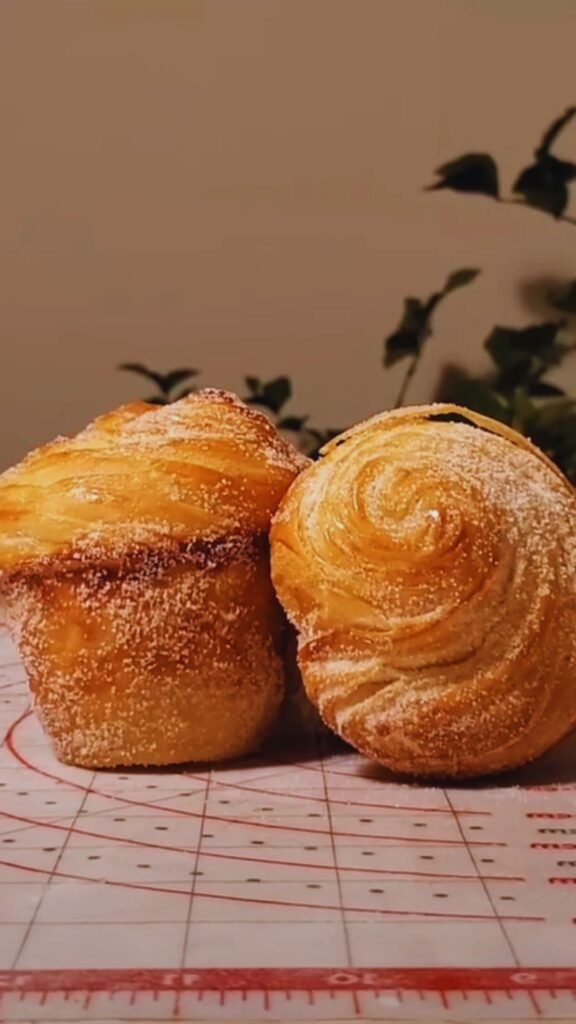
It’s no coincidence that cruffins rose to fame alongside Instagram. These photogenic pastries are made for social media with their intricate layers, towering height, and beautiful fillings that ooze dramatically when cut.
I’ve found that the most social media-worthy cruffins are those with:
- Perfectly even layers visible from the side
- A dramatic height that towers above the muffin tin
- Contrasting fillings that provide a pop of color
- Creative toppings that add visual interest
- A setting that showcases the handmade quality
For that perfect Instagram shot, I recommend cutting your cruffin in half to reveal the layers and filling, then photographing in natural light against a simple background. A sprinkle of powdered sugar adds that final touch of magic!
Beyond Home Baking: Where to Find the Best Cruffins
If you’re not quite ready to embark on the cruffin-making journey yourself, here are the types of places where you might find excellent examples:
- Artisanal Bakeries: Small-batch bakeries often feature cruffins as special weekend offerings.
- French Pastry Shops: Many French patisseries have embraced this American-born invention.
- Farmers Markets: Look for local bakers who bring fresh-baked goods.
- Specialized Croissant Shops: Places known for excellent croissants often excel at cruffins too.
When evaluating a bakery’s cruffin, look for visible layers, a good height, and fillings that complement rather than overwhelm the pastry itself. A great cruffin should have a shattery exterior giving way to a tender, pull-apart interior.
Frequently Asked Questions About Cruffins
Can I make cruffins with store-bought puff pastry? You can make a simplified version using store-bought puff pastry, but it won’t have the same texture as traditional cruffins made with yeasted dough. If using puff pastry, roll it out, cut into strips, roll into spirals, and bake in a muffin tin at 400°F (200°C) until golden.
Why are my cruffins not rising properly? Several factors could cause this: under-proofing, old yeast, or not enough layers in your lamination. Make sure your dough has visibly expanded before baking, your yeast is fresh, and you’ve completed all the recommended turns in the lamination process.
How do I prevent my filling from making the cruffins soggy? Fill cruffins just before serving, or use thicker fillings that won’t soak into the pastry. If preparing in advance, you can apply a thin layer of chocolate or white chocolate inside the cruffin to create a moisture barrier between the filling and the pastry.
Can I prepare cruffins in advance for a special occasion? Yes! You can prepare the dough through all lamination steps and even shape the cruffins, then freeze them before the final proof. The night before your event, transfer them to the refrigerator, then bring to room temperature and allow to proof before baking.
Why is my dough tearing during rolling? This usually happens when the dough is too cold or the gluten is too developed. Let the dough rest at room temperature for about 10 minutes, then try again. Work gently and avoid stretching the dough.
What’s the best way to fill cruffins? Wait until cruffins are completely cool, then use a piping bag with a long, narrow tip. Insert the tip deep into the center of the cruffin and slowly withdraw it as you pipe, filling from the inside out.
Can I make savory cruffins? Absolutely! Reduce or eliminate the sugar in the dough, and fill with options like herb-infused cream cheese, pesto, or cheese and ham. They make excellent brunch or appetizer options.
Final Thoughts: Why Cruffins Are Worth the Effort
After years of making cruffins, I can honestly say they remain one of the most rewarding baking projects I’ve ever undertaken. Yes, they’re time-consuming. Yes, they require patience and precision. But biting into a fresh, warm cruffin that you’ve created with your own hands is an experience that simply can’t be matched.
Beyond the delicious end result, the process of making cruffins teaches valuable baking skills – lamination, temperature control, and dough handling – that will improve everything else you bake. It’s a masterclass in pastry fundamentals wrapped in a delicious package.
So gather your ingredients, clear your schedule for a weekend baking project, and prepare to amaze yourself with what you can create. Whether you’re making them to impress guests, to share on social media, or simply for the joy of the process, cruffins are a pastry that proves that sometimes, the most wonderful things happen when traditions collide and create something entirely new.
Happy baking!