There’s something magical about the aroma of freshly baked bread wafting through my kitchen, especially when I’m pressed for time but still craving that homemade goodness. I’ve discovered the perfect solution in these 30-minute Asiago cheese rolls that deliver bakery-quality results without the lengthy commitment traditional bread recipes demand.
My journey with quick bread recipes began during my college years when I needed comfort food that wouldn’t consume my entire study schedule. These Asiago cheese rolls became my go-to solution, combining the rich, nutty flavors of aged Asiago cheese with the satisfying texture of perfectly risen rolls. What makes this recipe particularly special is how it transforms simple pantry staples into something extraordinary in just half an hour.
The beauty of this recipe lies not just in its speed, but in its versatility. I’ve served these rolls at casual family dinners, holiday gatherings, and even impressed dinner party guests who couldn’t believe something so delicious could be prepared so quickly. The secret is in understanding how to work with rapid-rise yeast and creating the perfect environment for quick fermentation.
Understanding Asiago Cheese
Asiago Cheese Types : Fresh Asiago (Asiago Pressato) – Mild, creamy texture with sweet, buttery flavor, aged 20-40 days : Medium Asiago (Asiago d’Allevo) – Semi-hard texture with more pronounced nutty flavor, aged 2-5 months
: Aged Asiago (Asiago Stravecchio) – Hard, granular texture with sharp, complex flavor, aged over 9 months
Flavor Profile Development : Young Asiago – Sweet and mild with subtle tanginess : Mature Asiago – Nutty undertones with increased sharpness : Aged Asiago – Complex flavors with hints of fruit and nuts
For my 30-minute rolls, I prefer using medium Asiago because it provides the perfect balance of flavor intensity and melting properties. The cheese should be freshly grated for optimal distribution and melting characteristics.
Essential Ingredients and Their Roles
| Ingredient | Quantity | Purpose | Substitution Options |
|---|---|---|---|
| All-purpose flour | 3 cups | Structure and texture | Bread flour (reduce by 2 tbsp) |
| Rapid-rise yeast | 1 packet (2¼ tsp) | Quick leavening | Active dry yeast (proof first) |
| Warm water | 1 cup | Yeast activation | Warm milk for richer flavor |
| Sugar | 2 tablespoons | Yeast food and browning | Honey or maple syrup |
| Salt | 1 teaspoon | Flavor enhancement | Sea salt or kosher salt |
| Olive oil | 3 tablespoons | Moisture and texture | Melted butter |
| Asiago cheese (grated) | 1½ cups | Primary flavor | Parmesan or Romano |
| Garlic powder | 1 teaspoon | Aromatic depth | Fresh minced garlic |
| Italian seasoning | 1 tablespoon | Herb complexity | Fresh herbs mix |
| Egg wash | 1 egg + 1 tbsp water | Golden finish | Milk or cream |
The magic happens when these ingredients work together. I’ve learned that the temperature of your liquids is crucial – too hot and you’ll kill the yeast, too cool and the rising process takes too long for our 30-minute timeline.
Equipment and Preparation
Essential Tools : Large mixing bowl – For combining ingredients and initial rising : Kitchen scale – For precise measurements (optional but recommended) : Clean kitchen towels – For covering during rising : Baking sheet – Heavy-duty preferred for even heat distribution : Parchment paper – Prevents sticking and easy cleanup
Preparation Steps : Preheat oven to 425°F (220°C) : Line baking sheet with parchment paper : Warm water to 110-115°F (43-46°C) : Grate Asiago cheese if using block cheese : Prepare egg wash in small bowl
My kitchen setup is crucial for success. I always ensure my workspace is warm and draft-free, as this significantly impacts the rising time. During colder months, I sometimes warm my oven for just a minute, turn it off, and use it as a proofing chamber.
Step-by-Step Instructions
Mixing the Dough
I begin by dissolving the sugar in warm water, then sprinkling the rapid-rise yeast over the surface. This step is critical – I wait for about 2-3 minutes until I see the mixture become foamy, indicating the yeast is active and ready to work its magic.
In my large mixing bowl, I combine the flour, salt, garlic powder, and Italian seasoning. Creating a well in the center, I pour in the yeast mixture along with the olive oil. Using a wooden spoon, I gradually incorporate the flour into the liquid ingredients, working from the center outward.
The dough should come together into a slightly sticky mass. I add 1 cup of the grated Asiago cheese at this point, kneading it gently into the dough. The texture should be soft and pliable, not dry or overly sticky.
Kneading Technique
I turn the dough onto a lightly floured surface and knead for exactly 5 minutes. My technique involves pushing the dough away from me with the heel of my hand, folding it back over itself, giving it a quarter turn, and repeating. This develops the gluten structure necessary for good texture.
During kneading, the dough transforms from sticky and rough to smooth and elastic. I know it’s ready when I can stretch a small piece thin enough to see light through it without tearing – this is called the windowpane test.
First Rise
Instead of the traditional long rise, I place the dough in a greased bowl, cover it with a damp towel, and set it in a warm location for just 10 minutes. My favorite spot is on top of the preheating oven or near a sunny window.
The dough won’t double in size during this short rise, but it will relax and become easier to shape. This brief rest is essential for workable dough and better final texture.
Shaping the Rolls
I divide the dough into 12 equal portions using a bench scraper or sharp knife. Each piece should weigh approximately 2.5 ounces if you’re using a scale. I shape each portion into a ball by tucking the edges underneath and rolling between my palms.

The rolls are placed on the prepared baking sheet, spaced about 2 inches apart. I brush each roll with egg wash and sprinkle the remaining ½ cup of Asiago cheese on top, pressing gently to ensure it adheres.
Final Proof and Baking
The shaped rolls need just 8-10 minutes for their final proof. I cover them lightly with a kitchen towel and let them rest while finishing the oven preheat. They should look slightly puffed but not necessarily doubled.
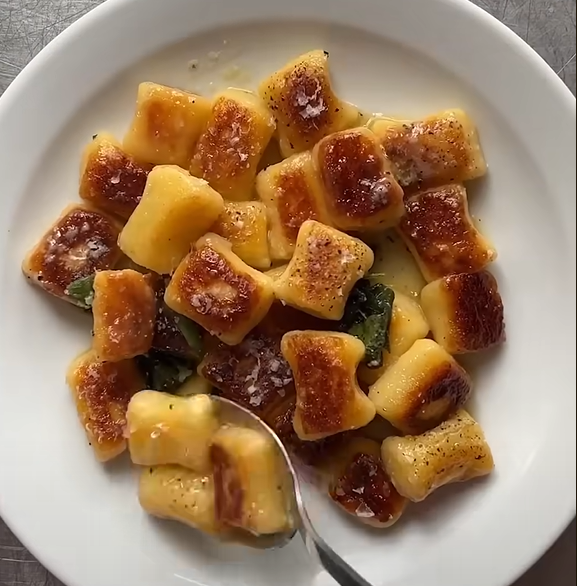
Into the 425°F oven they go for 12-15 minutes, until golden brown on top and the internal temperature reaches 190°F (88°C). The cheese should be melted and slightly crispy around the edges.
Timing Breakdown
| Phase | Duration | Activity |
|---|---|---|
| Preparation | 5 minutes | Measure ingredients, preheat oven |
| Mixing | 3 minutes | Combine ingredients, form dough |
| Kneading | 5 minutes | Develop gluten structure |
| First rise | 10 minutes | Dough relaxation |
| Shaping | 4 minutes | Form individual rolls |
| Final proof | 8 minutes | Final rise before baking |
| Baking | 15 minutes | Oven time until golden |
| Total | 50 minutes | Complete process |
Note: While called “30-minute rolls,” the total time includes baking. Active preparation time is approximately 17 minutes.
Variations and Flavor Combinations
Herb-Infused Variations
I love experimenting with different herb combinations. My rosemary-Asiago version includes 2 tablespoons of fresh chopped rosemary mixed into the dough. The earthy, pine-like notes complement the nutty cheese beautifully.
For a Mediterranean twist, I add sun-dried tomatoes (chopped and oil-drained) along with fresh basil. This creates a more complex flavor profile that pairs wonderfully with Italian meals.
Cheese Combinations
While Asiago is the star, I’ve successfully combined it with other cheeses. A 50-50 mix of Asiago and sharp cheddar creates a more familiar flavor for those new to Italian cheeses. Pecorino Romano adds saltiness and depth, though I reduce the added salt when using this combination.
Spice Additions
Red pepper flakes transform these rolls into something with a gentle kick. I add ½ teaspoon to the dry ingredients for warmth without overwhelming heat. Smoked paprika is another favorite addition that provides color and subtle smokiness.
Troubleshooting Common Issues
Dense or Heavy Rolls
Problem: Rolls turn out dense instead of light and fluffy Causes:
- Water too hot, killing the yeast
- Old or inactive yeast
- Over-kneading or insufficient kneading
- Insufficient rising time
Solutions: Always test water temperature with a thermometer. Fresh yeast should foam within 3 minutes when combined with warm water and sugar. Knead for the full 5 minutes but don’t exceed 7 minutes.
Cheese Not Melting Properly
Problem: Cheese remains hard or doesn’t integrate well Causes:
- Using pre-shredded cheese with anti-caking agents
- Cheese pieces too large
- Oven temperature too low
Solutions: Always grate cheese fresh from the block. Ensure pieces are uniform and not larger than rice grains. Verify oven temperature with an oven thermometer.
Rolls Spreading Instead of Rising
Problem: Rolls flatten out during baking Causes:
- Dough too soft or sticky
- Over-proofing
- Insufficient gluten development
Solutions: Add flour gradually if dough is too sticky. Don’t exceed proofing times. Ensure proper kneading technique and duration.
Serving Suggestions and Pairings
These Asiago cheese rolls shine as accompaniments to numerous dishes. I serve them alongside my favorite minestrone soup, where they’re perfect for soaking up the rich broth. They’re equally at home next to a crisp Caesar salad or roasted vegetable medley.
For breakfast or brunch, I slice them horizontally and toast them lightly, then top with scrambled eggs and fresh herbs. The nutty cheese flavor complements eggs beautifully, creating a satisfying morning meal.
During holiday gatherings, these rolls have become my signature bread basket contribution. They pair wonderfully with roasted meats, particularly herb-crusted chicken or beef tenderloin. The cheese adds richness that complements rather than competes with main dishes.
Storage and Reheating Methods
| Storage Method | Duration | Quality Notes |
|---|---|---|
| Room temperature (covered) | 2-3 days | Best texture, slight staleness after day 2 |
| Refrigerated (sealed bag) | 5-7 days | Firmer texture, good for toasting |
| Frozen (wrapped well) | 3 months | Nearly original quality when reheated |
| Freeze before baking | 2 months | Shape rolls, freeze on tray, then bag |
For reheating, I wrap refrigerated rolls in damp paper towels and microwave for 15-20 seconds, or warm them in a 300°F oven for 5-8 minutes. Frozen rolls can go directly from freezer to 350°F oven for 10-12 minutes.
Nutritional Information and Dietary Considerations
Each roll contains approximately 185 calories, with 8 grams of protein from the cheese and flour combination. The Asiago cheese provides calcium and vitamin A, while the moderate fat content (about 6 grams per roll) comes primarily from the olive oil and cheese.
For those monitoring sodium intake, the salt content is moderate at about 280mg per roll, mostly from the cheese. I’ve successfully reduced the added salt by half when using aged Asiago, which tends to be saltier.
Advanced Techniques and Tips
Temperature Control
I’ve learned that ambient temperature significantly affects timing. During summer months, I reduce rising times by 2-3 minutes. In winter, I extend them slightly or create a warmer environment using the oven light or a heating pad under the bowl.
Moisture Management
The dough should feel slightly tacky but not sticky. I adjust flour or water by tablespoons as needed, based on humidity and flour type. Different flour brands absorb water differently, so I trust feel over strict measurements.
Professional Finishing
For bakery-style appearance, I brush the rolls with egg wash twice – once before the final proof and again just before baking. This creates a deeper golden color and glossy finish.
Seasonal Adaptations
Spring brings fresh herbs to my garden, and I incorporate whatever’s available. Fresh thyme, oregano, or sage each create unique flavor profiles. Summer tomatoes, when available, can be diced small and added for bursts of flavor and color.
Fall flavors work beautifully too. I’ve added toasted walnuts and fresh sage for an autumnal variation that pairs perfectly with butternut squash soup. Winter calls for heartier additions like caramelized onions or roasted garlic.
Questions and Answers
Q. Can I make these rolls without a stand mixer? Absolutely! I developed this recipe specifically for hand mixing and kneading. The 5-minute kneading time is perfectly manageable by hand and actually gives you better control over dough development.
Q. What if I don’t have rapid-rise yeast? You can substitute active dry yeast, but you’ll need to proof it first. Dissolve the sugar in warm water, add the yeast, wait for it to foam (5-10 minutes), then proceed with the recipe. Add an extra 5-10 minutes to rising times.
Q. Can I prepare the dough ahead of time? Yes, but it changes the timeline. You can make the dough through the first rise, then refrigerate for up to 24 hours. Remove 30 minutes before shaping to come to room temperature.
Q. Why are my rolls not browning evenly? Uneven browning usually indicates hot spots in your oven. Rotate the baking sheet halfway through baking. Also, ensure rolls are similar sizes and properly spaced for even heat circulation.
Q. Can I freeze the shaped but unbaked rolls? This is one of my favorite time-saving tricks! Shape the rolls, place on a baking sheet, and freeze until solid. Transfer to freezer bags and bake directly from frozen, adding 3-5 minutes to the baking time.
Q. What’s the best way to measure flour for this recipe? I prefer weighing flour (approximately 360g for 3 cups), but if using cups, spoon the flour into the measuring cup and level with a knife. Don’t pack or tap the cup, as this adds too much flour.
Q. How do I know when the rolls are fully baked? They should be golden brown on top and sound hollow when tapped on the bottom. Internal temperature should reach 190°F (88°C). The cheese should be melted and starting to turn golden at the edges.
Q. Can I use different types of cheese? Certainly! Parmesan, Romano, aged cheddar, or Gruyère all work well. Each brings its own flavor profile. Hard cheeses work better than soft ones for this recipe’s timing and texture.
Q. What if my dough seems too sticky to work with? Add flour gradually, one tablespoon at a time, until the dough is manageable. Remember, it should be slightly tacky – completely non-sticky dough often results in dense rolls.
Q. How can I make these rolls more substantial for a meal? I sometimes add cooked, crumbled bacon or diced ham to the dough along with the cheese. Chopped scallions or chives also add flavor and make them more filling as a side dish.
These 30-minute Asiago cheese rolls have become more than just a quick bread recipe in my kitchen – they’re a reliable solution for impressive homemade bread without the time commitment. Whether you’re hosting unexpected guests or simply craving fresh bread with dinner, this recipe delivers consistent, delicious results that never fail to satisfy.